VMLogin
Anti-detect browser
Getting Started
To start, you'll need to download the application and create an account, which you can do here.
Proxy Setup
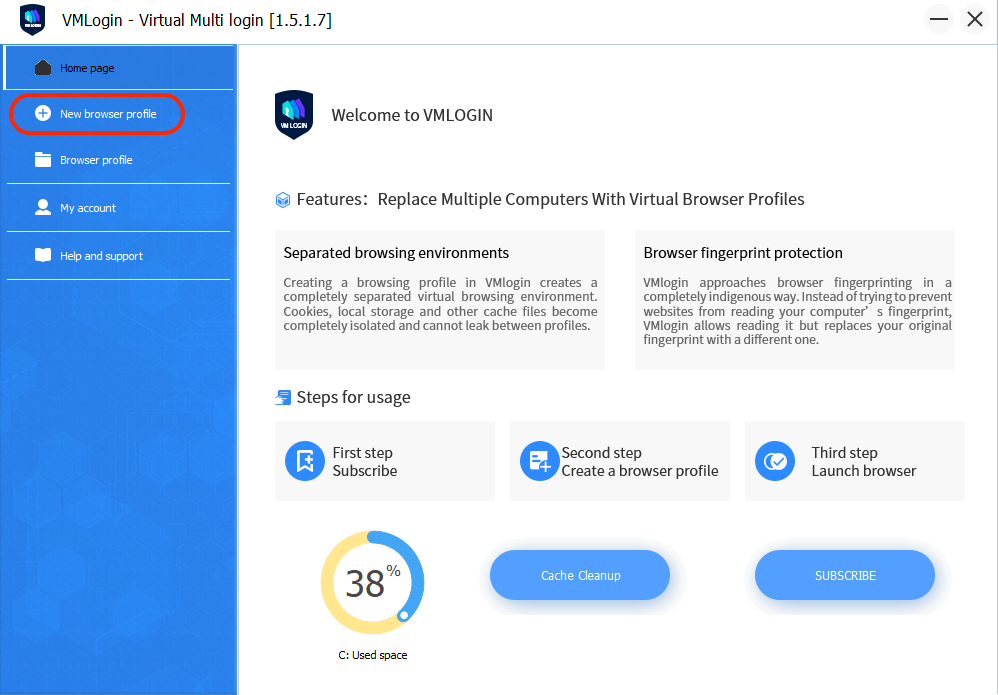
- Open the VMLogin application.
- In the main menu on the left, click the New browser profile button to enter the setup page.
VMLogin – New browser profile
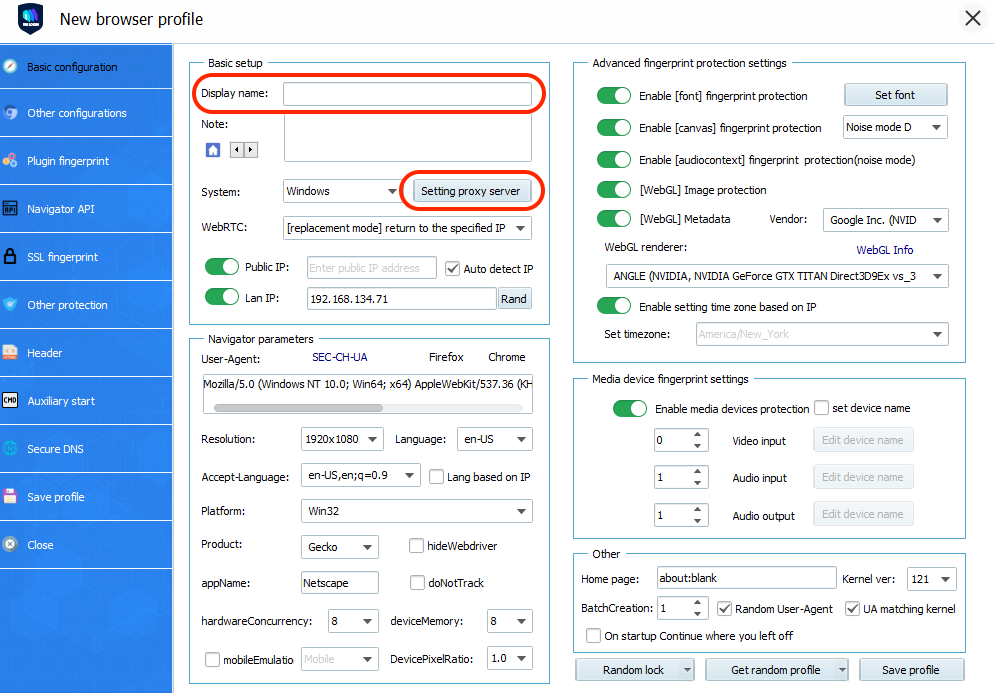
- First, enter a name for the browser profile in the Display name field and then click the Setting proxy server button.
VMLogin – Profile creation
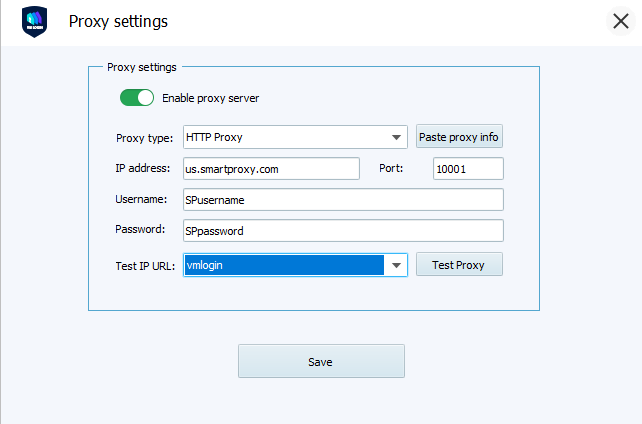
- Select the HTTP proxy in the drop-down menu and then input the proxy details, which can be found on your Smartproxy dashboard. Here's an example for residential proxies:
- IP address:
gate.smartproxy.com - Port:
10001 - Username: Input your
proxy username - Password: Input your
proxy password
- IP address:
Proxy Guides
You can find our quick setup guides for each proxy type here.
VMLogin – Proxy settings
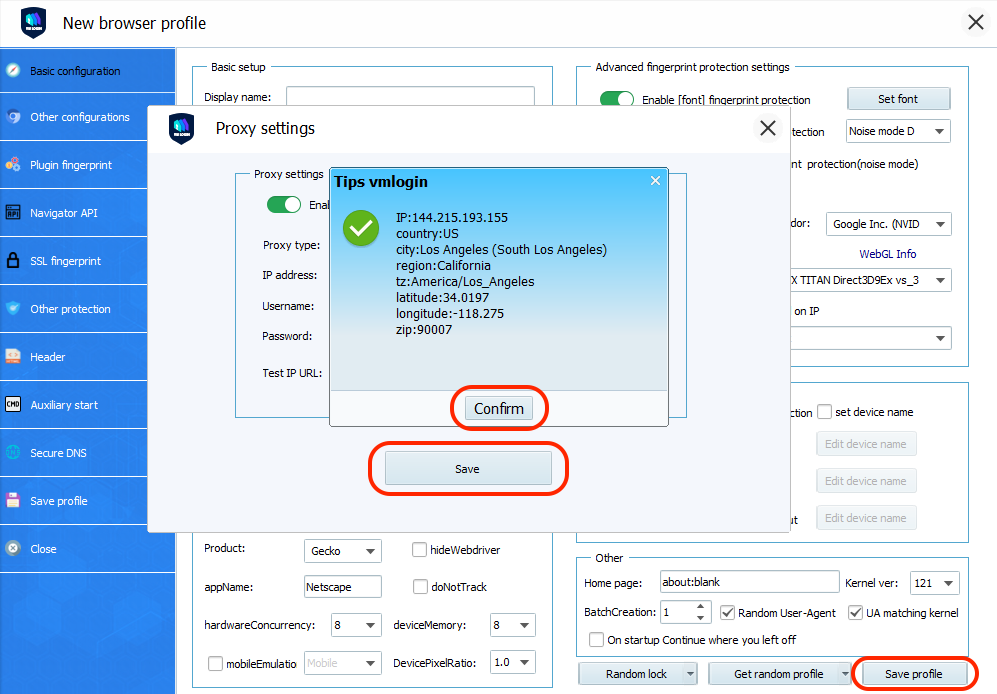
- Click Test Proxy to test the connection. If it displays detailed IP information, you’re good to go. Simply click Confirm. To finalize the proxy setup, click Save.
- After you've set up all your preferences on the setup page, save the browser profile with the Save profile button.
VMLogin – Profile creation
Checking the Proxy IP / Connection
- Launch the created profile from the main menu.
- Visit ip.smartproxy.com to check the current IP address and location.
Target Access
Please be aware that we restrict access to some domains. You can learn more here.
Support
Need help or just want to say hello? Our customer support is available 24/7. You can also reach us anytime via email at [email protected].
Updated 7 days ago