Windows 11
Proxy setup for Windows 11
Proxy Setup
This guide is also applicable to Windows 10.
- Click on the Windows logo and search for Change proxy settings.
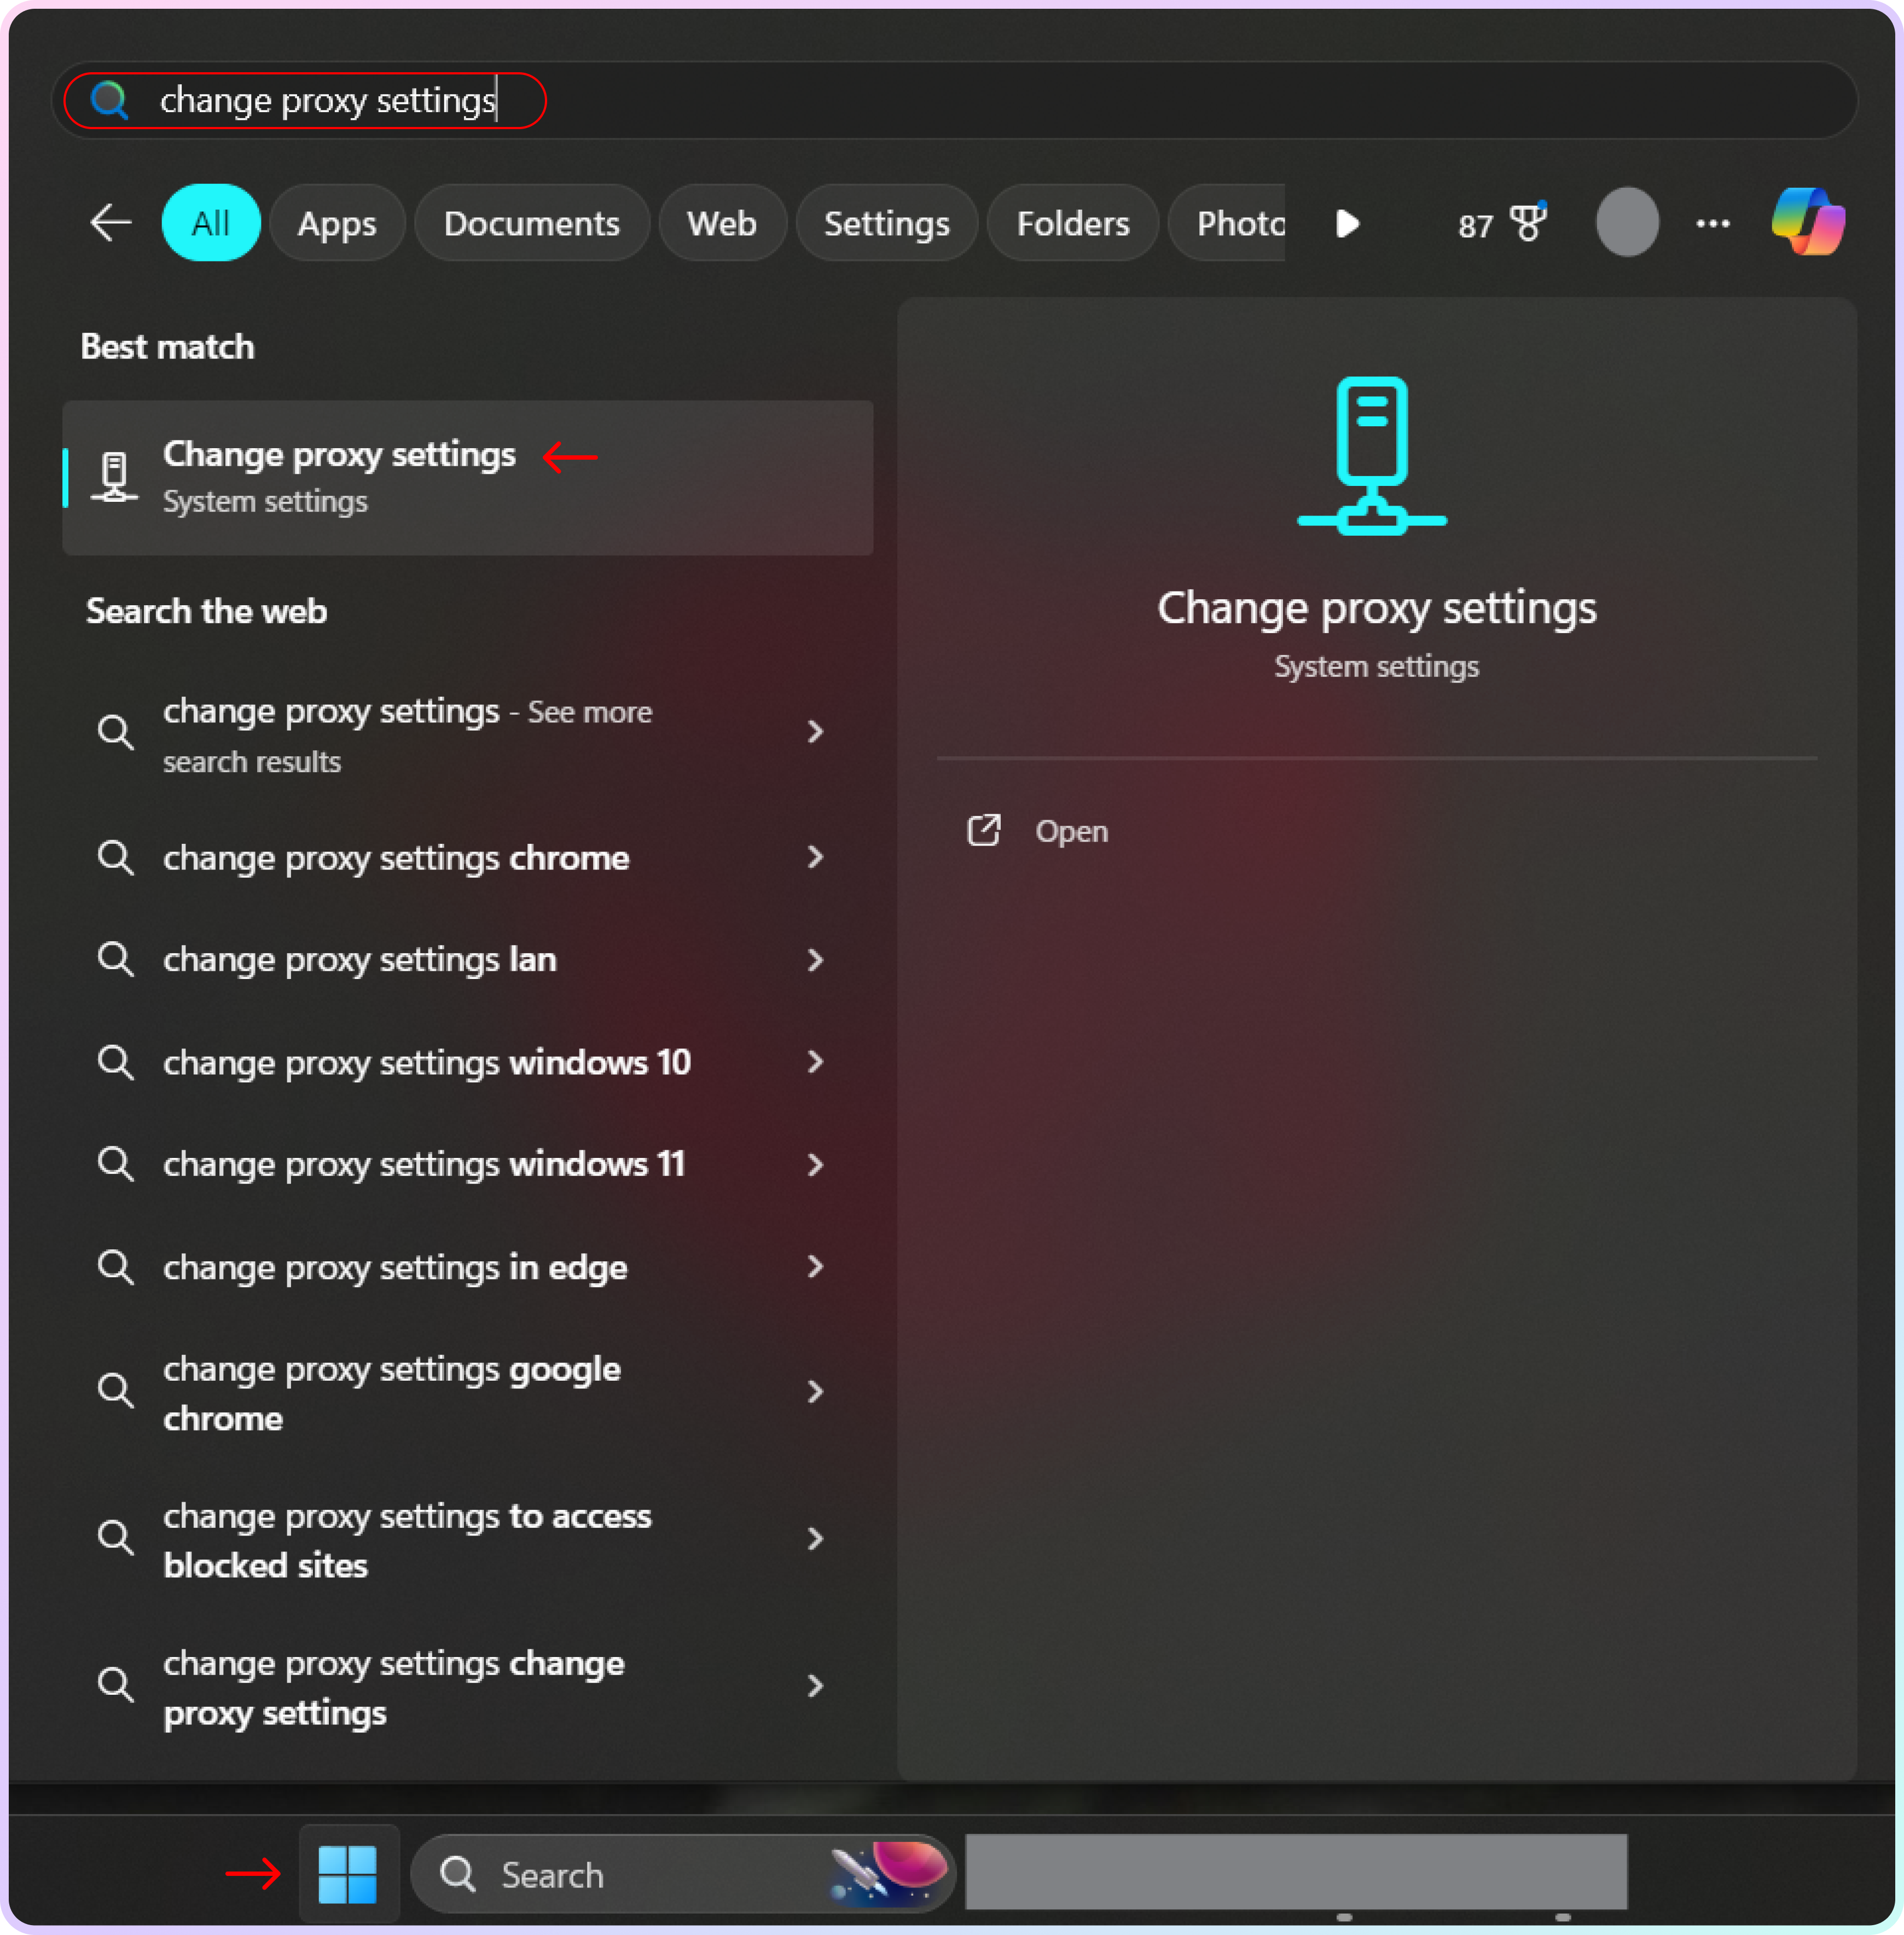
Search for change proxy settings
- Next, click Set up under the Manual proxy setup section.
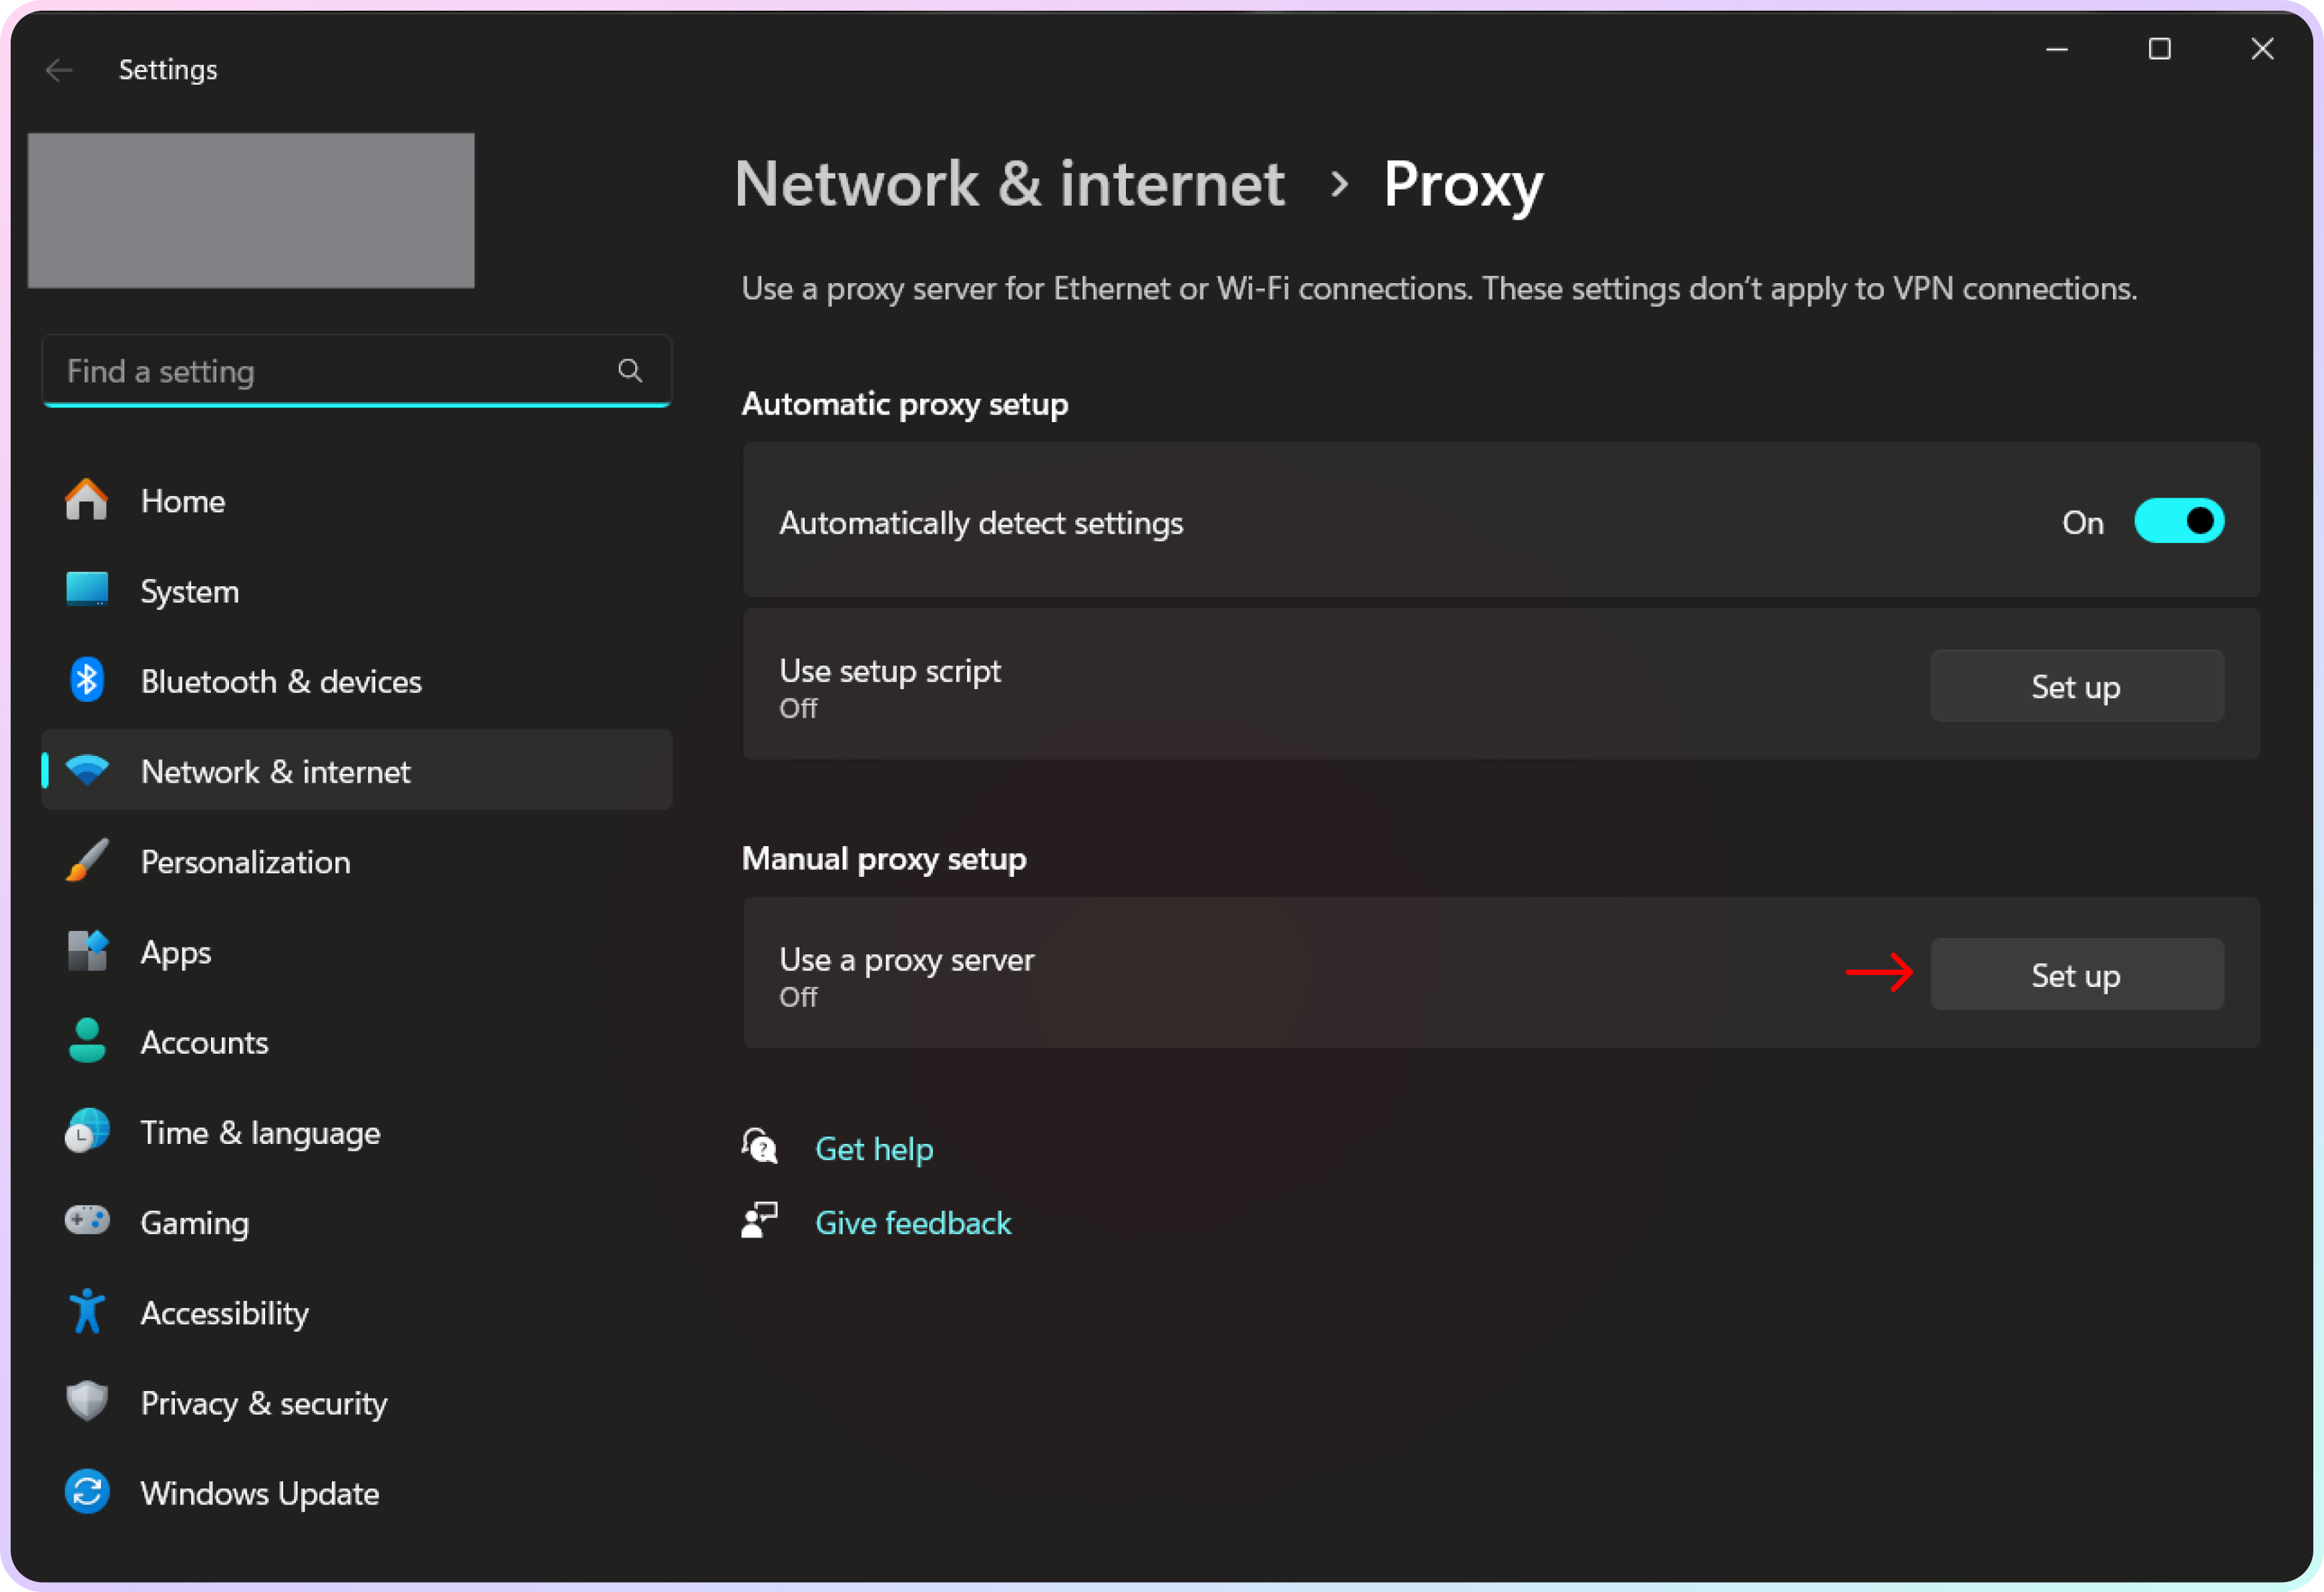
The manual proxy setup section
- Next, fill in the Proxy IP Address and Port fields with the desired
endpoint:port, and finally, click Save.- Check out our Quick Start Guides for these details on each product.
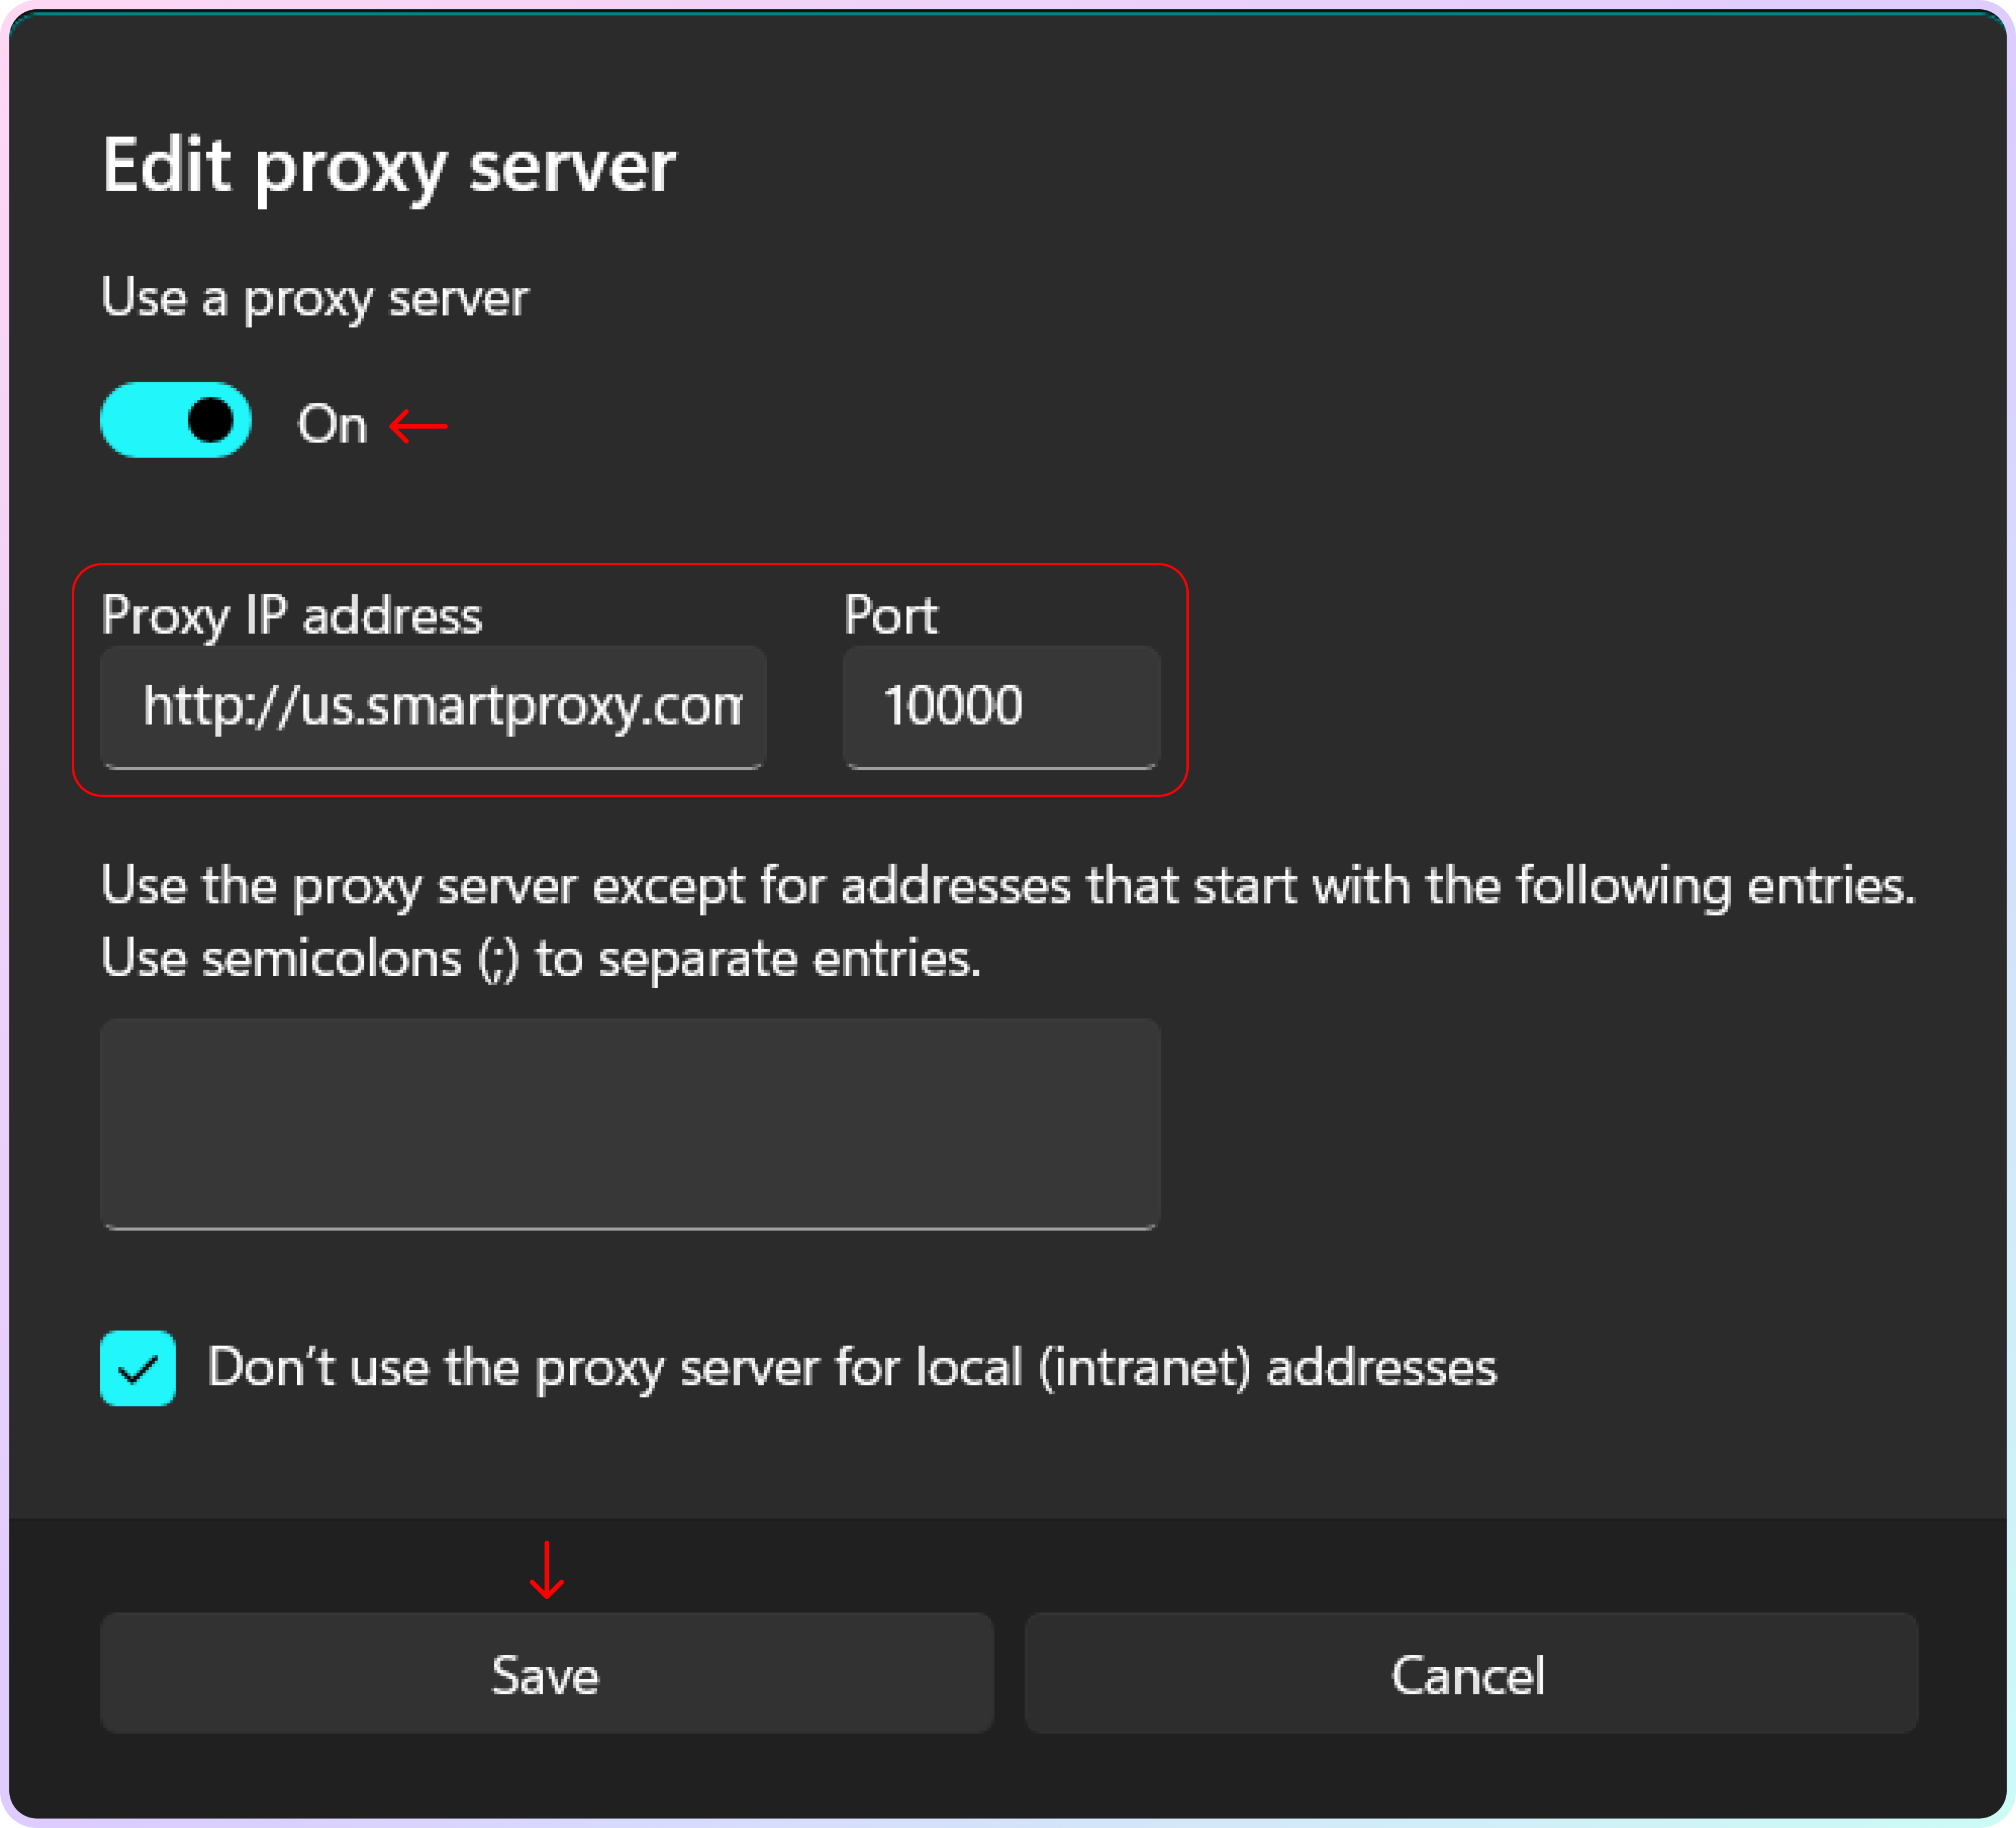
Endpoint:port details
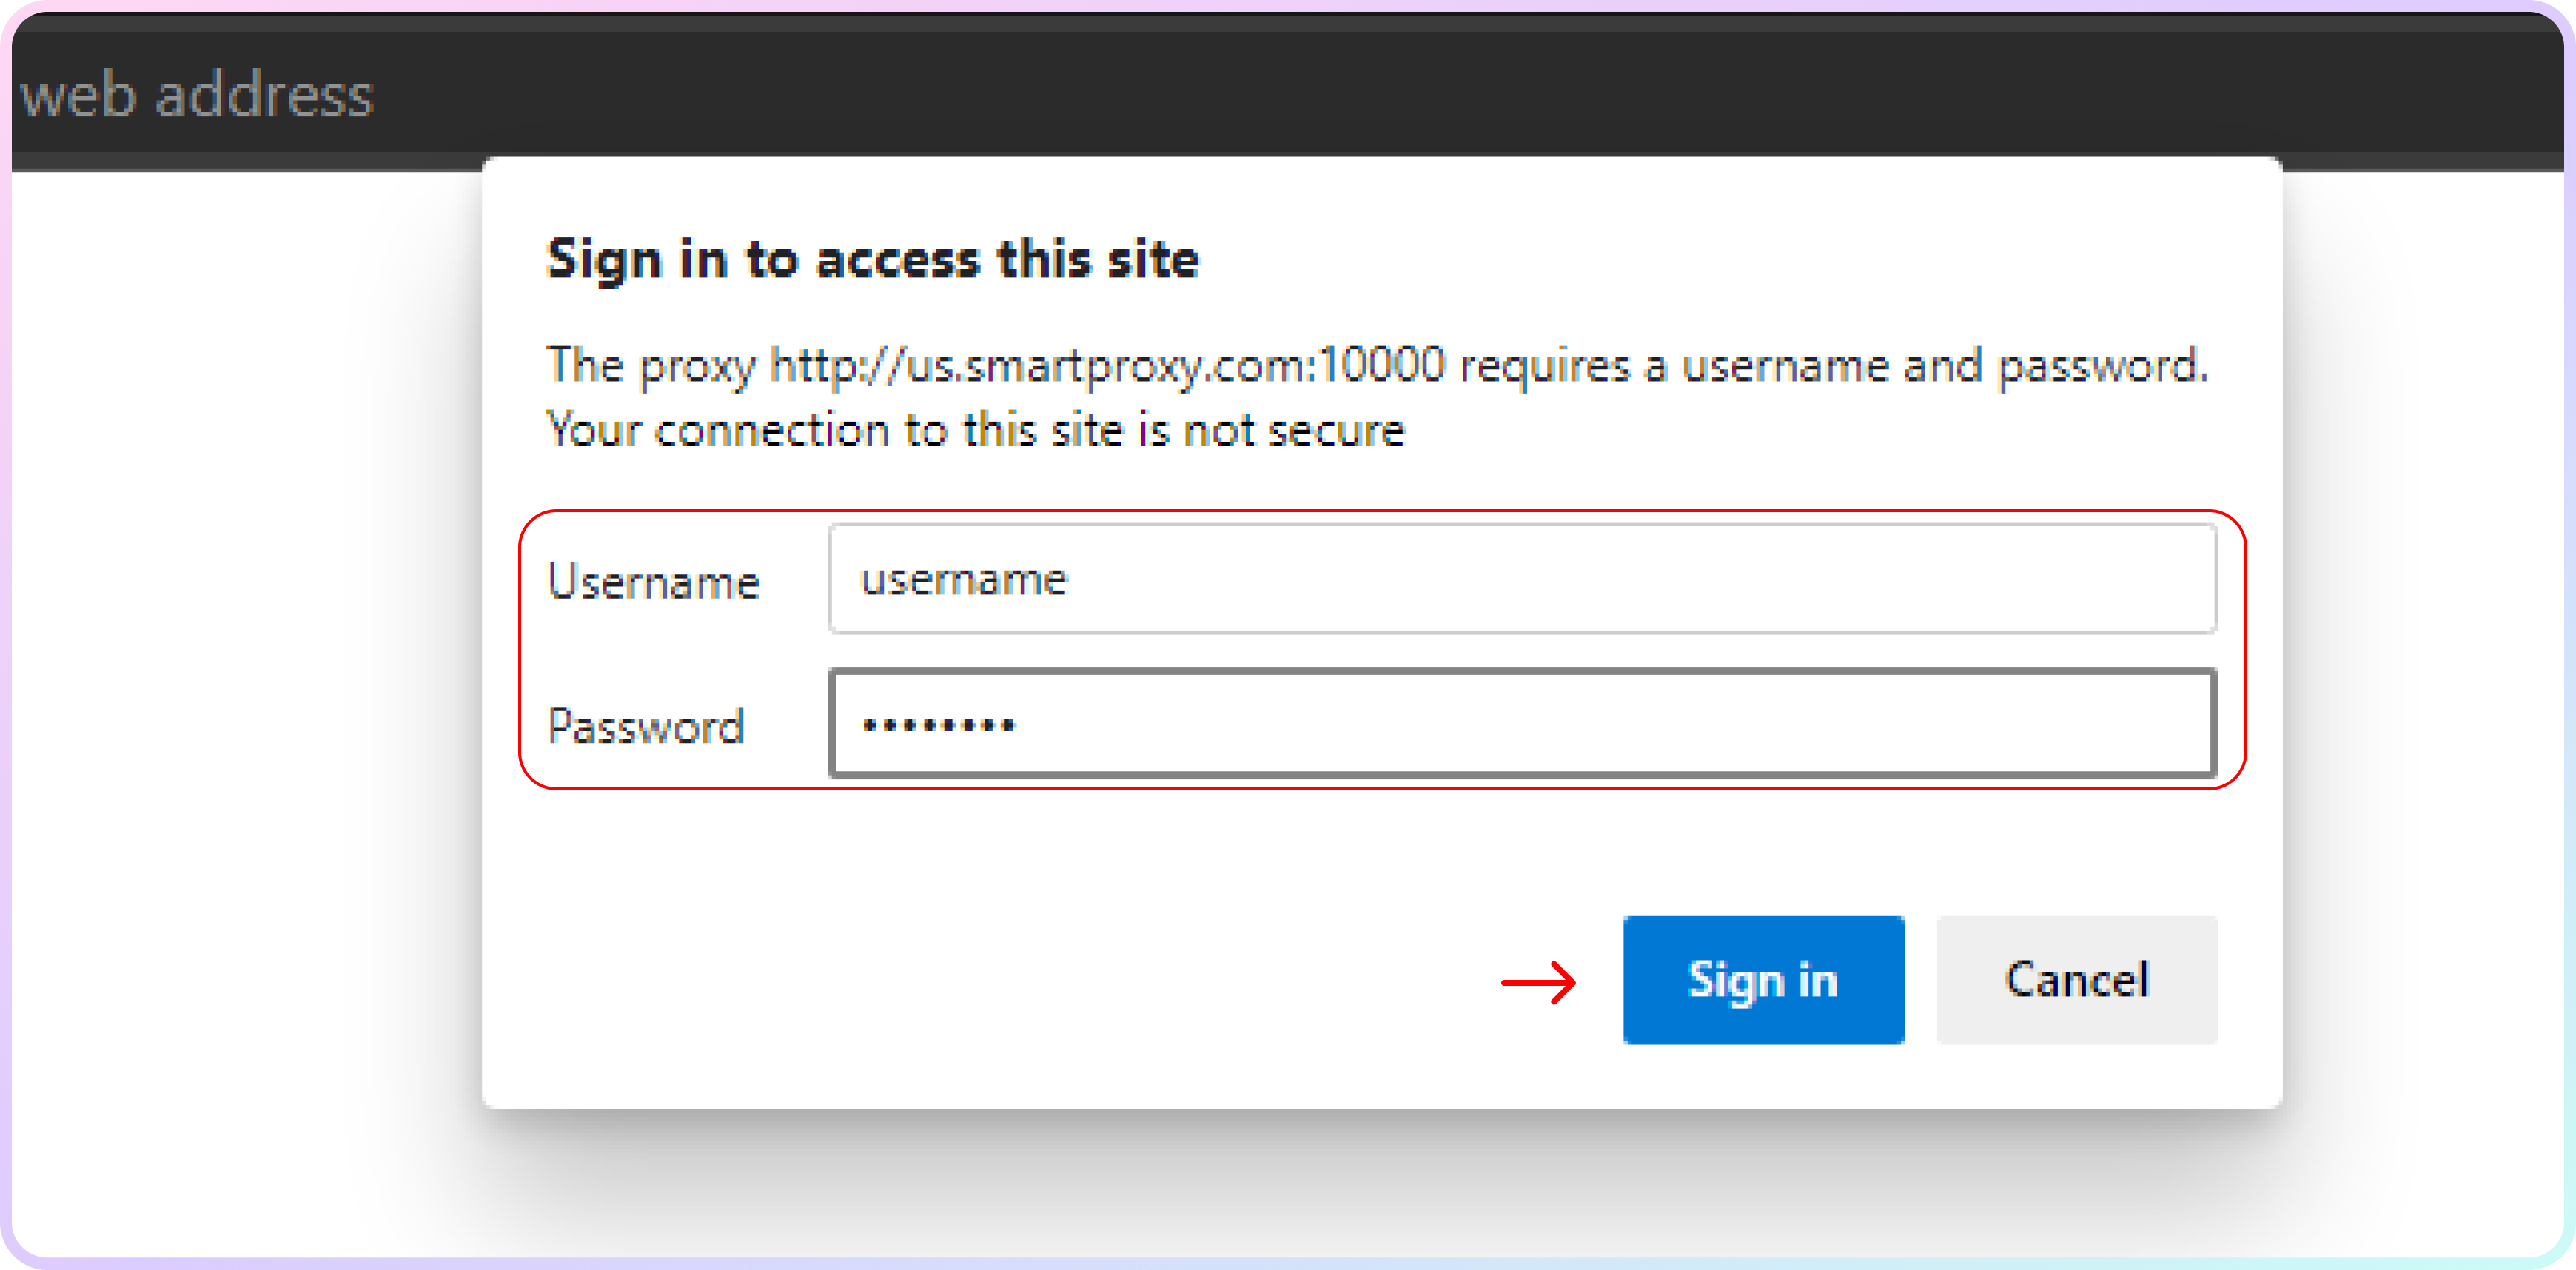
- If you do not have a whitelisted IP, you will be asked for your Proxy user's username and password when trying to open a browser or website. Enter the credentials and click Sign in.
- Check out our Authentication Guides for these details on each product.
Authentication prompt
- Visit ip.smartproxy.com to check the current IP address and location.
Support
Need help or just want to say hello? Our customer support is available 24/7. You can also reach us anytime via email at support@smartproxy.com.
Updated about 1 month ago
Did this page help you?