SessionBox extension
Guide by Thomas Vinke
Proxy Setup
- Set up and log in to the SessionBox extension on your browser.
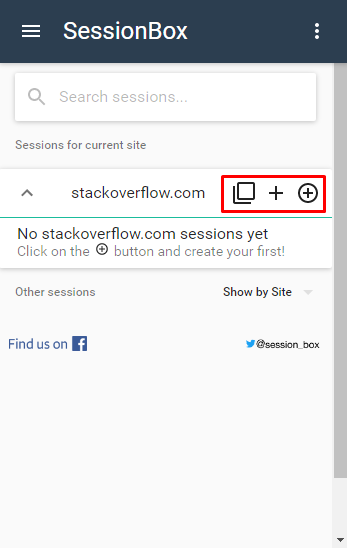
- In the extension, click on one of the symbols near the site's name to create a new session.

SessionBox – Create a new session
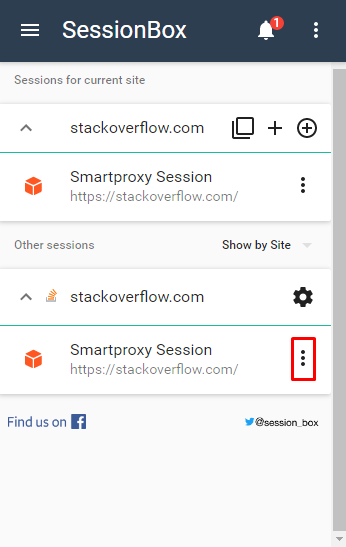
- Select the website for which you have created the new session and go to session settings (click on the three dots and then on the settings menu symbol).

SessionBox – Session settings
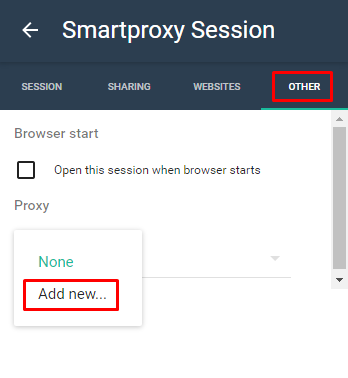
- Select the Other tab. In the Proxy dropdown menu, select Add new.

SessionBox – Add new
-
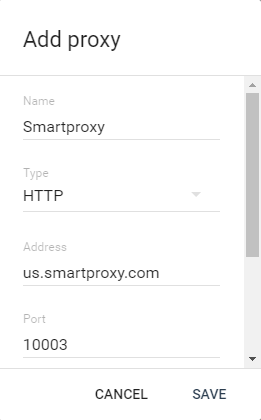
In the Add proxy menu:
- Enter any name you wish.
- For Type, select HTTP.
- In the Address and Port fields, enter your chosen endpoint and its port. E.g.
us.smartproxy.comand10003. - In the Username and Password fields, enter the credentials of your proxy user accordingly. If you are using a whitelisted IP address, these fields can be skipped. Learn more about our authentication methods.

SessionBox – Add proxy
- Click Save.
The proxies will be active during the session you have set them up for. You can check if the proxies are working correctly by creating a session for an IP check website and setting proxies for it. For example **ip.smartproxy.com **.
Support
Need help or just want to say hello? Our customer support is available 24/7. You can also reach us anytime via email at [email protected].
Updated about 2 months ago