Quick Start
Dedicated datacenter proxy Quick Start
- Firstly, go to the Datacenter Proxies → Dedicated Datacenter → Proxy setup section on your dashboard.
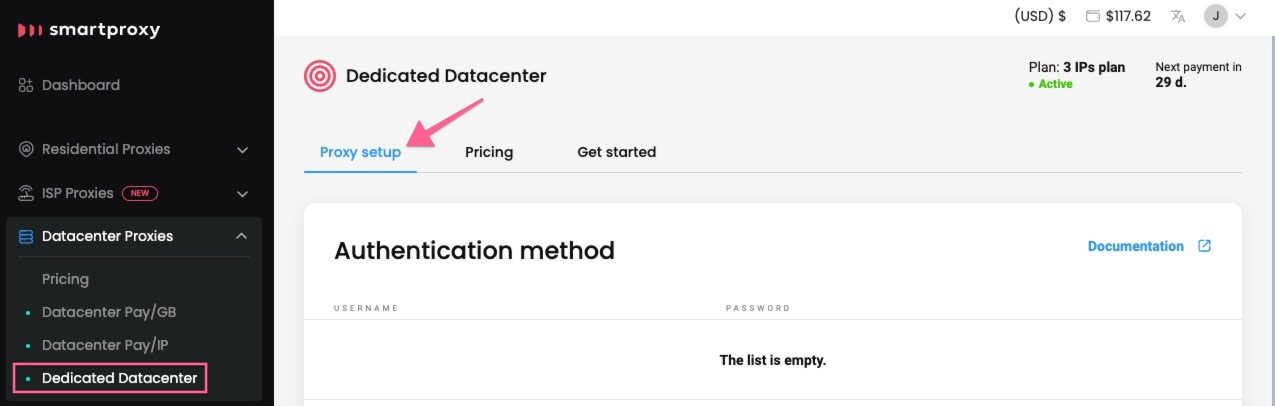
The Proxy setup section.
- Next, create proxy user credentials in the proxy Authentication method section. Check out the Proxy authentication article for more details.
- Passwords cannot be edited later.
- To delete your current proxy user (e.g. if you need to change your password), please get in touch with our 24/7 customer support by clicking the chat widget on the bottom right or by using this link.
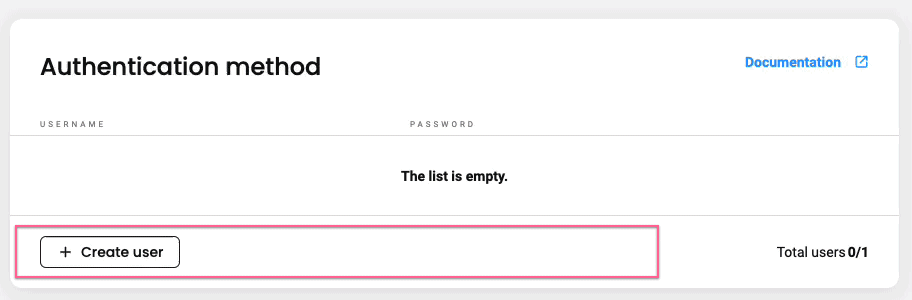
Proxy user creation.
- Then, scroll down to the Proxy management section and enter your Username and Password.
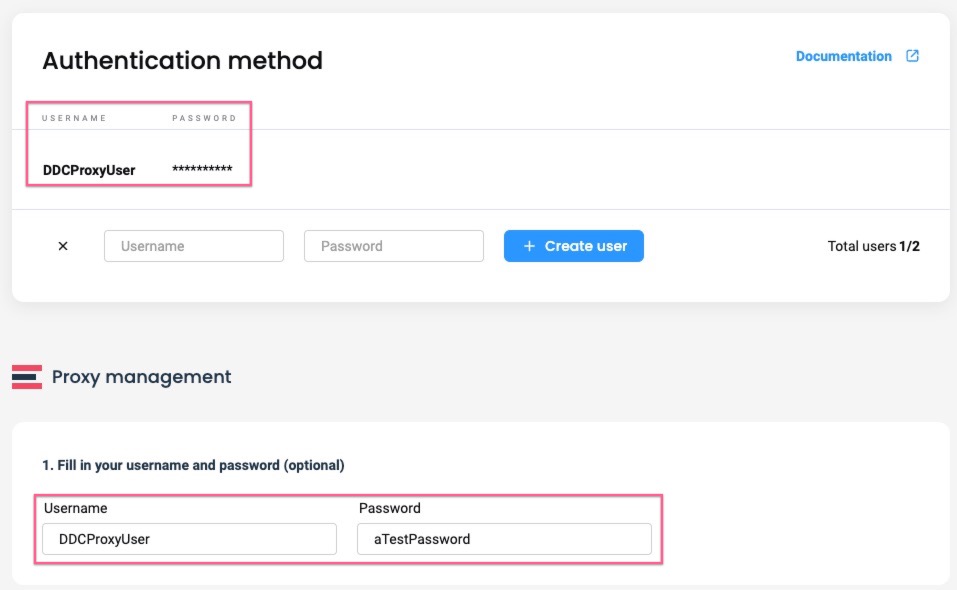
Entering credentials.
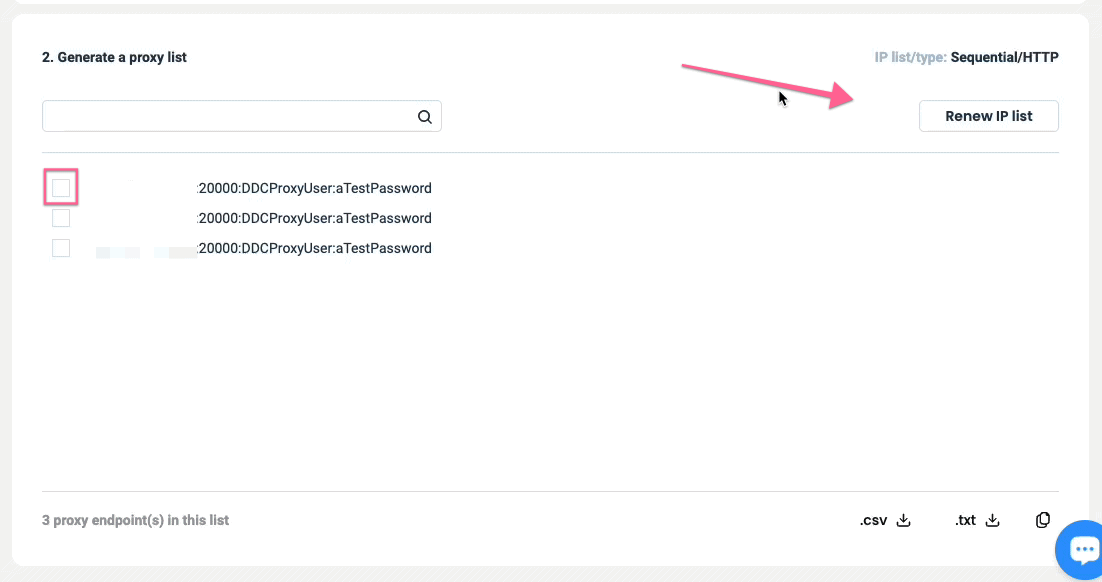
- You will see a your proxy list in the Generate a proxy list section.
- Search for a specific IP using the search field.
- Download the list as a
.csvor.txtfile, or simply copy it to your clipboard. - Check the number of the IPs in the list at the bottom left.
- Check if the IP list is sequential or non-sequential, and type (HTTP/SOCKS5) at top right side.

Proxy list management.
Replace the whole list or a specific IP(s) by clicking Renew IP list and Recreate selected IPs, after selecting the ones you want to replace, respectively. Then proceed to the checkout.
- If you select to Renew the entire IP list, you can change the format type and the sequence (non-sequentual has a 25% extra fee).
- The price of replacement will depend on your selection and also on the sequence format of the list.
Repurchasing IPs.
Updated 2 months ago