ScrapeBox
A quick guide on how to set up proxies on ScrapeBox.
- Open the ScrapeBox application.
- Check the Use Proxies field in Select Harvester and Proxies settings.
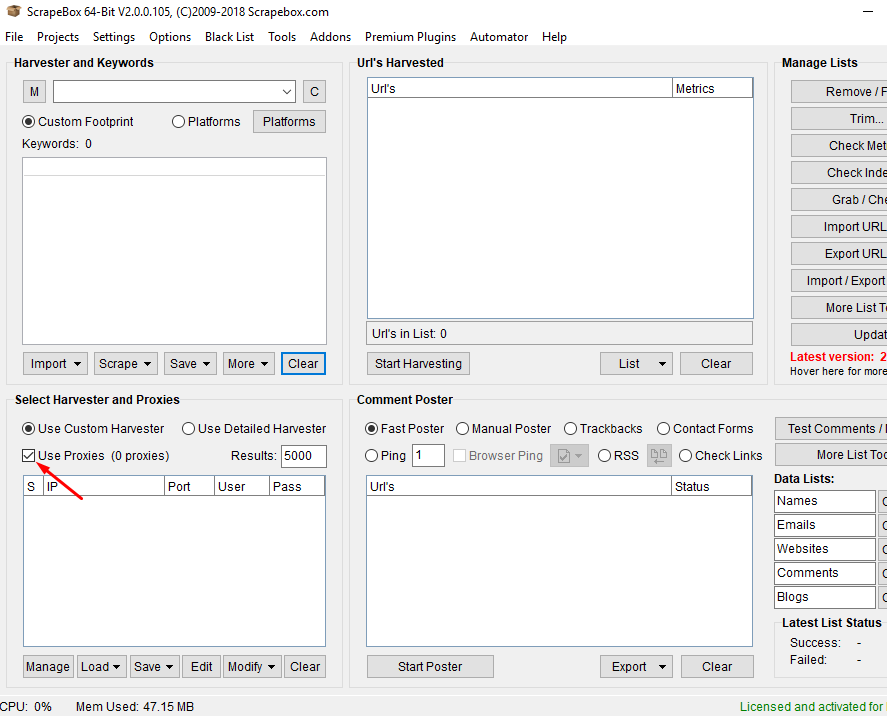
ScrapeBox – Use proxies
- Click the Edit button to start setting up your proxies.
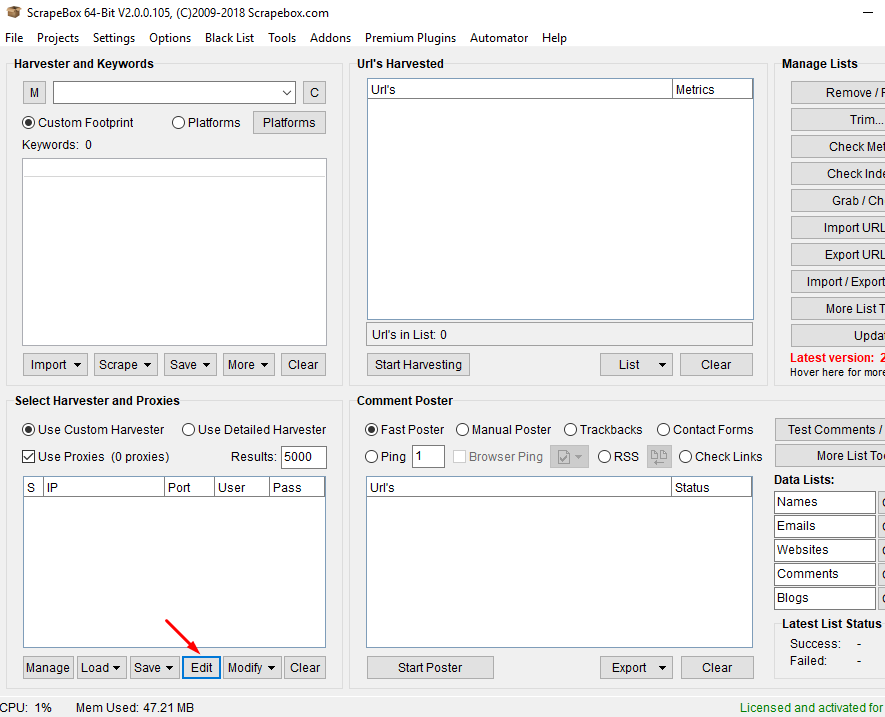
ScrapeBox – Edit
- Depending on the authentication method you would like to use, type in the information for the proxy authentication as in the example below:
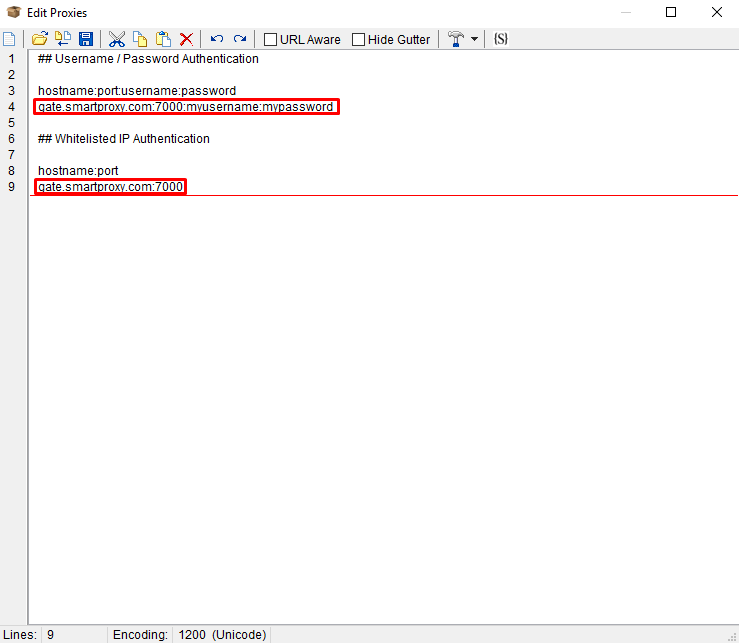
ScrapeBox – Edit Proxies
- Once that is done, click Save to save the proxy settings. Now you should see your proxies in the Select Harvester and Proxies box.
- Select all of the proxies you have entered and click the Modify button.
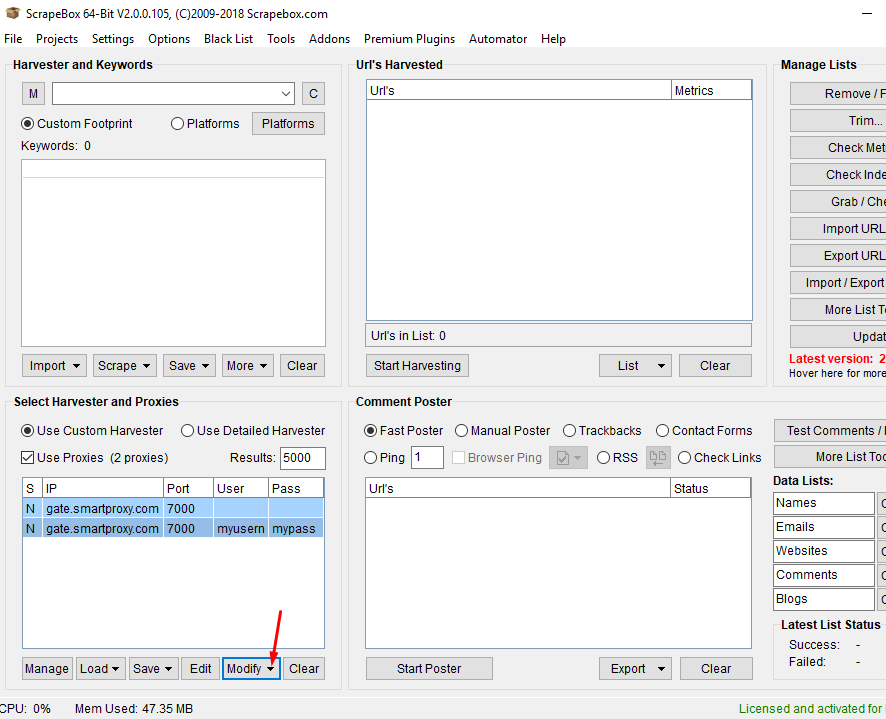
ScrapeBox – Modify
- Click on the option Mark all Proxies as Non-Socks proxies. If done correctly, you should see the letter N under each entered proxy in the S field of the proxy table.
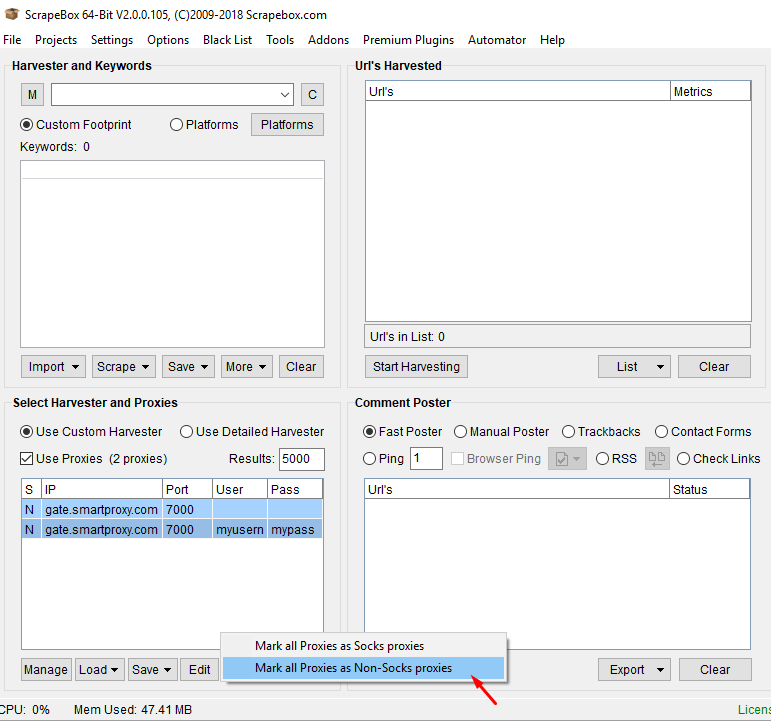
ScrapeBox – Mark all Proxies as Non-Socks proxies
- You can configure the rest of the ScrapeBox settings according to your needs. To test if you are using proxies, simply check if Harvester Status indicates Proxies Enabled.

ScrapeBox – Proxies enabled
Make sure that you are not checking the status of the proxies in the Proxy Editor as you will get negative results. ScrapeBox does not support checks on backconnect proxies used by Smartproxy.
Support
Need help or just want to say hello? Our customer support is available 24/7. You can also reach us anytime via email at [email protected].
Updated about 2 months ago