eCommerce Scraping API (LEGACY)
With our eCommerce Scraping API, you can gather the most important data from eCommerce websites. Most notably and in-depth Amazon.
You can integrate the API into your code, or test requests via our dashboard.
We offer two solutions - Core and Advanced. You can use our Playground to find out which solutions fits your use case best. Or learn more about them in this page
Authentication
Once you have an active eCommerce subscription, you will be able to check your generated proxy Username as well as see or regenerate a new Password in the API Authentication tab.
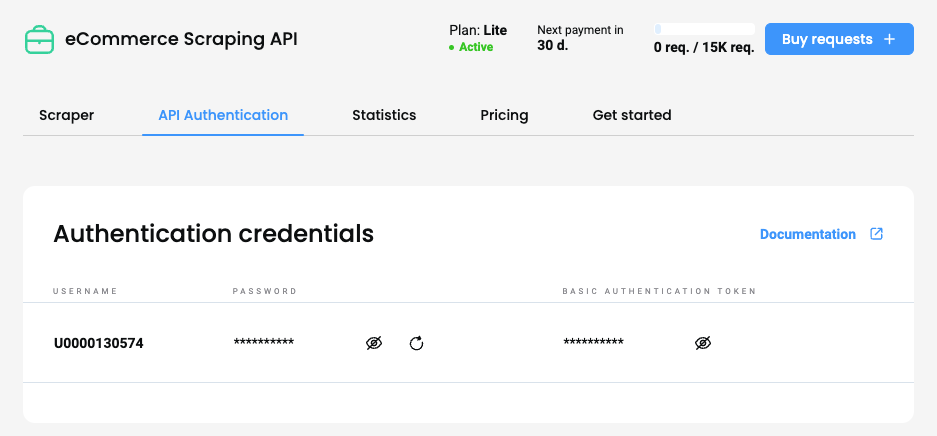
Smartproxy dashboard – the eCommerce API authentication section.
Sending requests via the dashboard for Core plans
You can send a request via your dashboard in the Scrapers section
- Click Create new project

The Scrapers section – creating a new project.
- Add Target URL and open the dropdowns to specify your custom parameters.
- Click Save and scrape
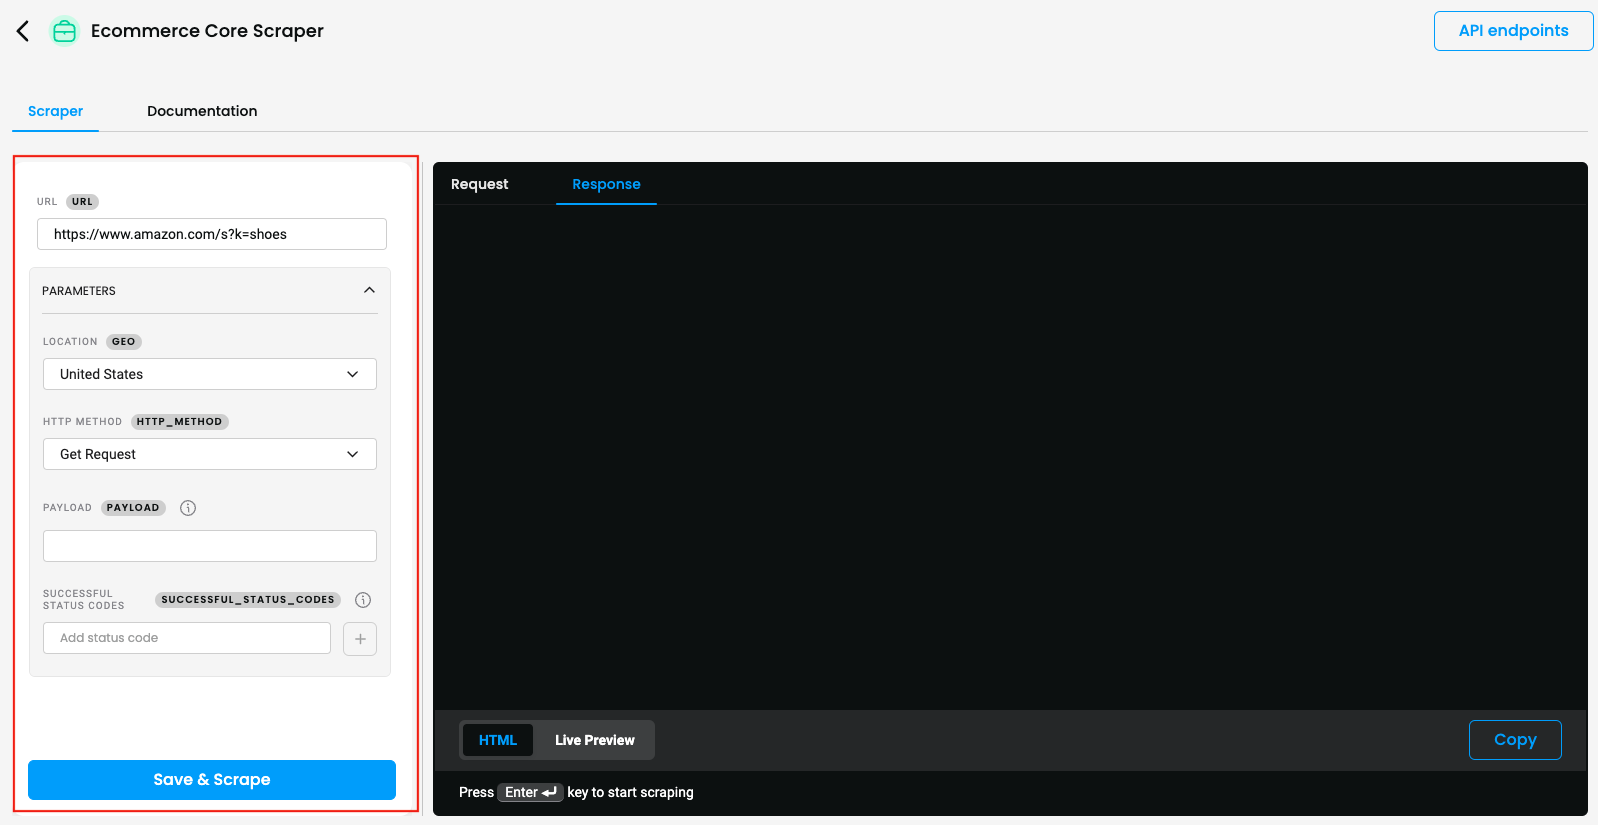
Core scraper request builder
- You will see the response in
HTMLformat
- You can Copy or Export the Response in
HTMLformat. - You can Copy the Request in each available language.
Sending requests via the dashboard using templates, for Advanced plans
You can send a request via your dashboard in the Scrapers section by selecting your Target from the pre-made templates and customizing your desired parameters for the request.
- Click Create new project, or one of the top Popular Scrapers directly.
The Scrapers section – creating a new project.
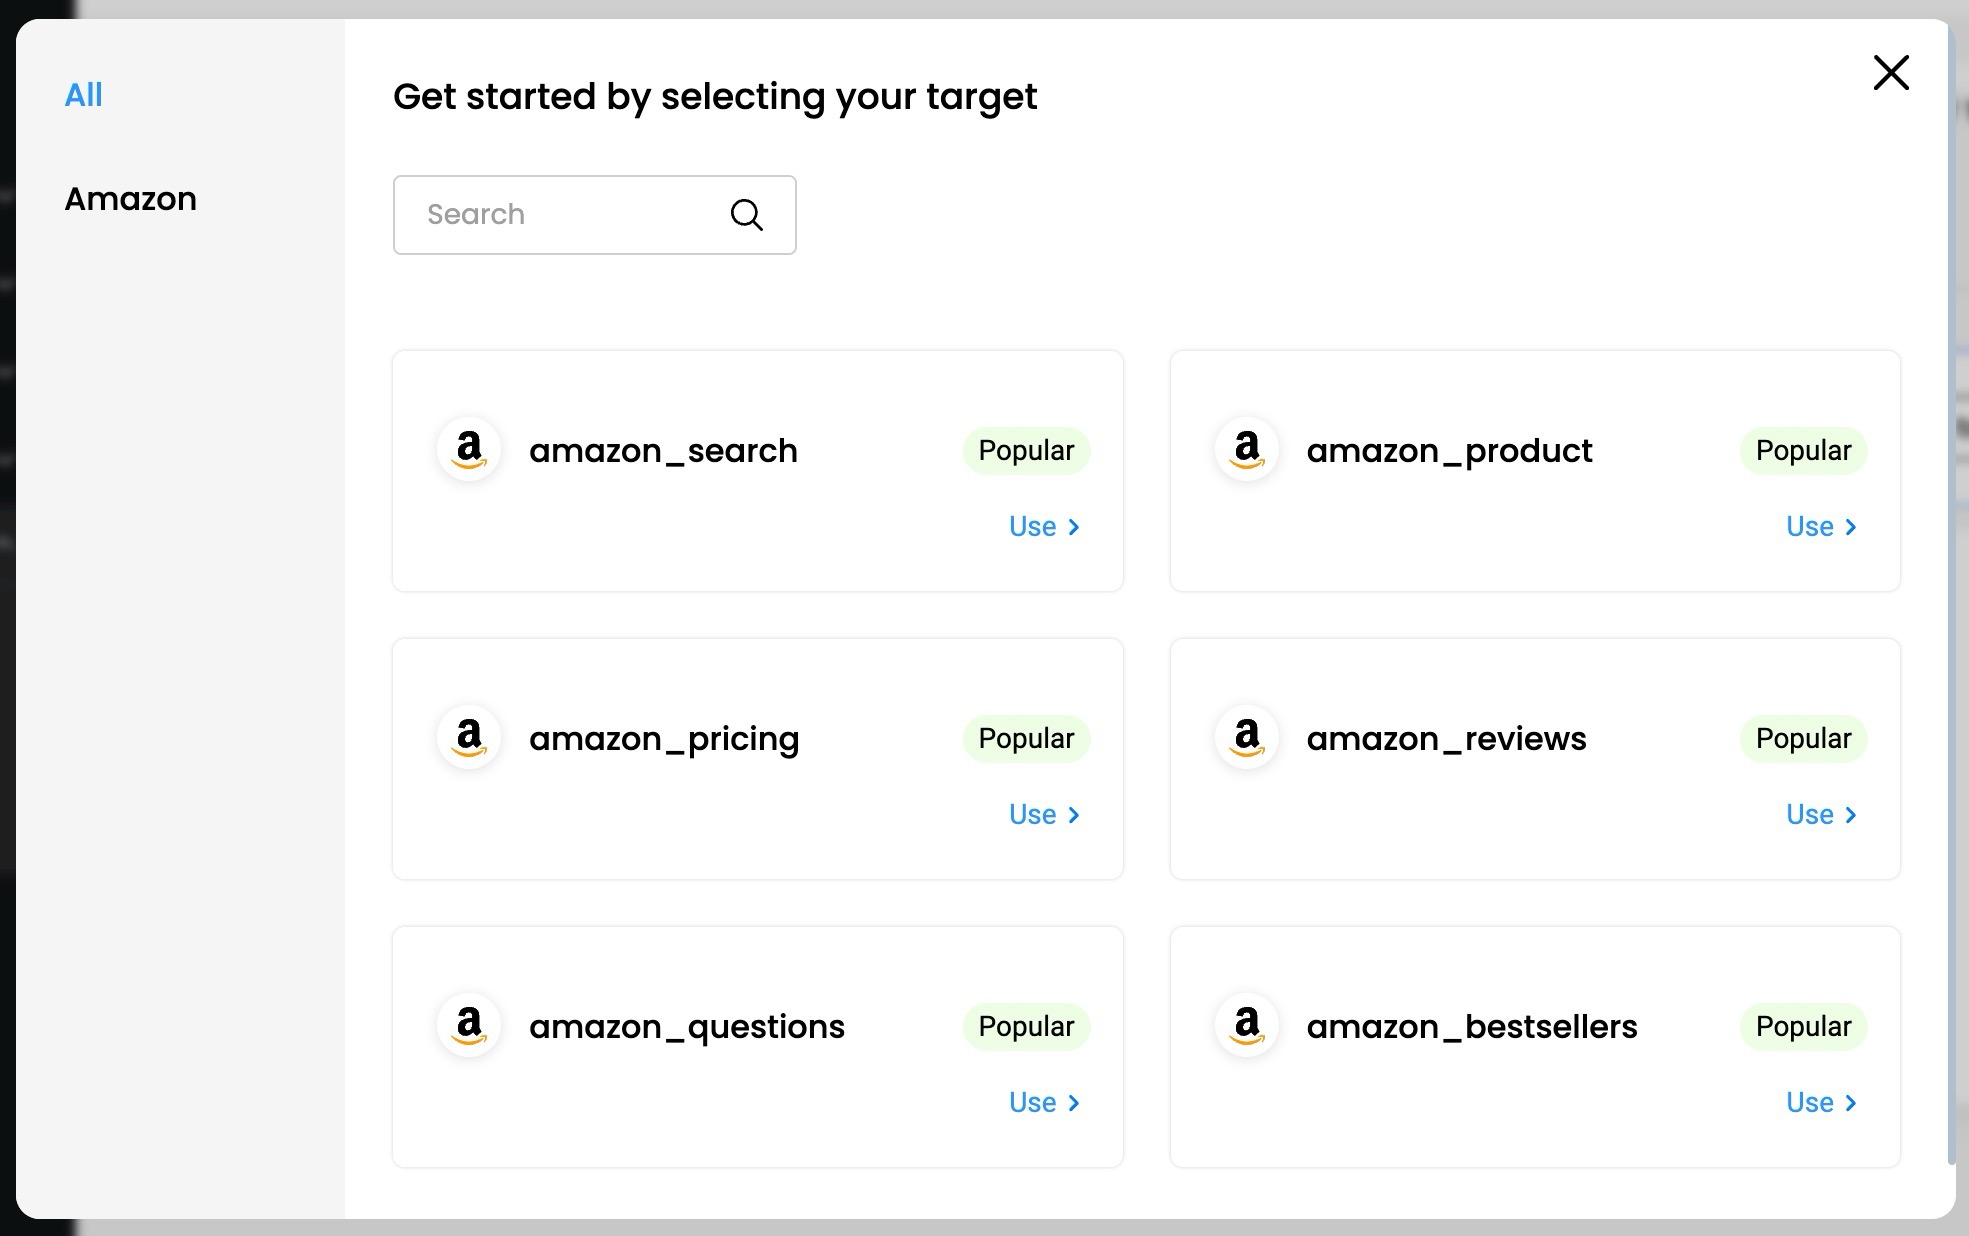
The Scrapers section – selecting a target.
- Open the dropdowns to specify your custom parameters.
- Click Start scraping.
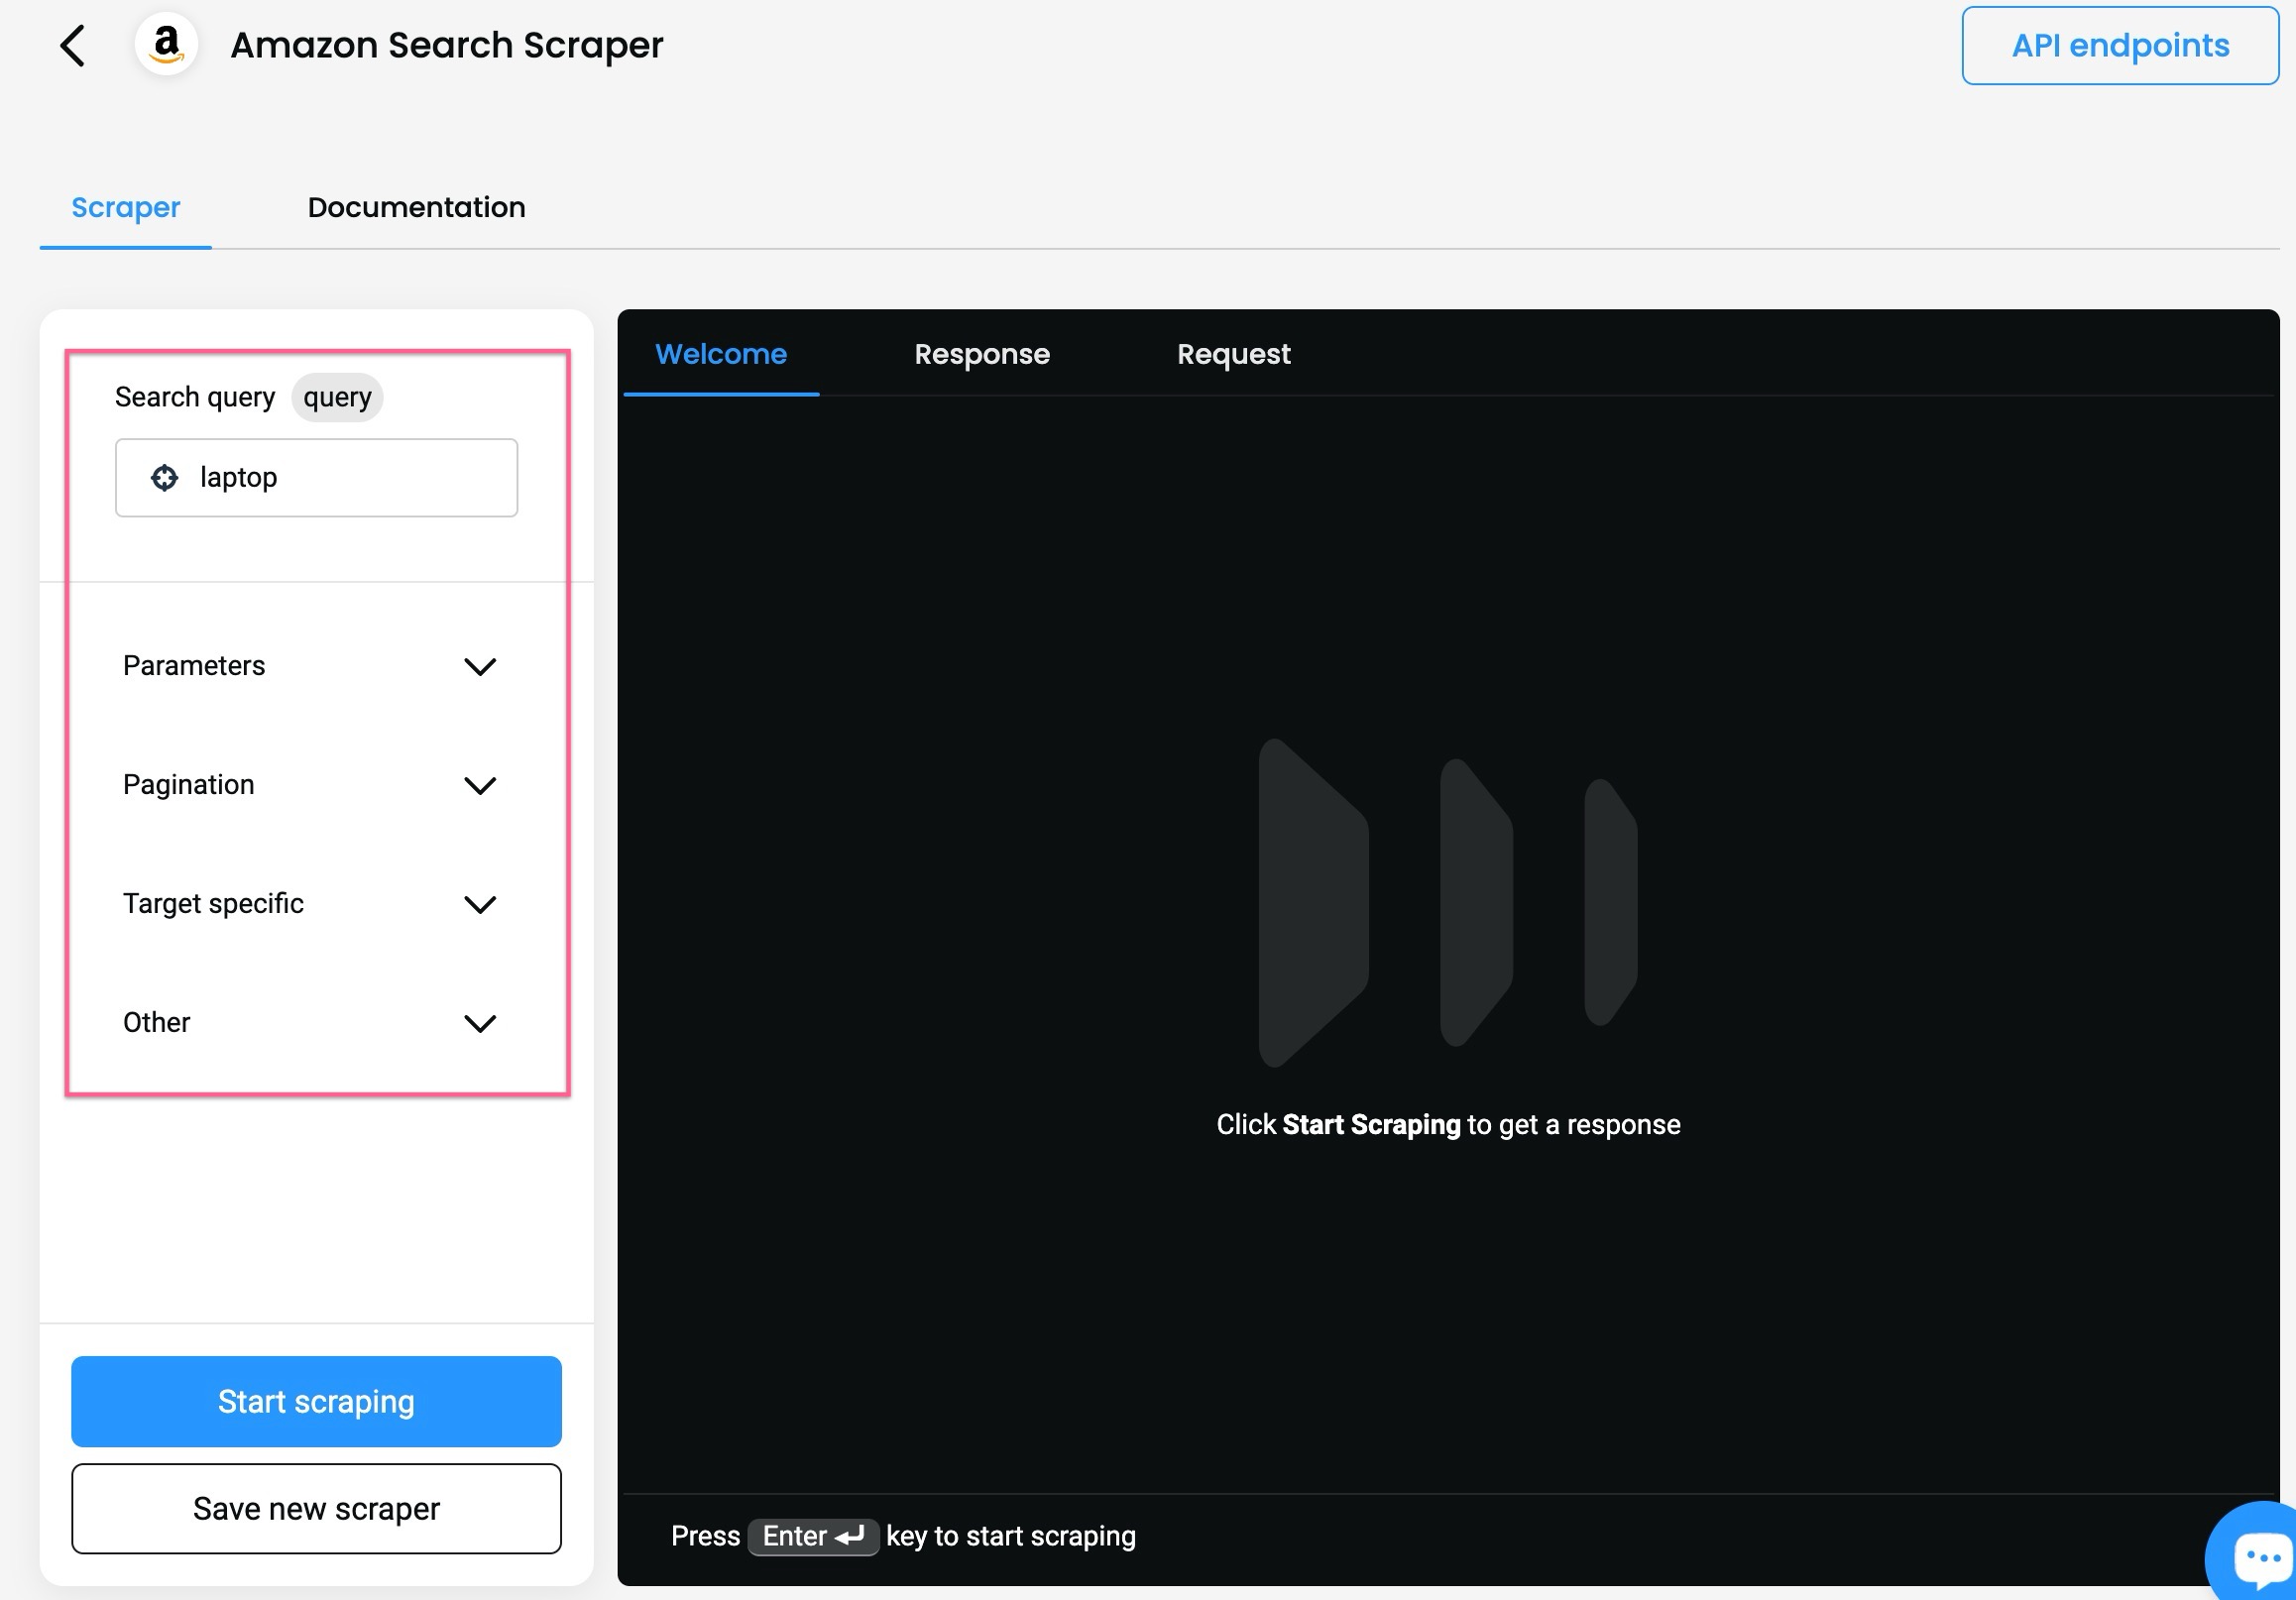
The Scrapers section – selecting parameters.
- You will also see the response in
JSONand parsed in a table format, as well as an example of acURL,NodeorPythonrequest if you select the Response or the Request tab respectively.
- You can Copy or Export the Response in
JSONorCSVformat. - You can Copy the Request in each available language.
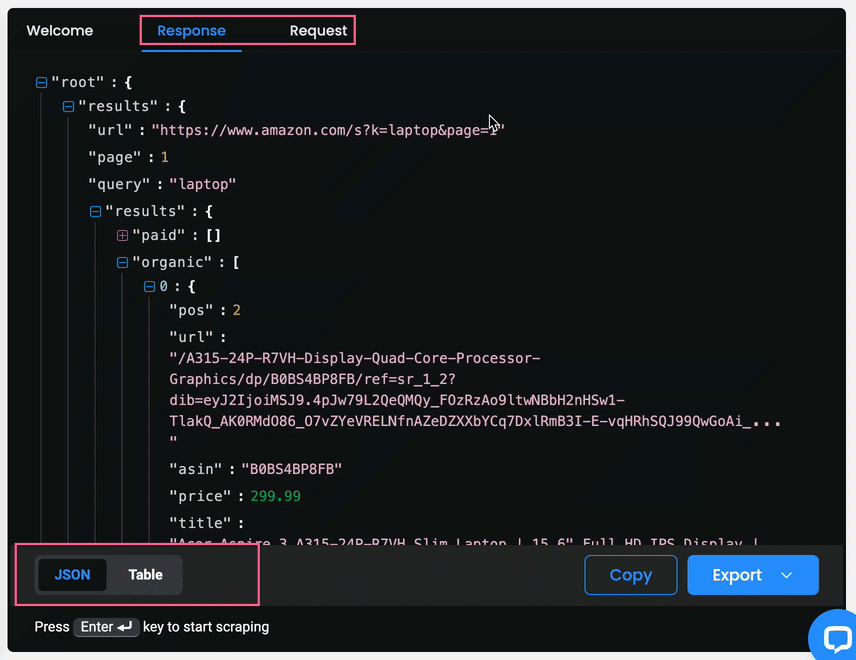
The Scrapers section – reviewing the results.
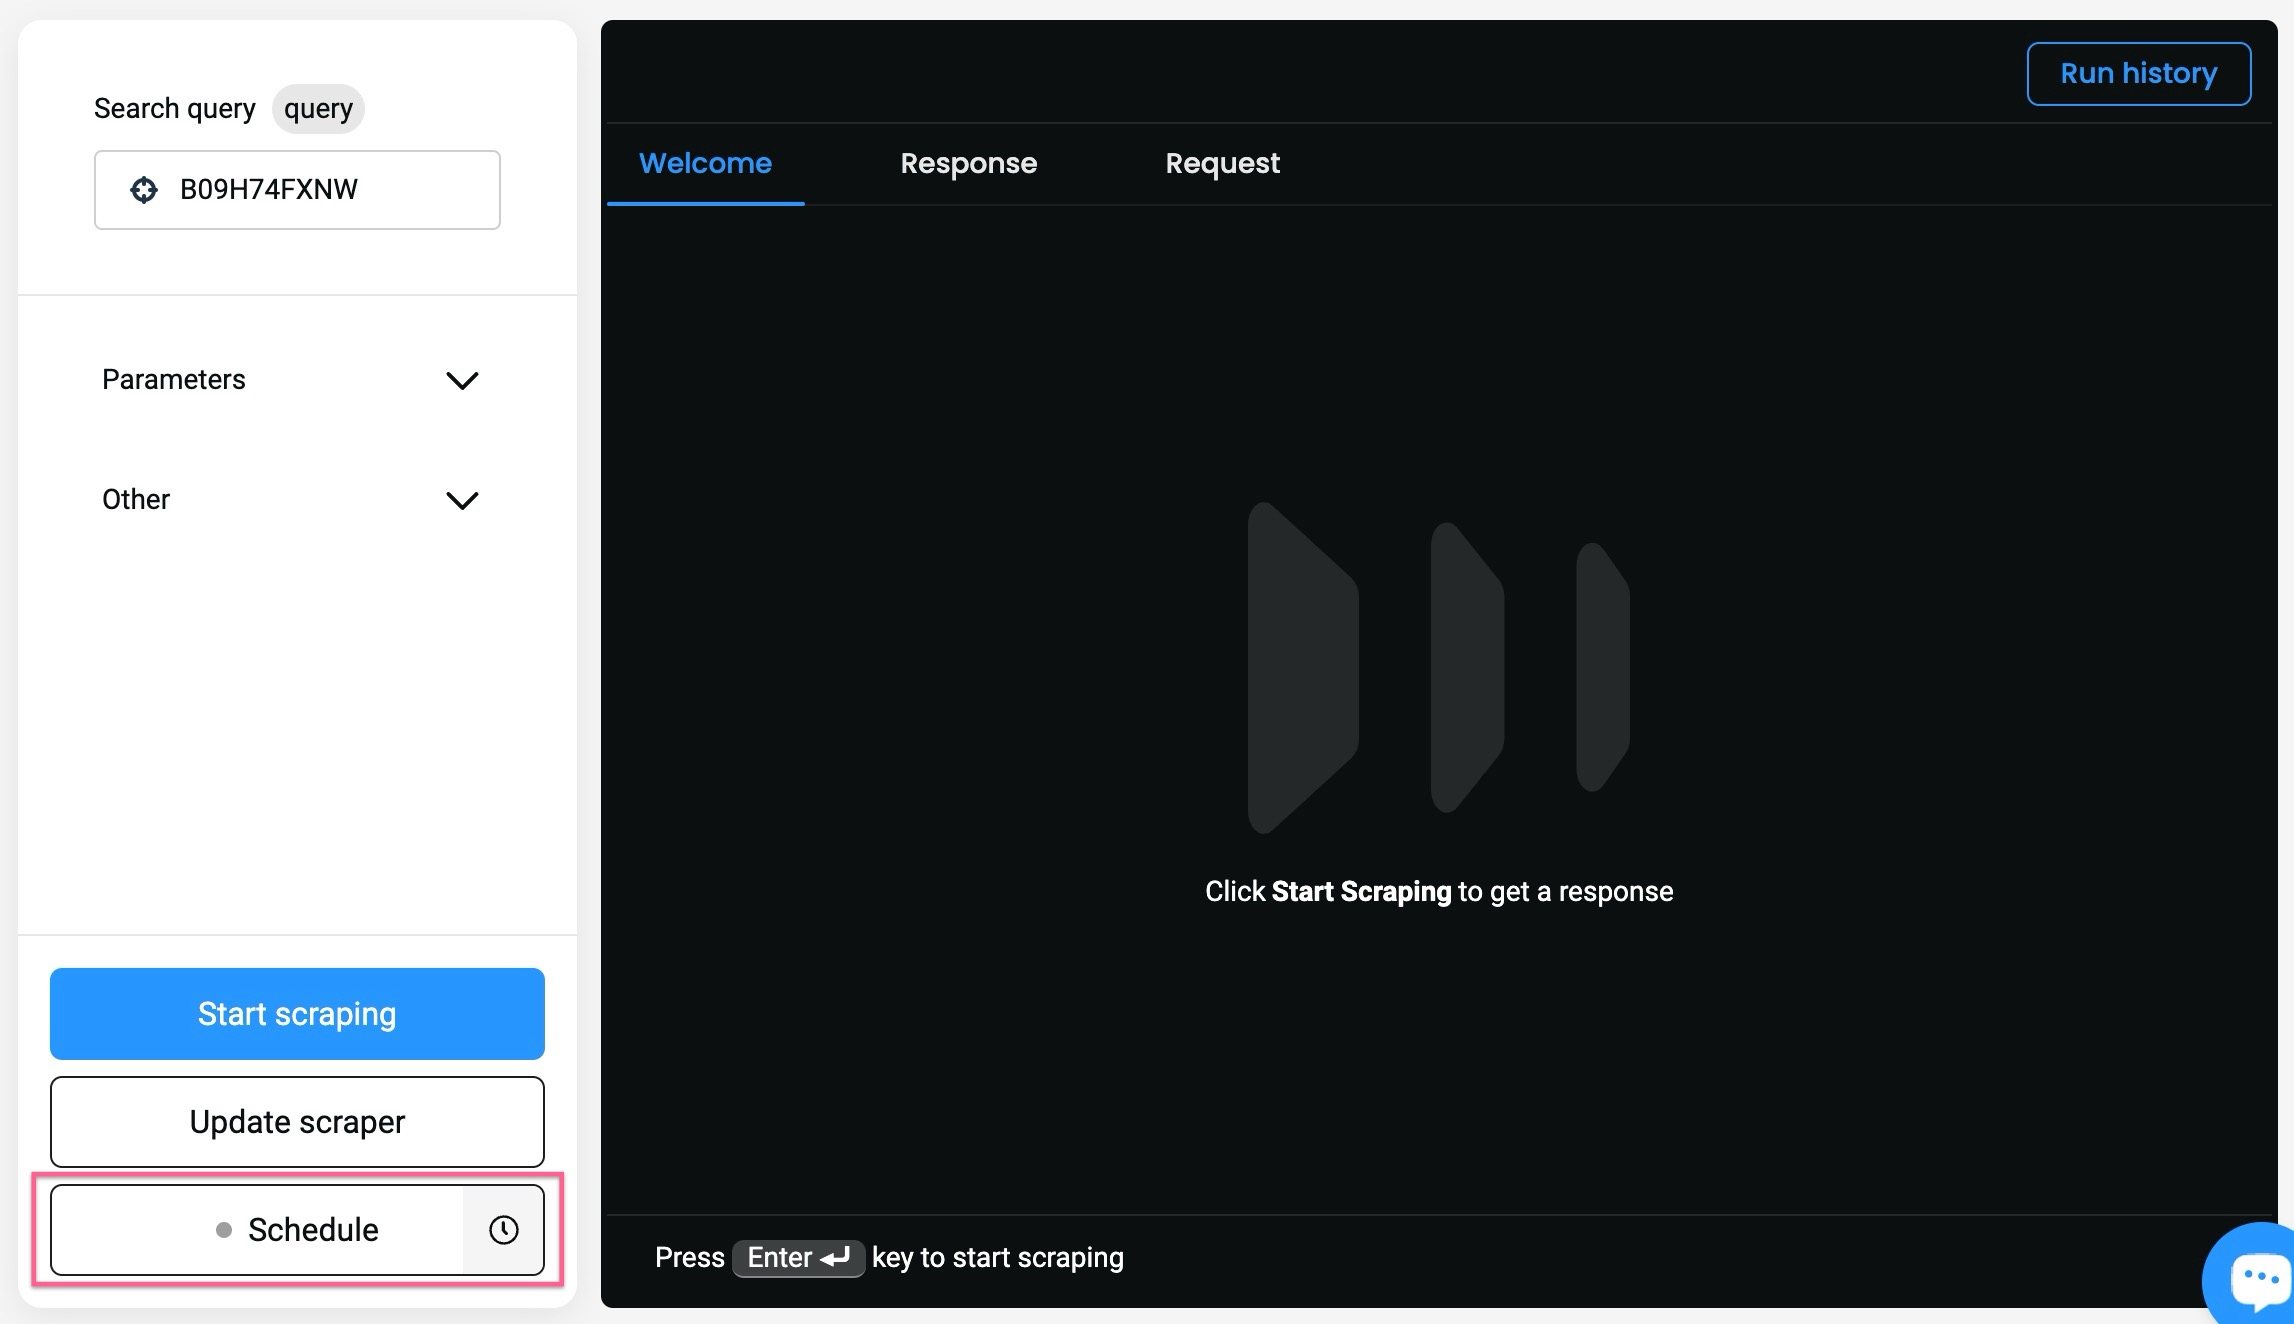
Saving & scheduling scraping templates
You can save a specific template by clicking Save new scraper once you select your parameters.
- Once saved, it will appear in the Scrapers section and you can click it to start working on it again.
- Click Update scraper to update the template.

The Scrapers section – saved templates.
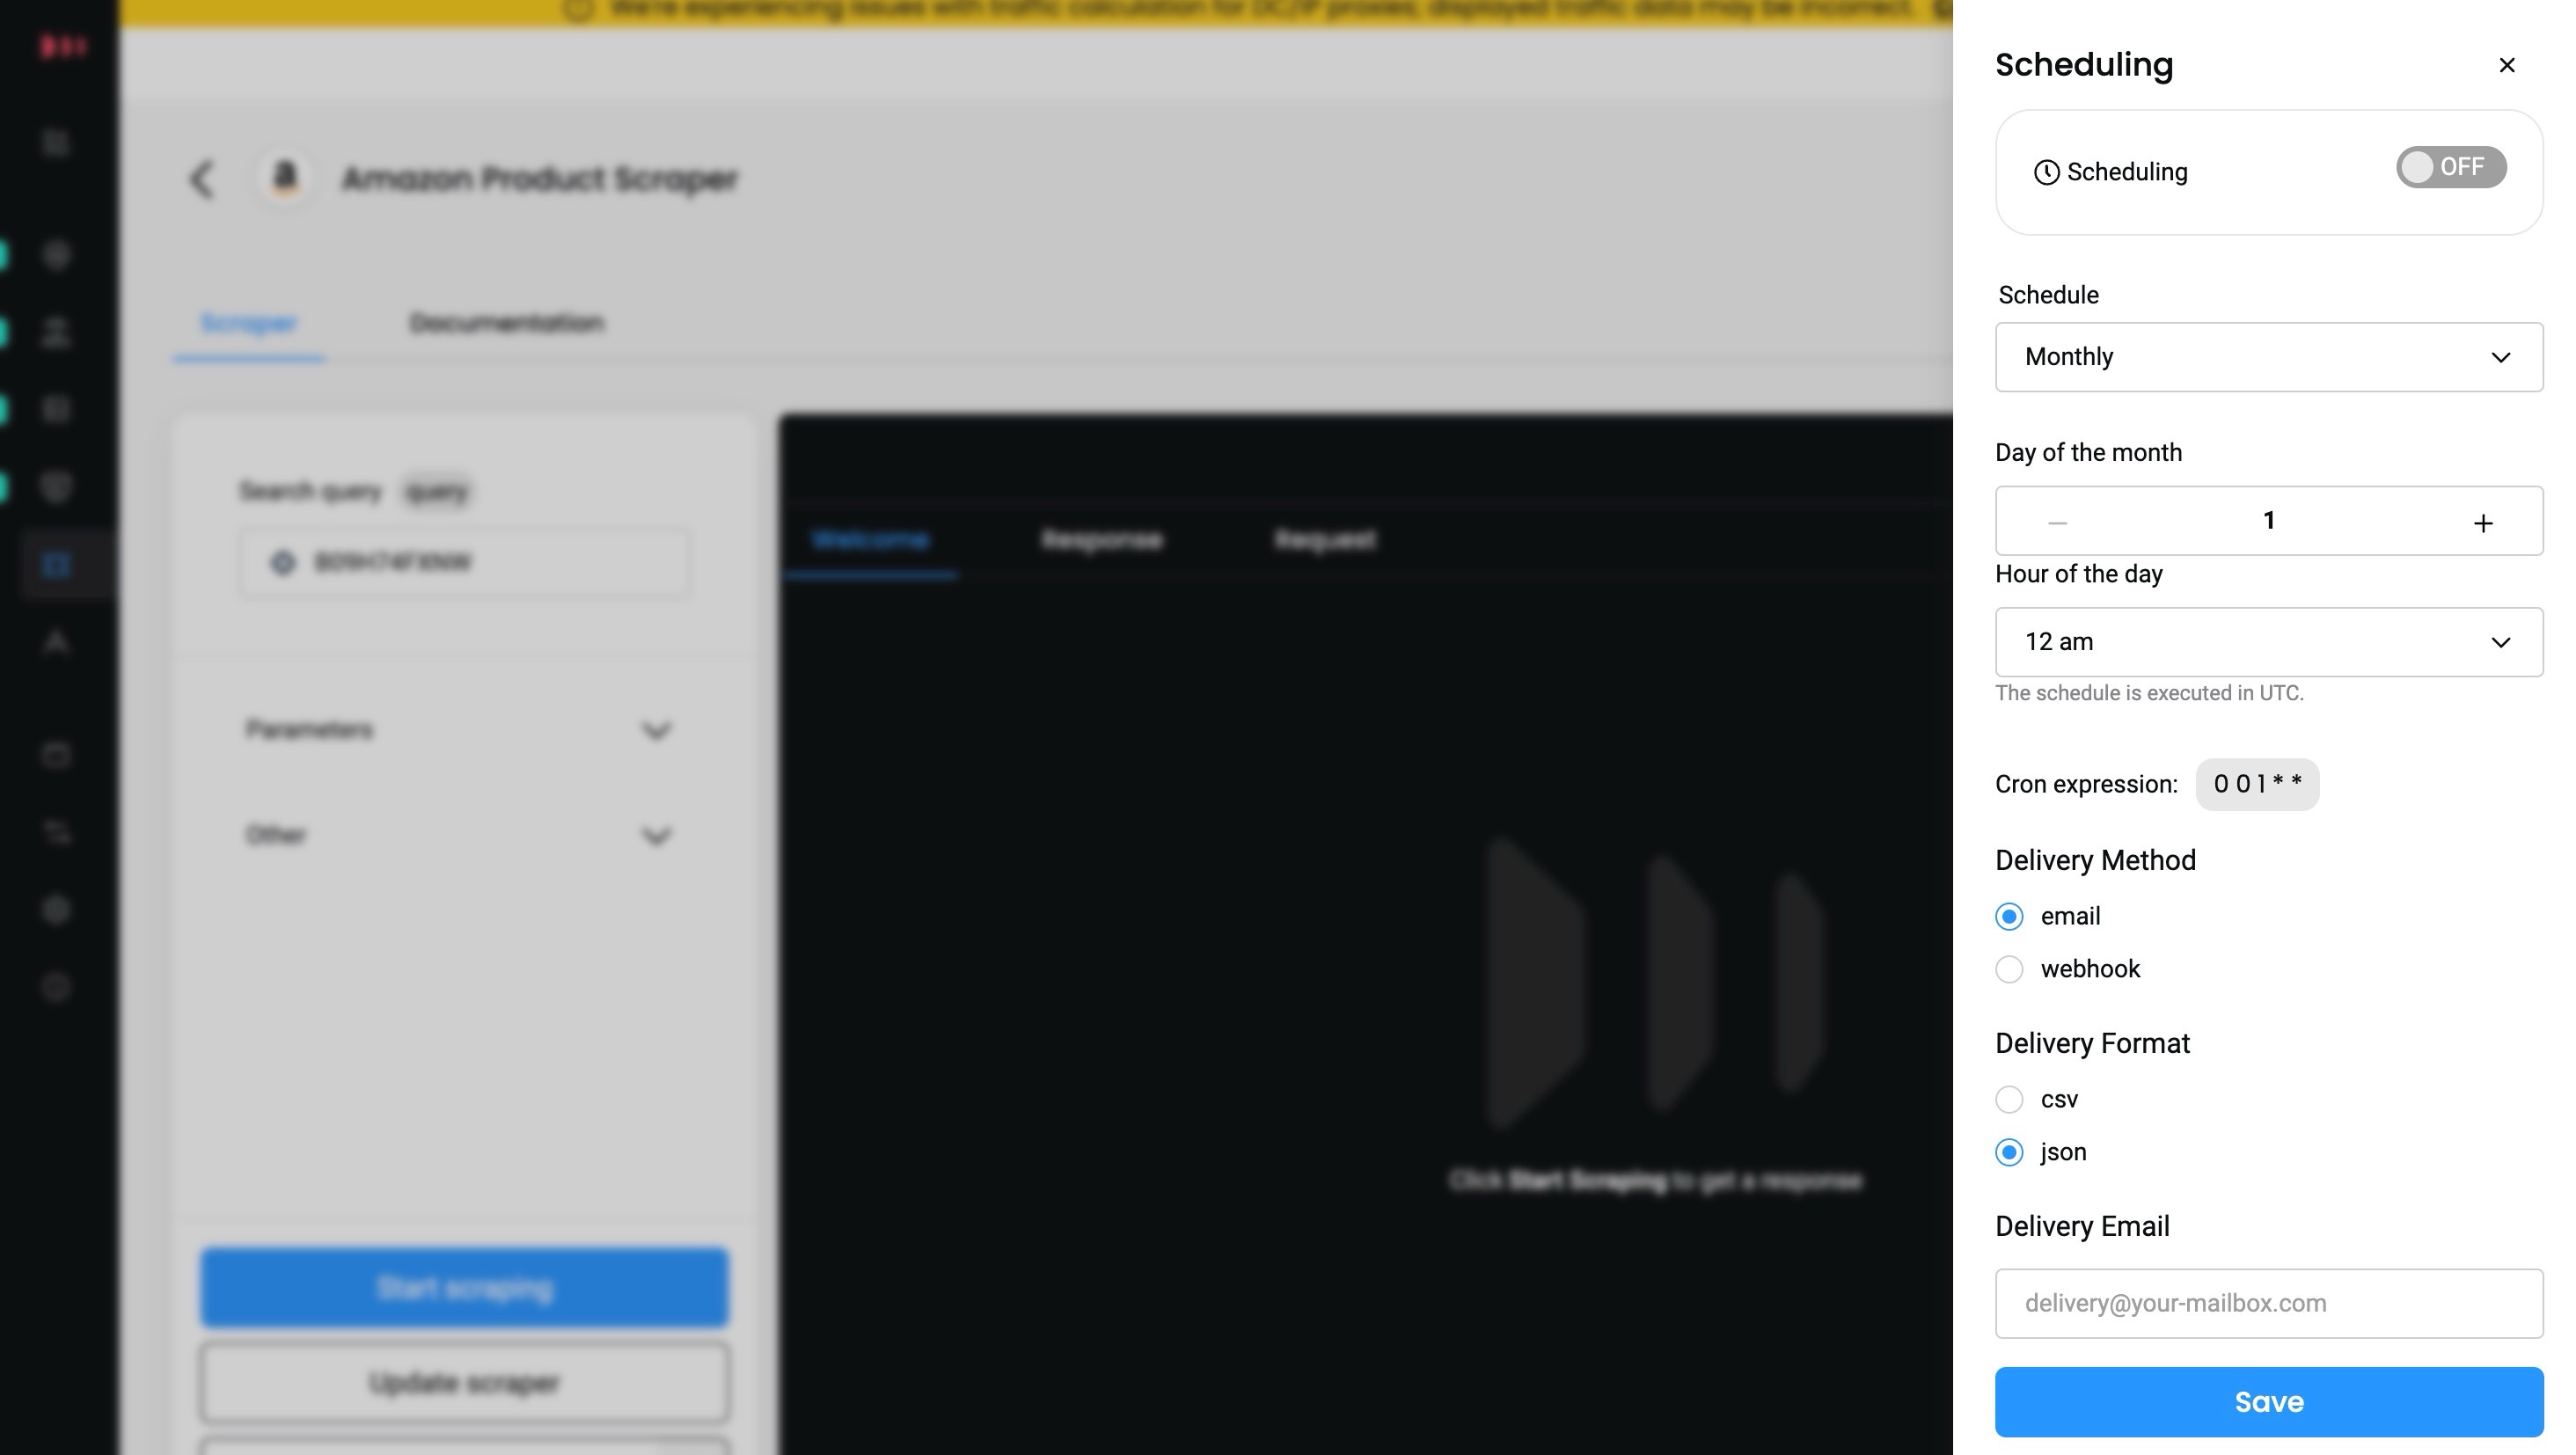
To create a Schedule, click Schedule while a template is selected, and a right-side menu will pop up.
Scheduling is available for Advanced plans.
- You can specify the scheduling's frequency, delivery method (
emailorwebhook), and the format (SCVorJSON).
Creating a Schedule.
Managing the various aspects of scheduling.
Updated 10 days ago