AdsPower
Anti-detect browser
Getting Started
Proxy Setup
-
Open up the AdsPower app
-
In the main screen, press on the "New profile" button to enter the profile setup page.

AdsPower - New profile
-
In the Name field, type in what you would like your profile to be called.
3.1. Select the preferred device type for your profile, in the User Agent dropdown menu.
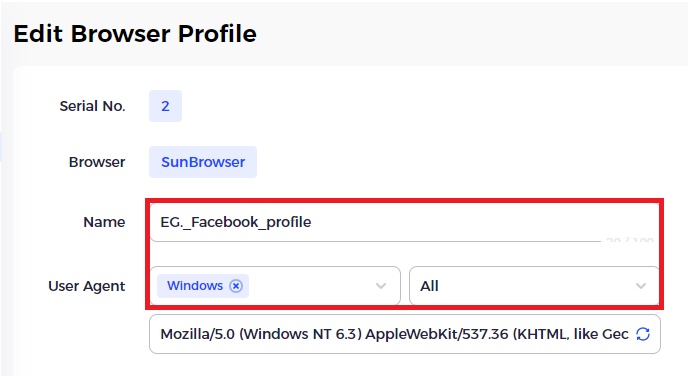
AdsPower - Add profile name and user agent
- In the "Proxy type" section press on the dropdown menu and select the HTTP as the proxy protocol.
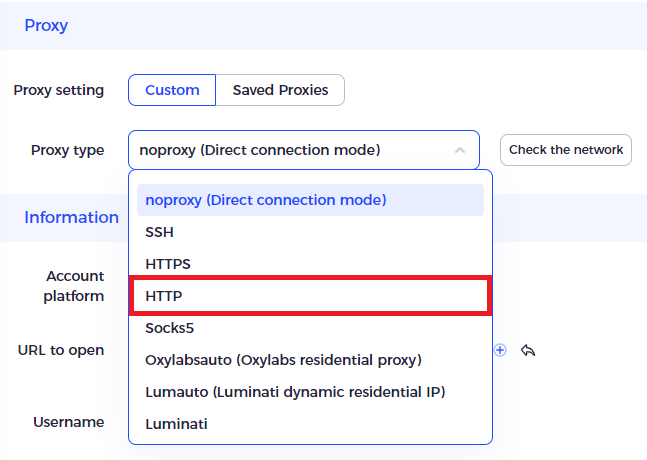
AdsPower - Choose a proxy type
- Fill in text fields for Proxy Host, Proxy Port, Proxy User, and Proxy Password as in the example below.
Proxy Guides
You can find our quick setup guides for each proxy type here.
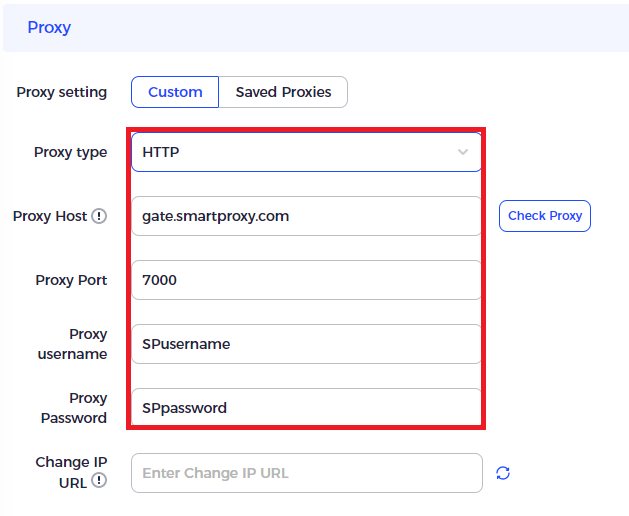
AdsPower - Fill in the proxy parameters
- If you are using the HTTP protocol, you can check if the proxies are working by pressing the "Check Proxy" button next to the Proxy Host field.

AdsPower - Check the proxy connection
If you have the proxies set up using HTTPS protocol, you will not be able to check them in the setup page, however, you can check the proxy by launcing a finished profile and checking then.
- In the "Account Platform" dropdown menu, you can select the website you will be accessing with the Browser Profile.
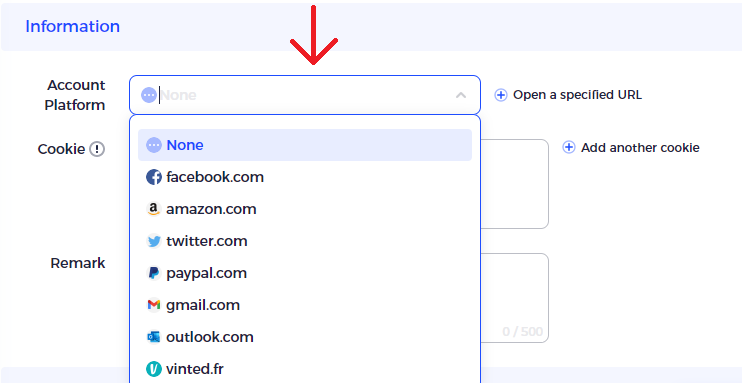
AdsPower - Choose the website you will be accessing
- Once the platform is selected, you can enter the Username and Password to the respective fields, this will automatically fill the login information fields on the site, every time you open the profile you are creating.
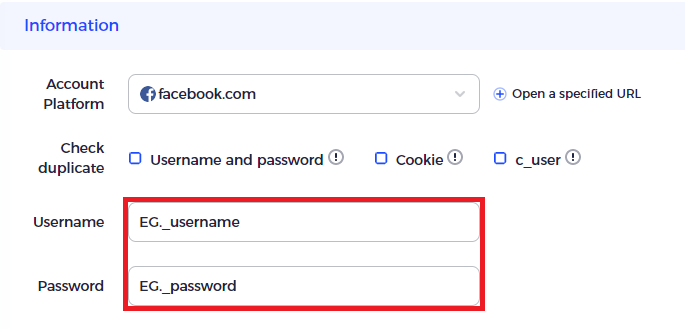
AdsPower - Input the login details for the website
- In the Advanced section, you can select any specific fingerprint settings for your browser profile.
- After you have set up all your preferences on the setup page, press the OK button on the bottom of the window to save the profile setup.

AdsPower - Save your profile
- Your Profile Management tab displays the profiles you have created. Press the Open button to launch the Browser profile.

AdsPower - Launch your profile
- Once the profile launches, the first tab will show your proxy IP, and check the connections to a few sample sites. This is an example of what you should be seeing:
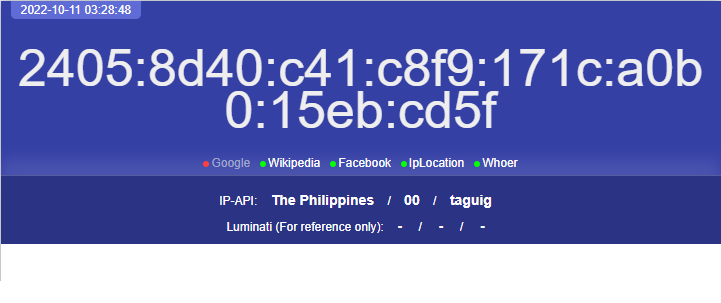
Example of the first page you will see upon launching the AdsPower profile
Checking the Proxy IP / Connection
- Launch the created profile from the main menu.
- Visit ip.smartproxy.com to check the current IP address and location.
Target Access
Please be aware that we restrict access to some domains. You can learn more here.
Editing / Deleting profiles
If you wish to alter the setup, you can edit the profile by clicking on the three dots next to it and selecting edit or delete from the dropdown menu.

AdsPower - How to edit the profile
Support
Need help or just want to say hello? Our customer support is available 24/7. You can also reach us anytime via email at [email protected].
Updated about 2 months ago