Quick Start
Datacenter Pay/GB proxy Quick Start
Datacenter Pay/GB proxies use endpoints
Endpoints are like gateways to IP pools.
The endpoint generator will automatically assign you proxies from the selected endpoint (proxy address).
- Firstly, go to the Datacenter Proxies → Datacenter Pay/GB → Proxy setup section on your dashboard.
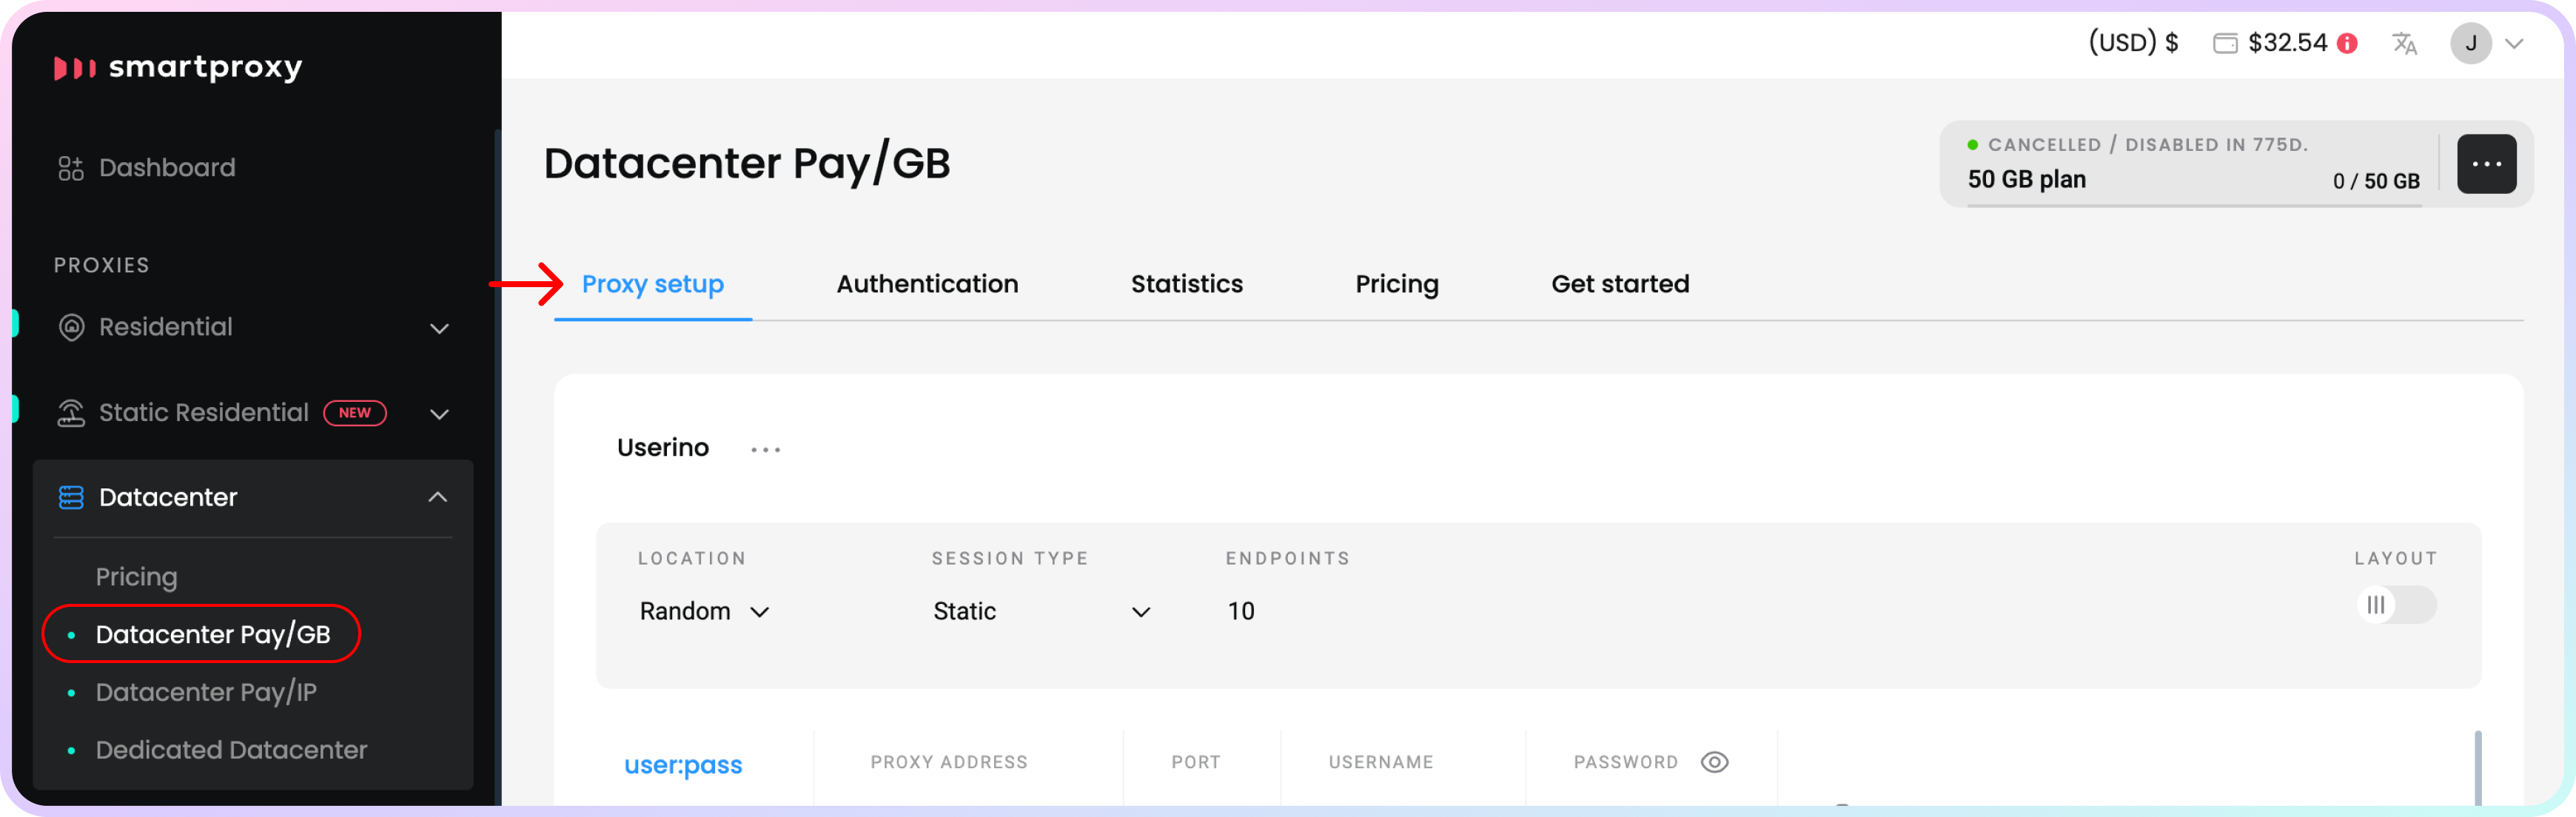
The Proxy setup section.
- Next, choose your proxy Authentication method. It can be either your whitelisted IP or one of your proxy users. Check out the Proxy authentication article for more details.
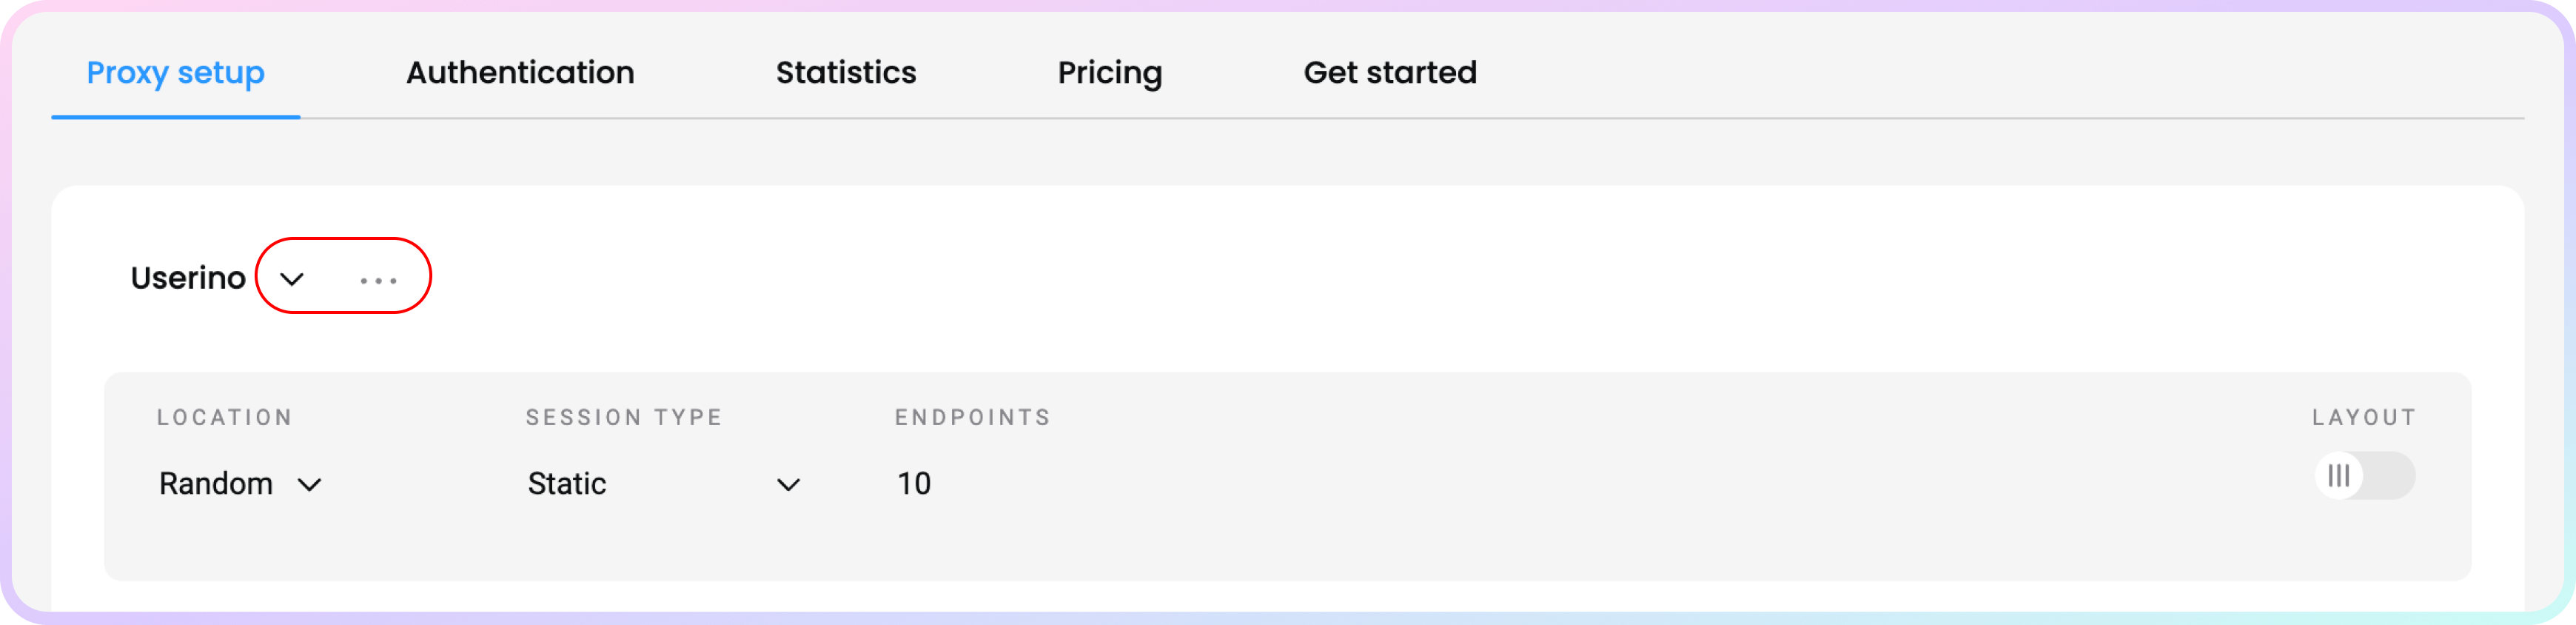
Authentication method selection.
- Then, select the location of your proxy, session type and Protocol.
- Choosing Random will pick the IPs randomly from one of our Datacenter Pay/GB pools.
- Choosing a specific country will allow you to generate a list only from that location.
- For Datacenter Pay/GB Proxies a location can only be specified when using the user:pass authentication method. Otherwise, you can only select a random location with a whitelisted IP.
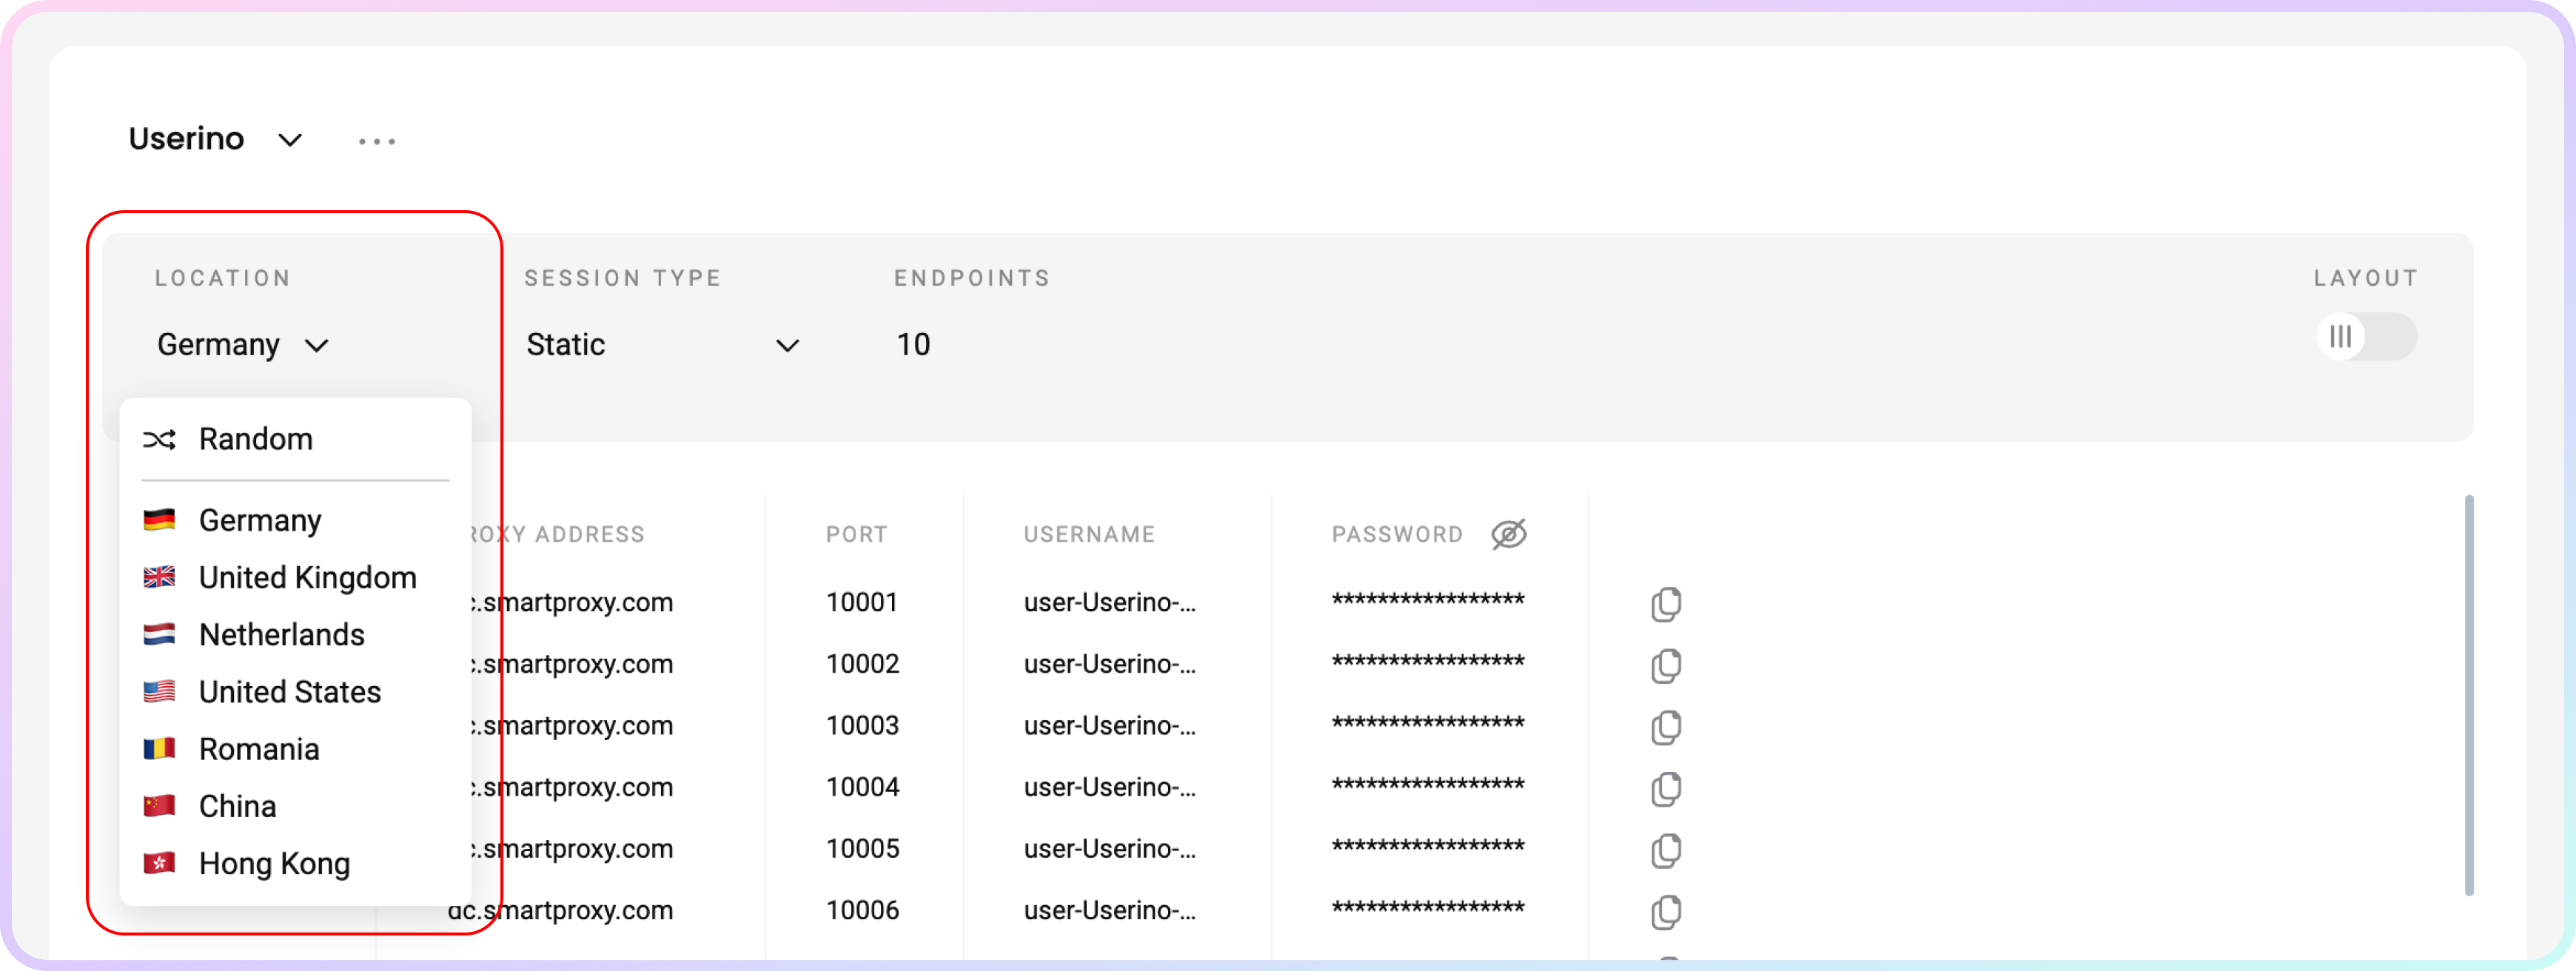
Location selection.
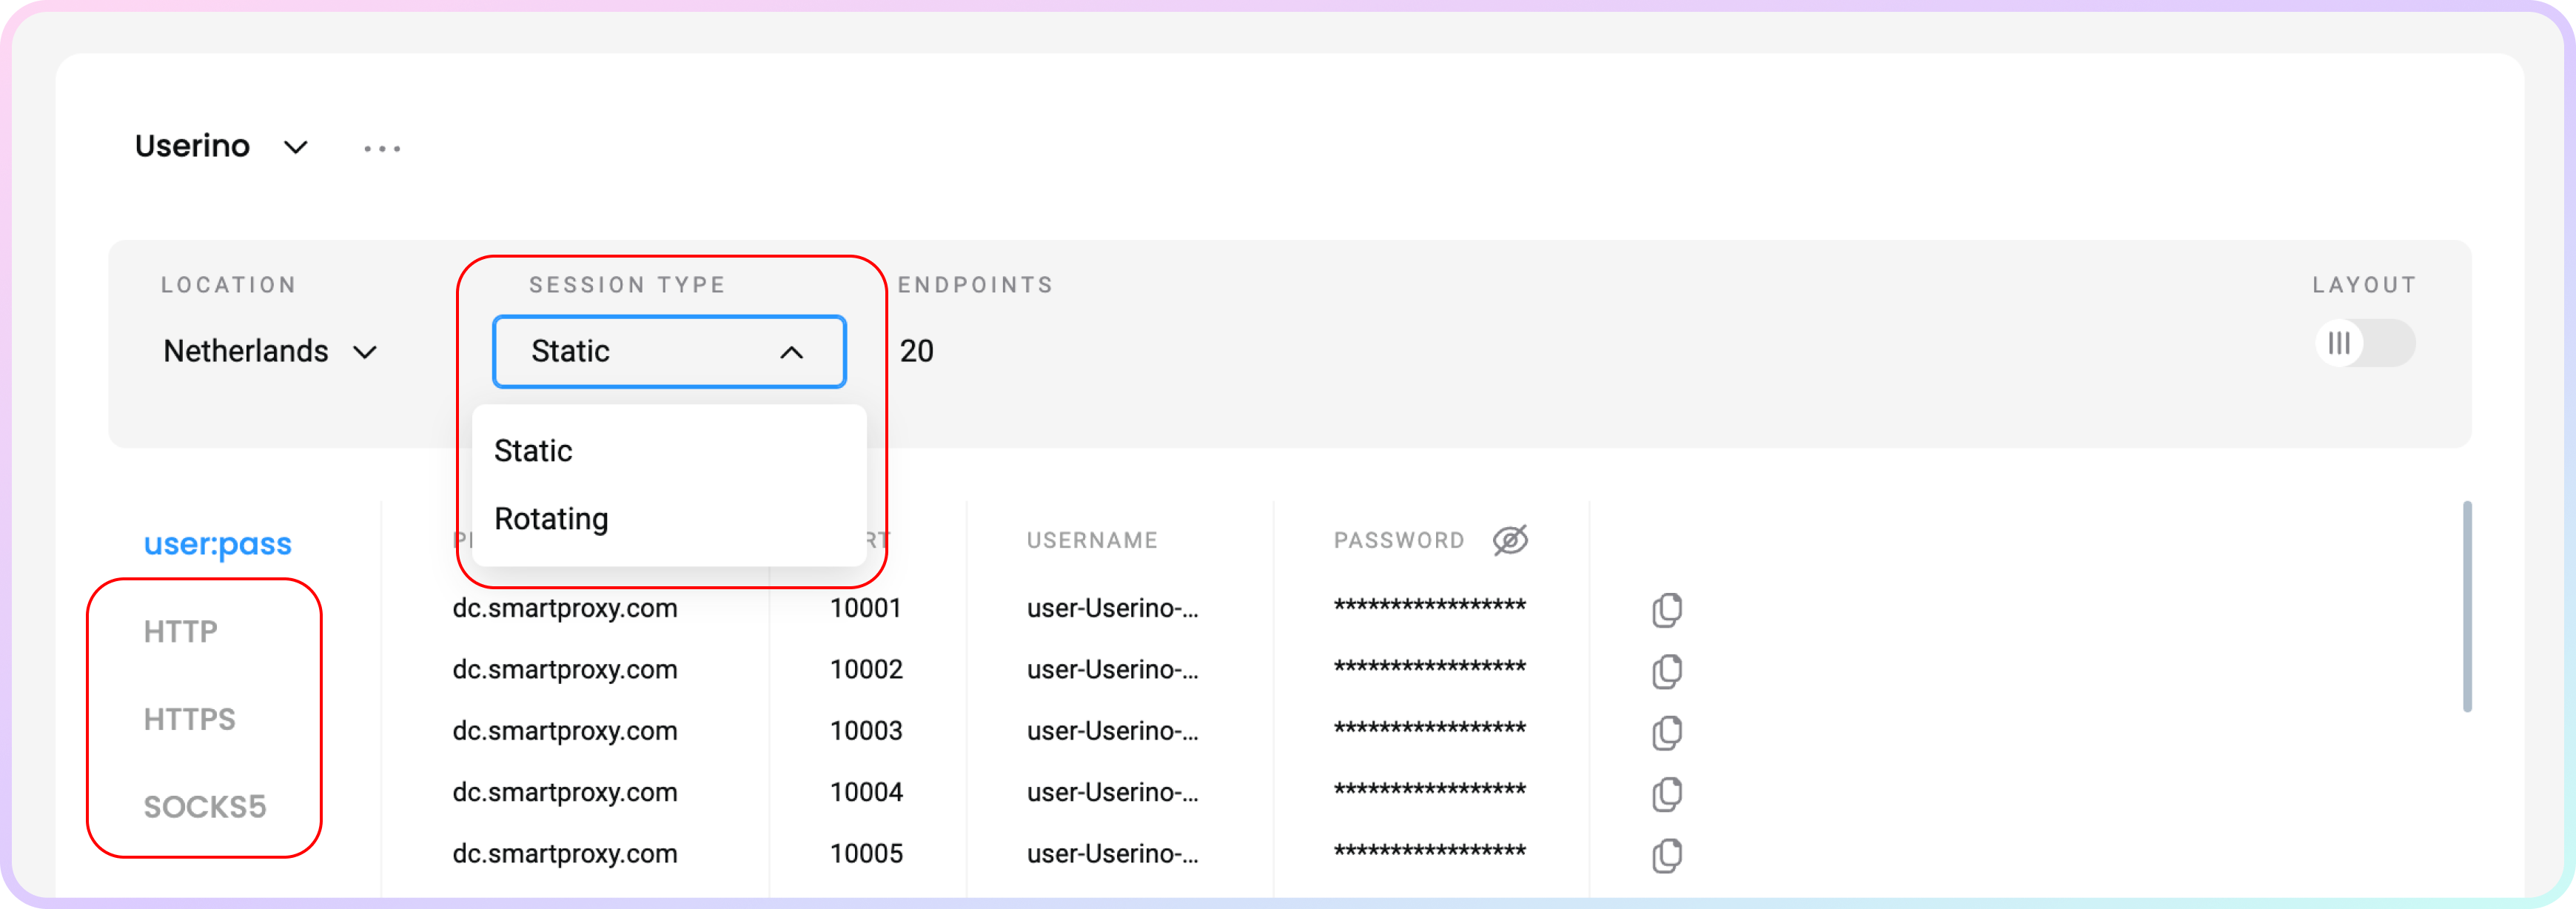
Session type and Protocol selection.
- You will see a proxy list of generated endpoints and ports based on your selection. You can download a
.csvor.txtfile of the created proxy list, or simply copy it to your clipboard.- Alternatively, you can copy single elements of the generated parameters, such as the Proxy Address, Port, Username, and Password, or copy the entire example string.
- You can hide your password by clicking on the eye icon. It will not affect the copy & paste function.
- Click Switch View at the top right under Layout to display the entire parameter string.
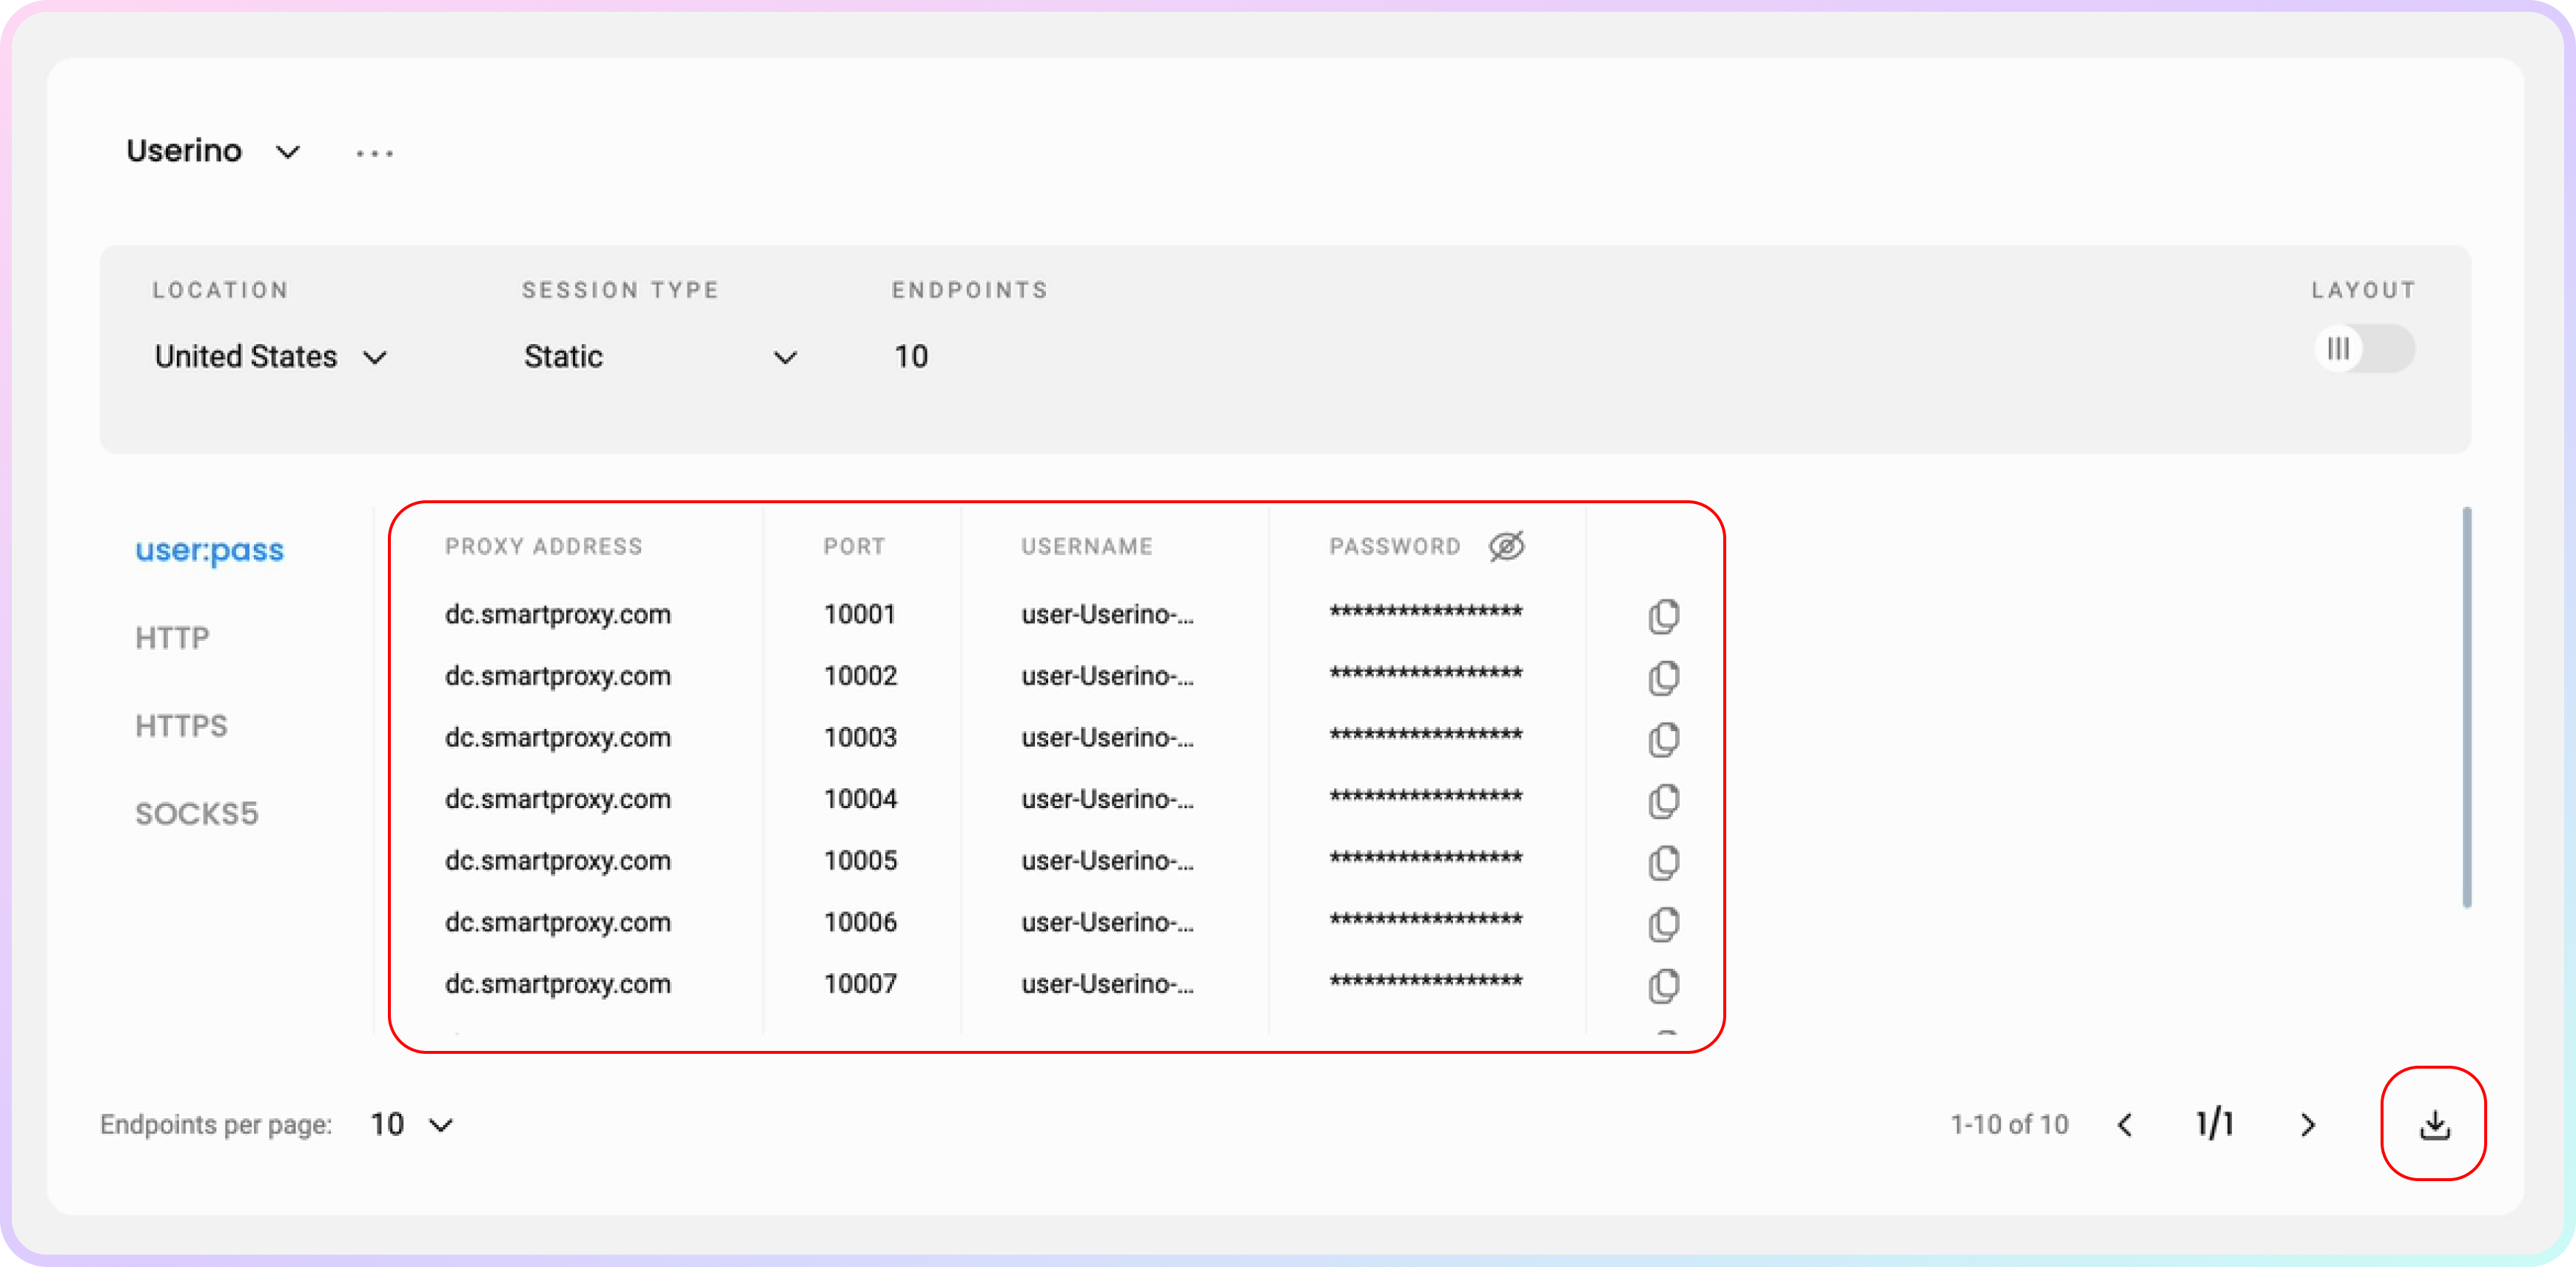
Proxy list selection.
- You can apply these ports and endpoints to any application or tool to start using proxies instantly.
- Check out the most popular tool guides in the Integrations overview section.
Code examples
You can also test your proxies with code examples.
- You can select any of the available languages:
cURL,Python,NodeJS,PHP, orGO. - Click Copy in the bottom right corner for convenient pasting.
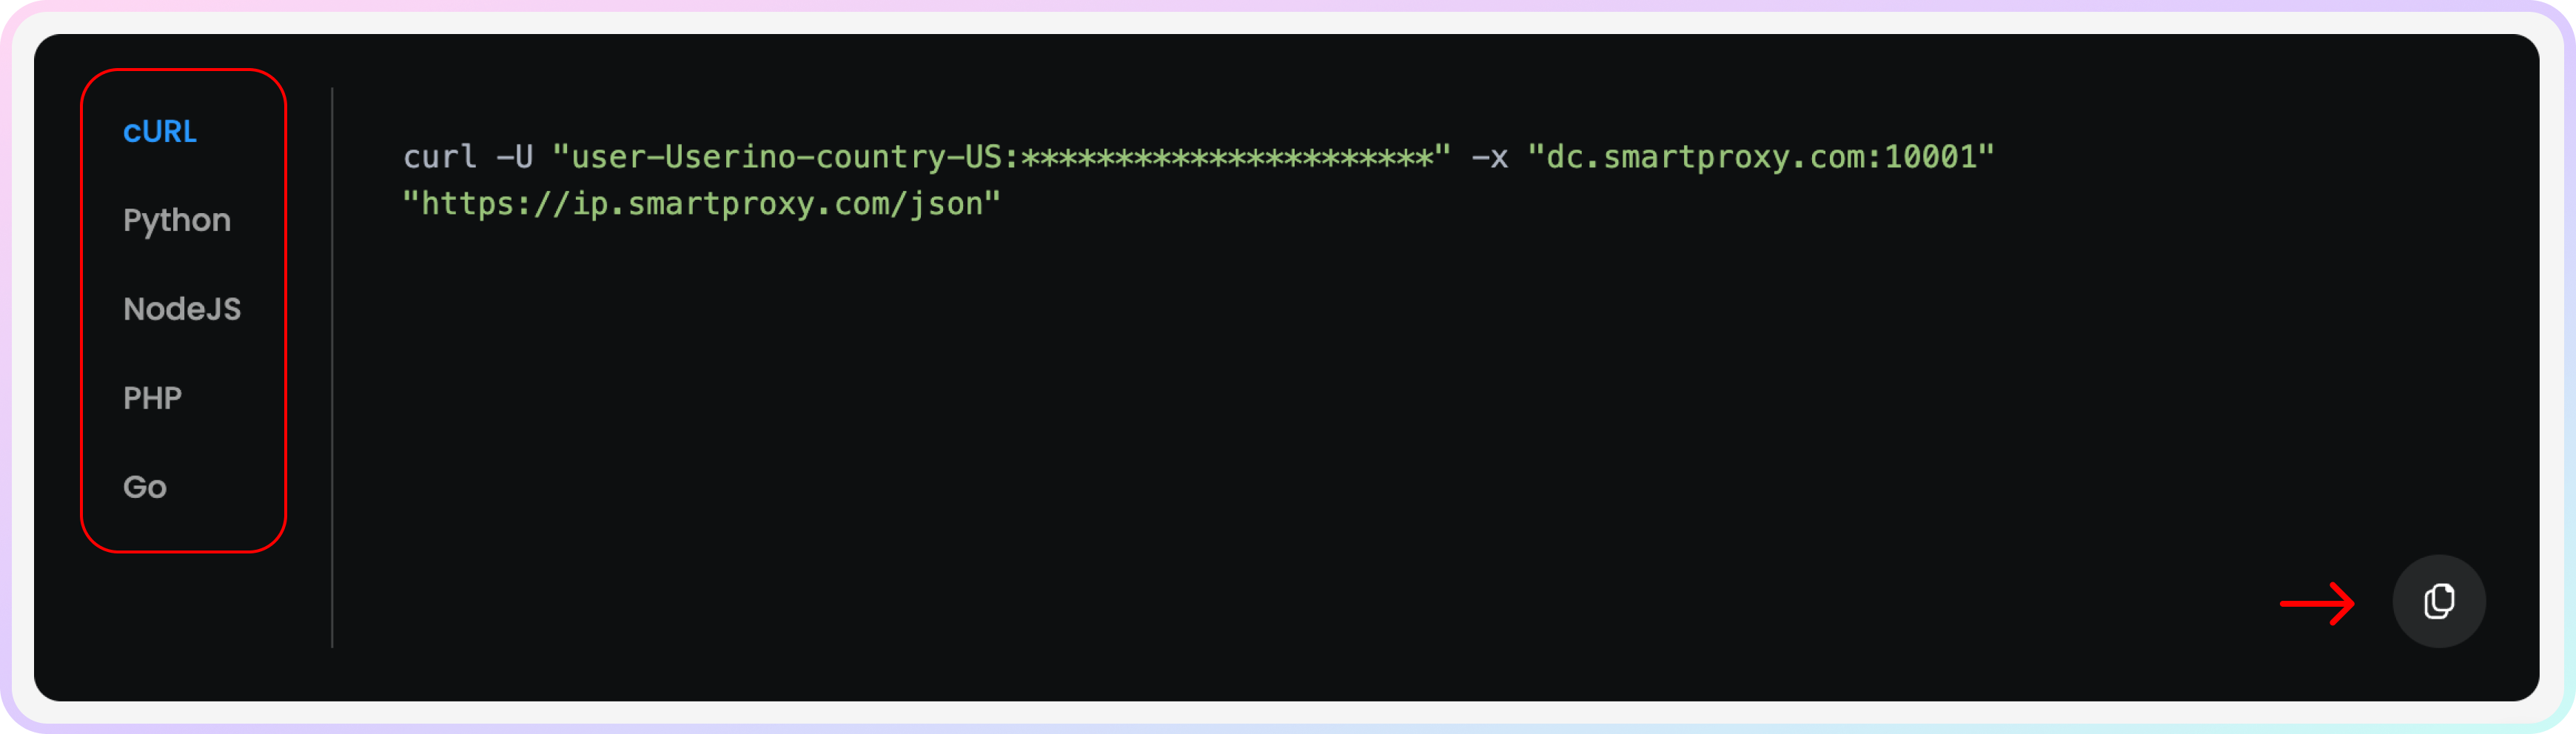
A cURL example.
GitHib
For advanced code samples and middleware, visit our GitHub page.
Support
Need help or just want to say hello? Our customer support is available 24/7. You can also reach us anytime via email at [email protected].
Updated 3 months ago