X Browser
Juggle multiple profiles and protect your digital identity
Introduction
X Browser is a multi-session browser offering anonymous fingerprint profile management.
Supported products
- Residential,
- Mobile,
- Datacenter Pay/GB,
- Datacenter Pay/IP,
- ISP Pay/GB ,
- Dedicated ISP.
Downloading X Browser
To download X Browser, visit the Tools page in our Dashboard and click Download.
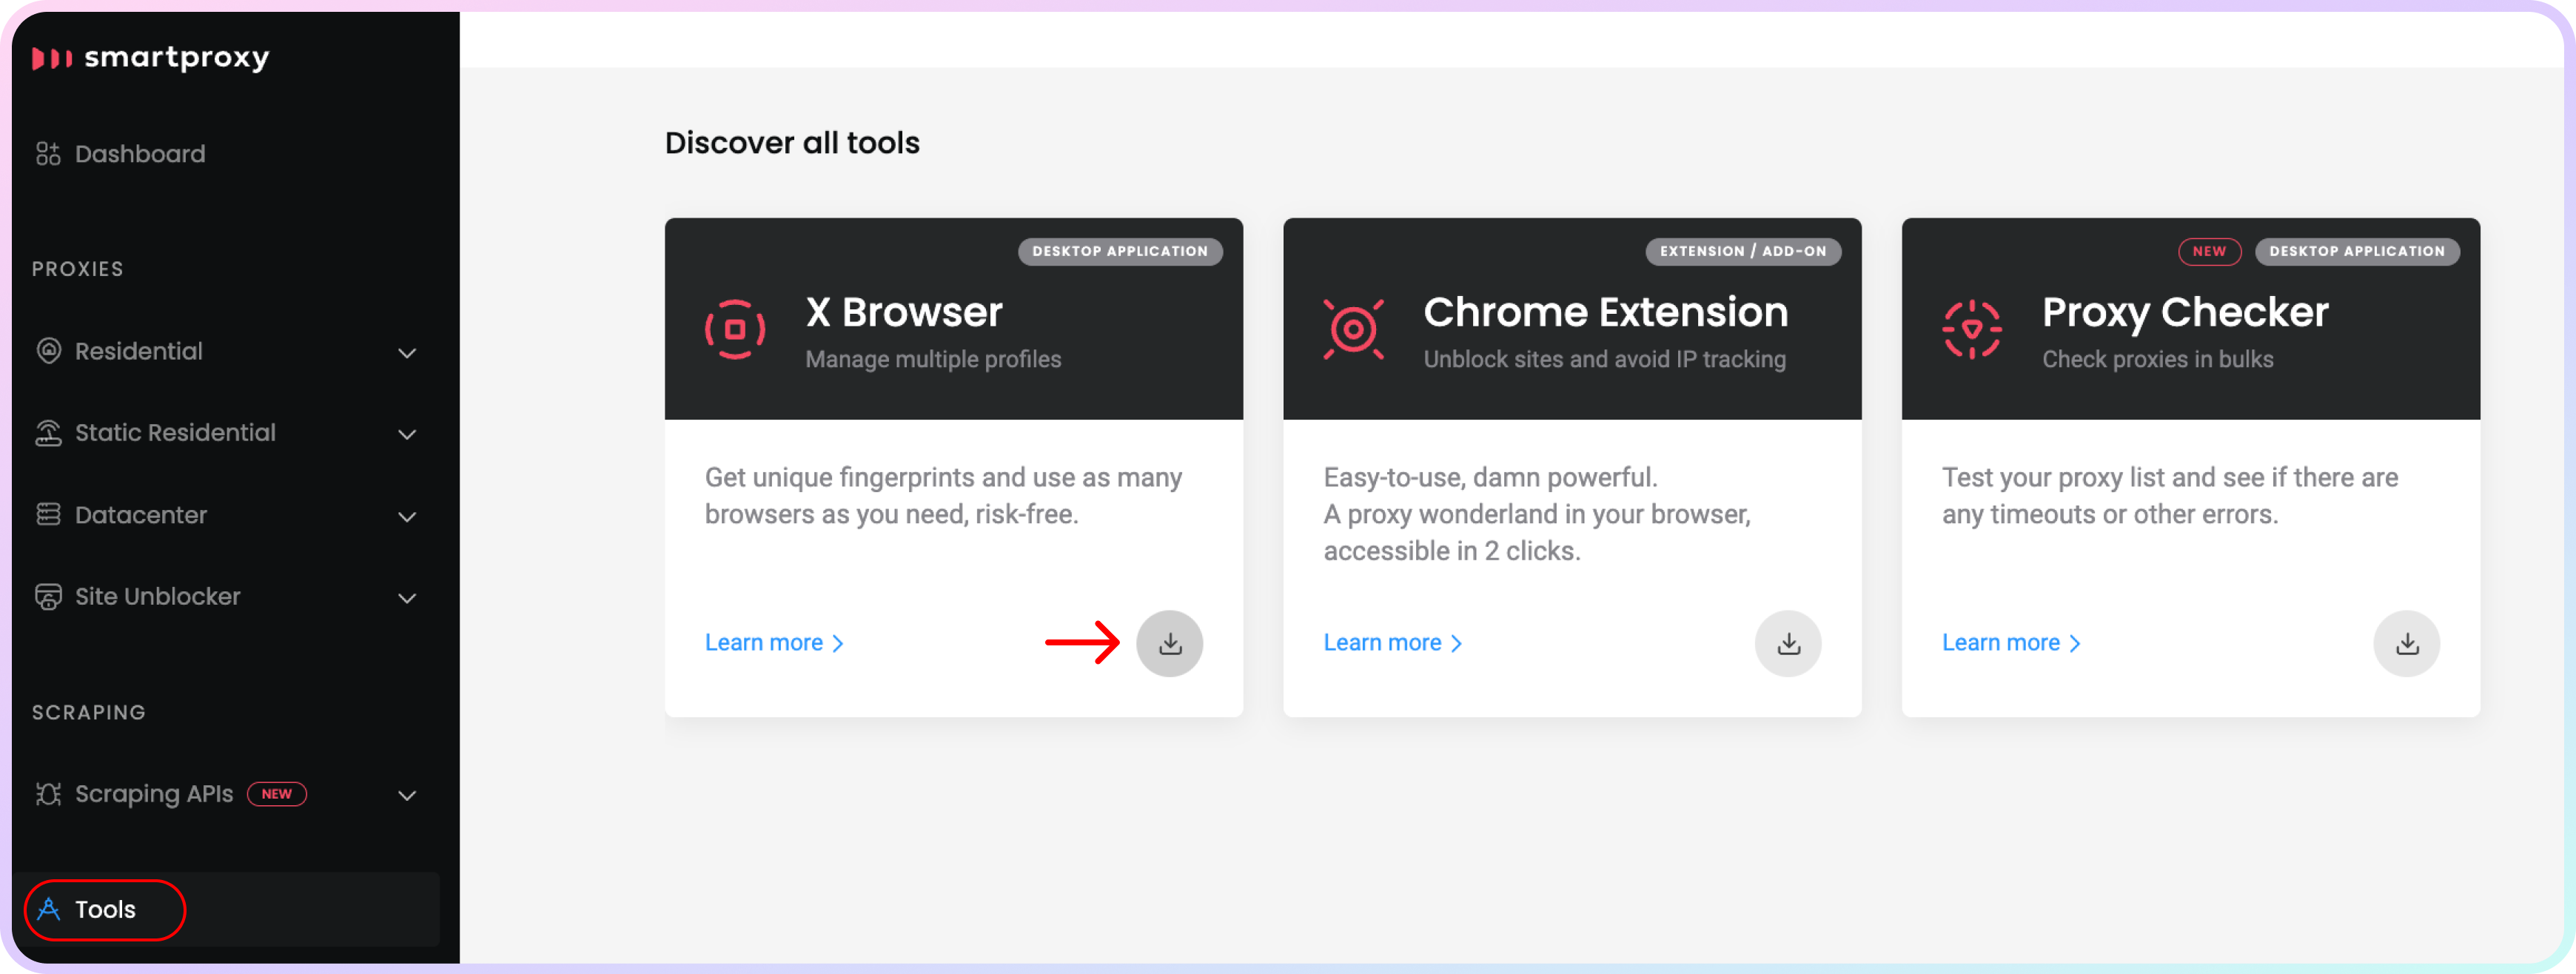
Smartproxy dashboard – Tools section.
Installing X Browser
X Browser currently supports Windows 10 and macOS operating systems. To install it, open the downloaded file and follow the instructions according to your OS.
Once the application is installed, you can set up your first stealth profile.
Installation on Windows
- Launch the .exe installation file you downloaded from the website.
- If SmartScreen opens, click on More info and then Run Anyway.
Windows version support
X Browser is available with Windows 10 and newer operating systems.
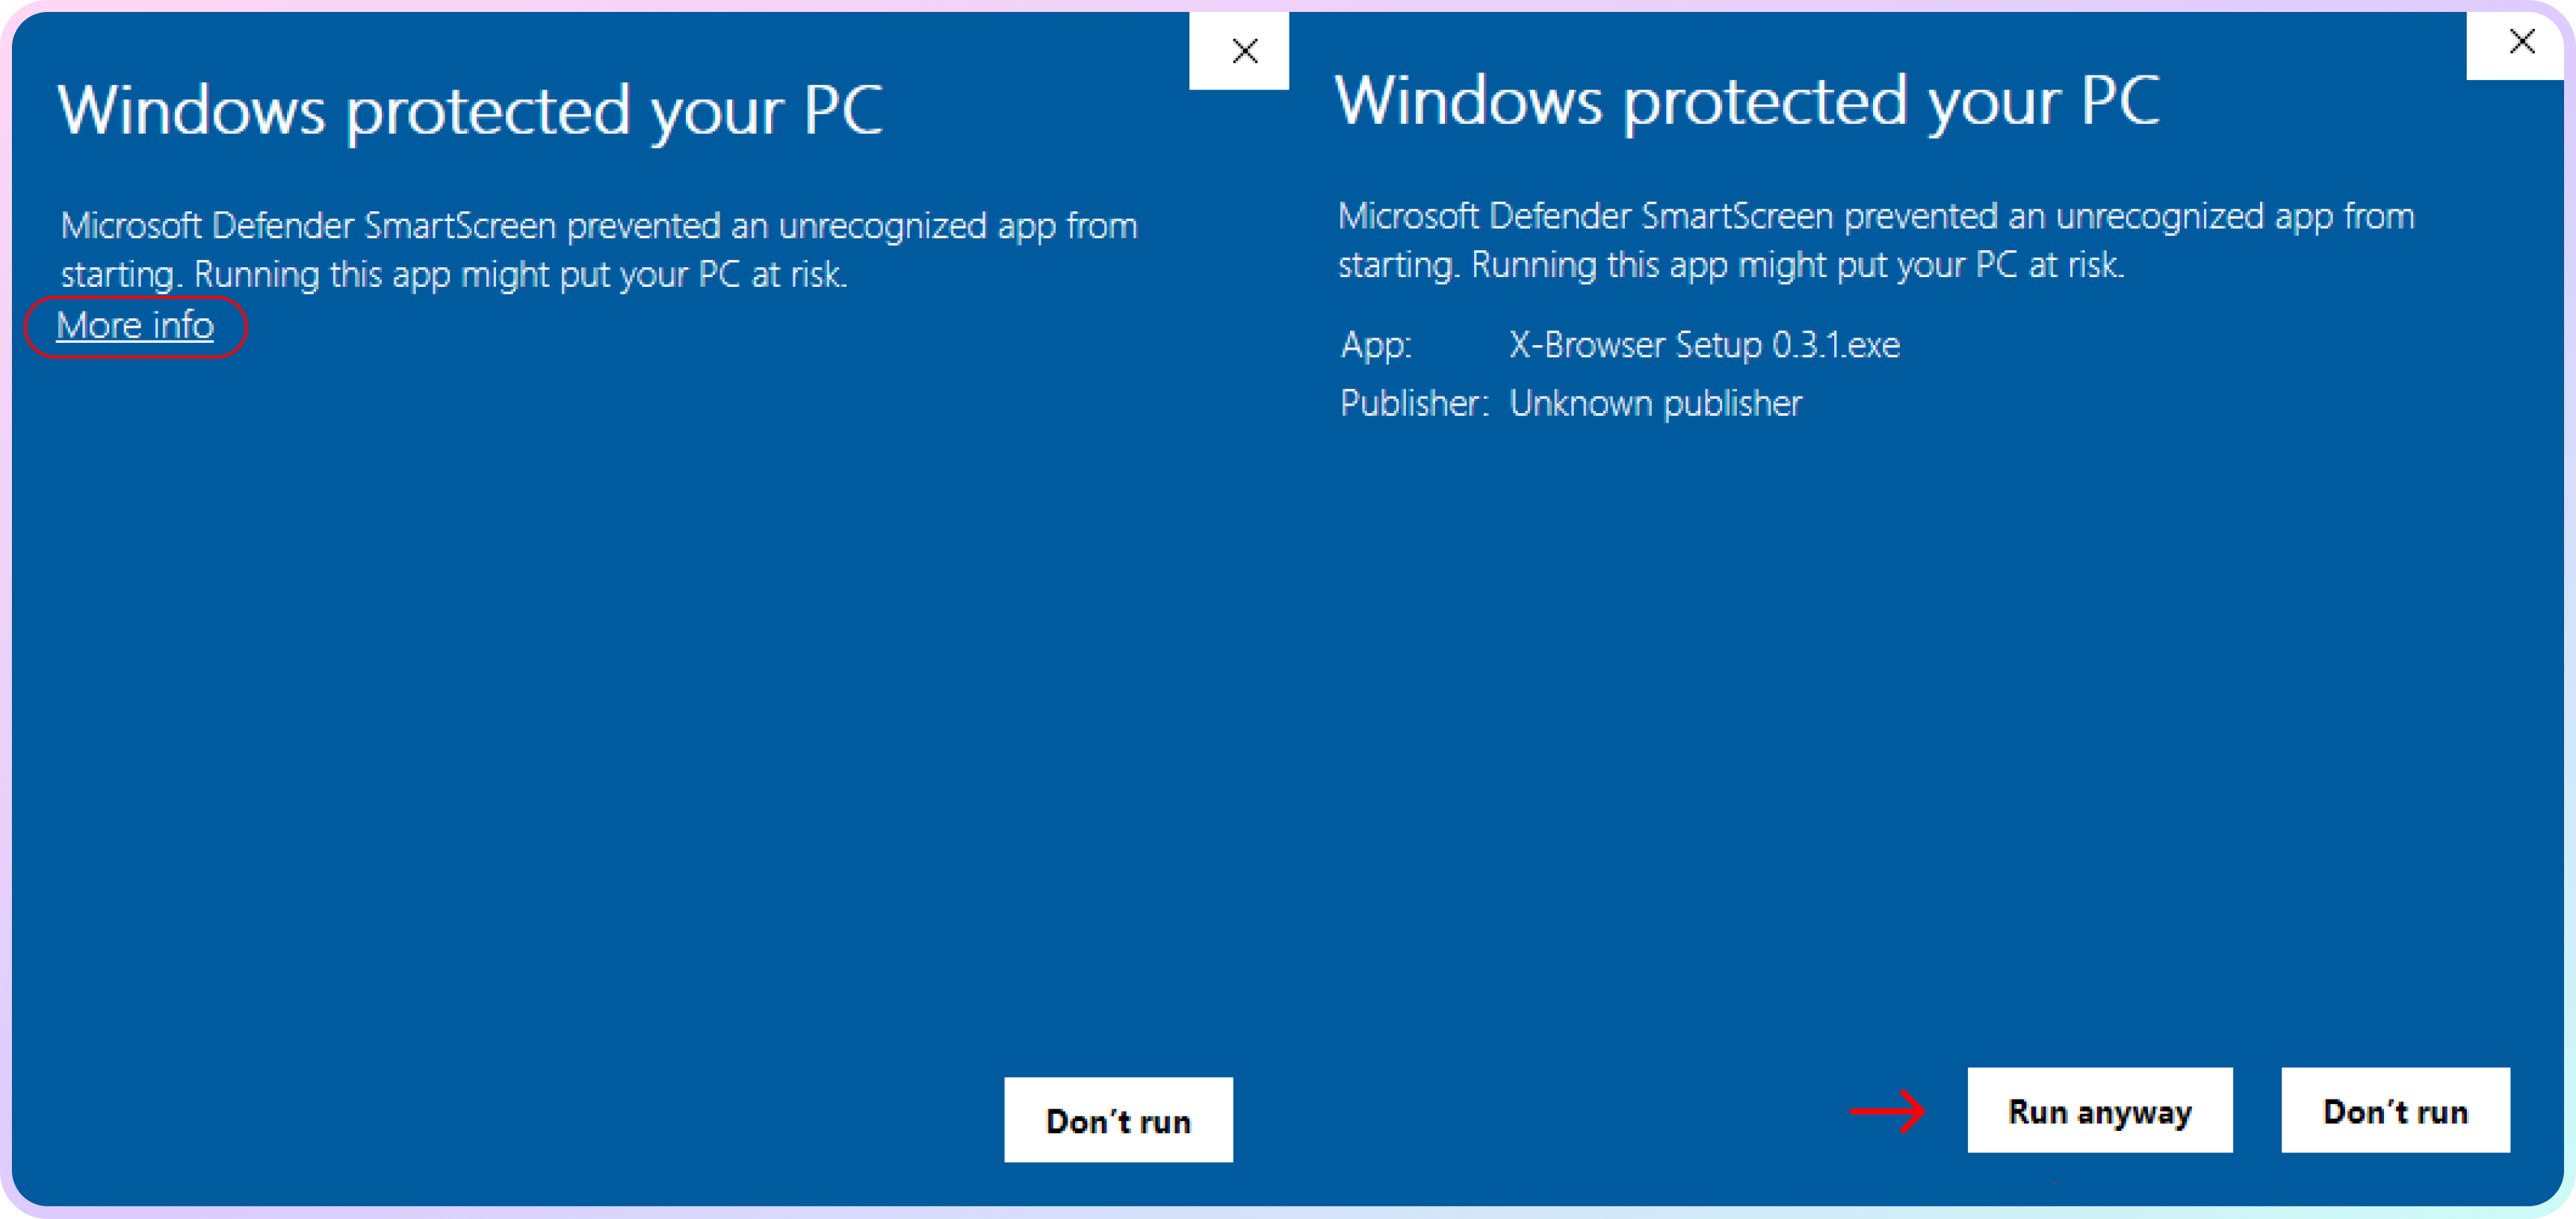
Windows SmartScreen.
- The install prompt for X Browser will open, and the application icon will appear on your desktop after the installation is complete.
Installation on MacOS
- Launch the DMG installation file you downloaded from the website.
- Click and drag X Browser to the Applications folder.
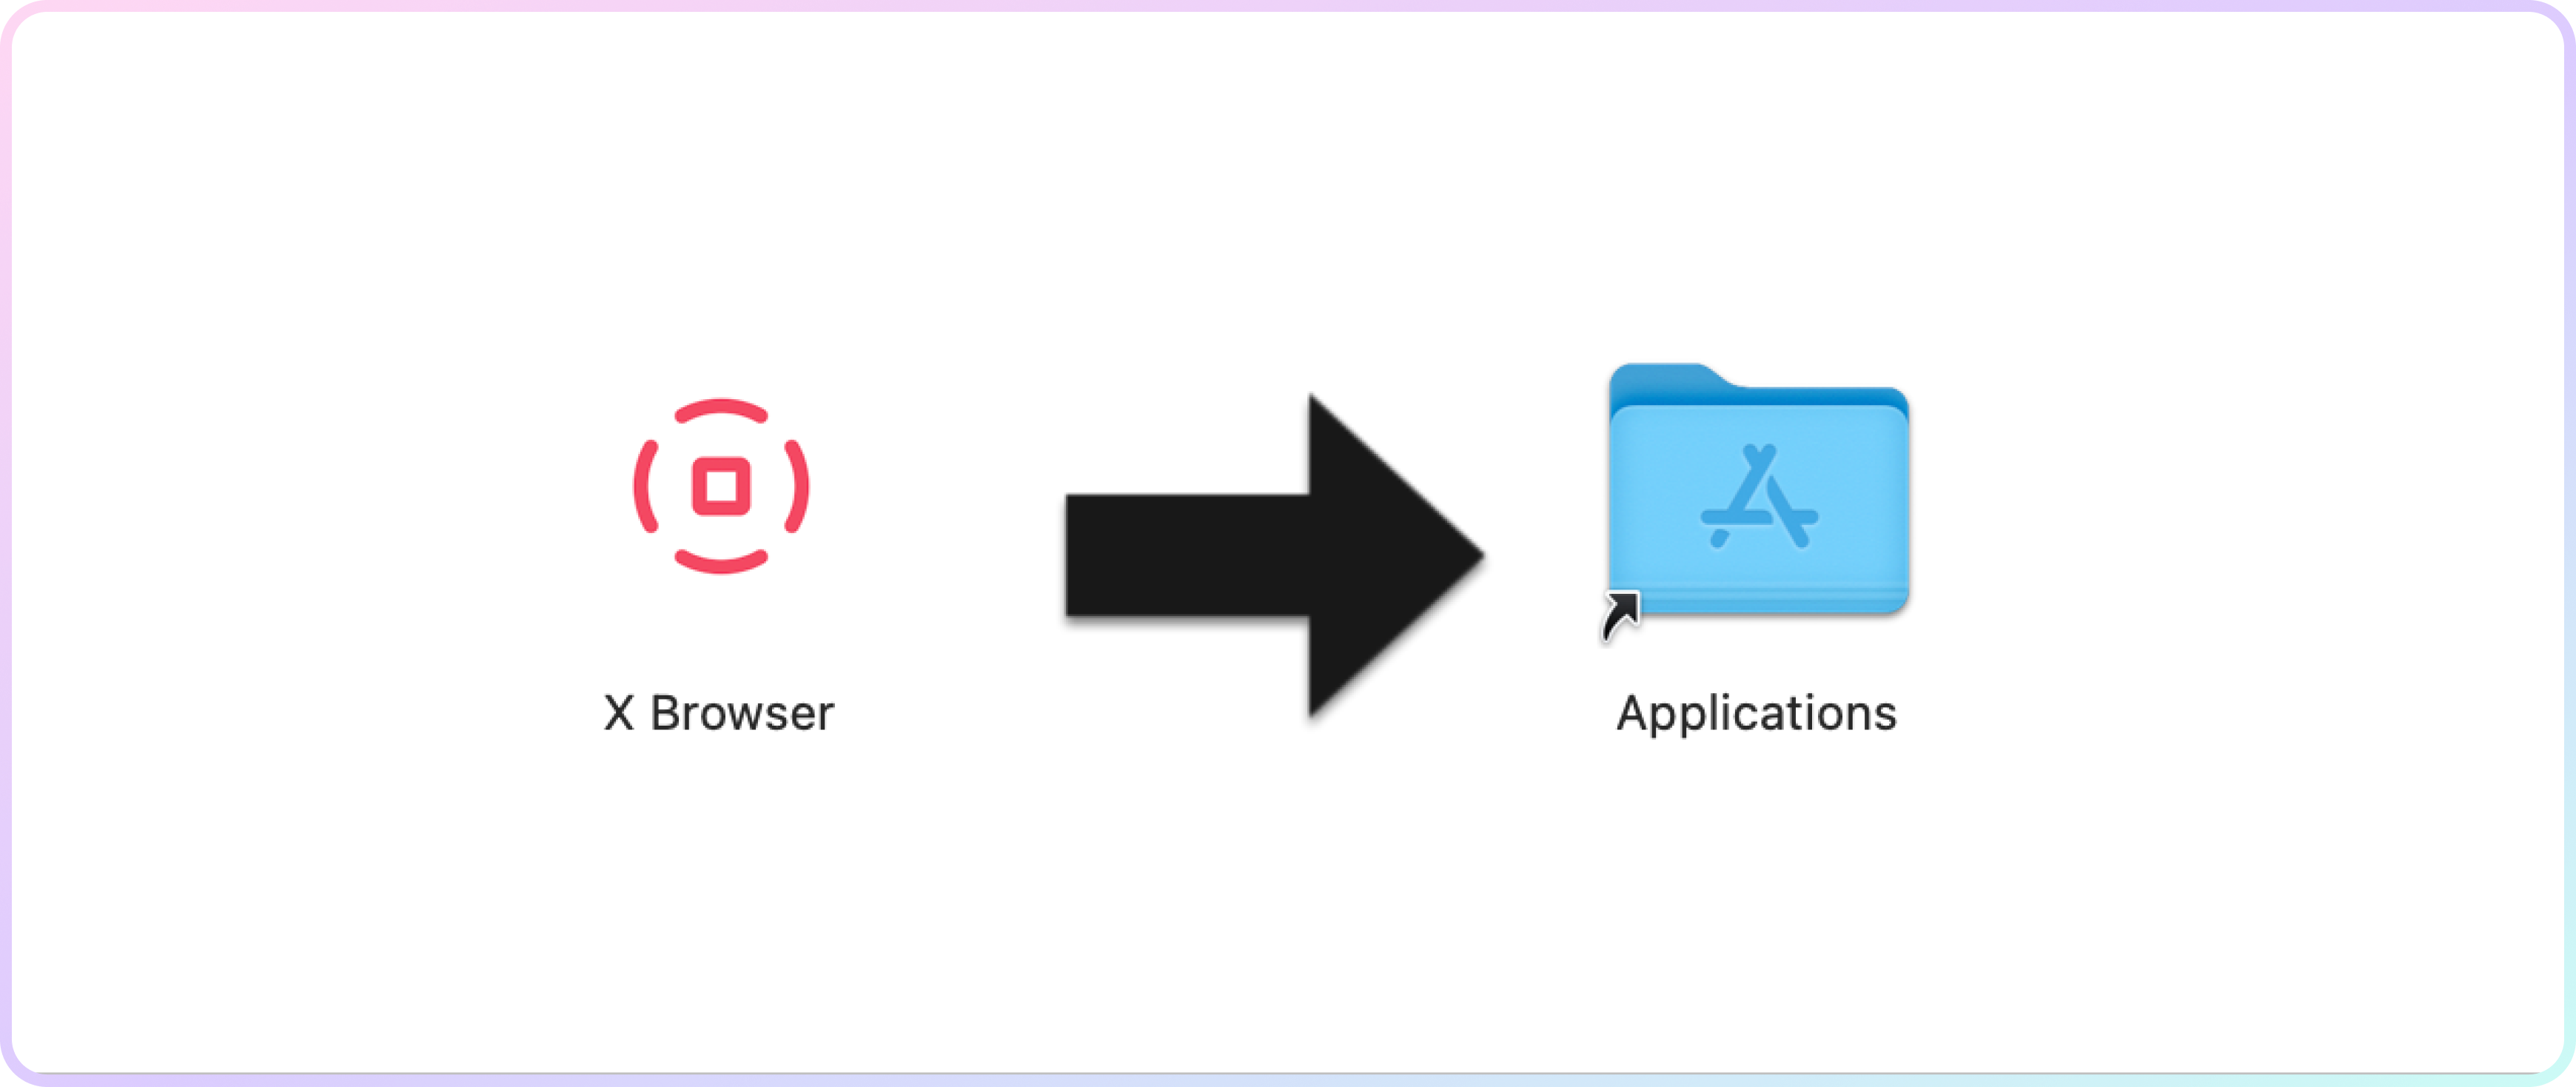
MacOS – X Browser installation.
- Once the application is unpacked, you can find it in your Applications folder or using Mac search (Command + Space) and typing in X Browser.

MacOS – looking up X Browser.
- You will receive a prompt asking you to open the application. Click Open to launch the application.
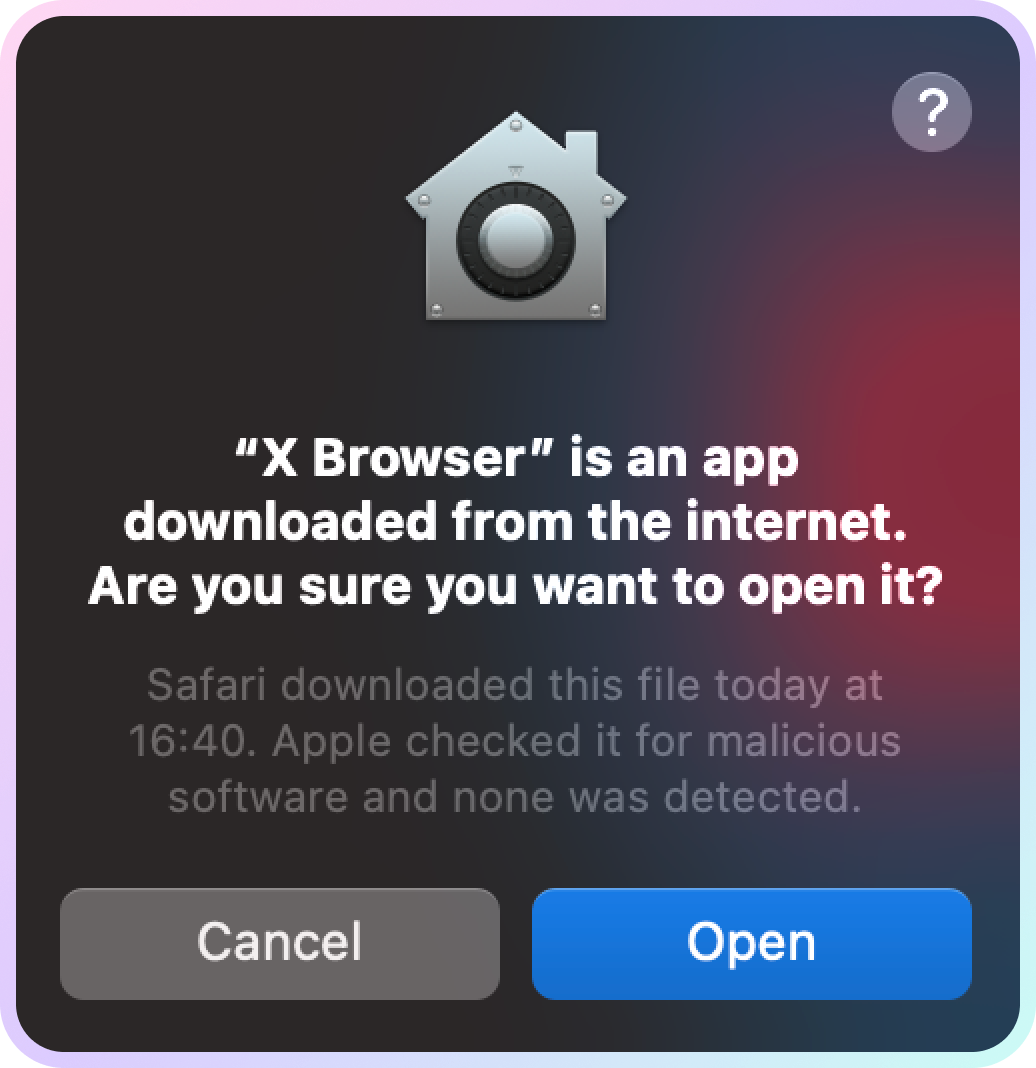
MacOS – launching X Browser.
Using X Browser
- Click Login with browser to be redirected to the dashboard login page for authentication.
- Click Login to X Browser with the chosen account.
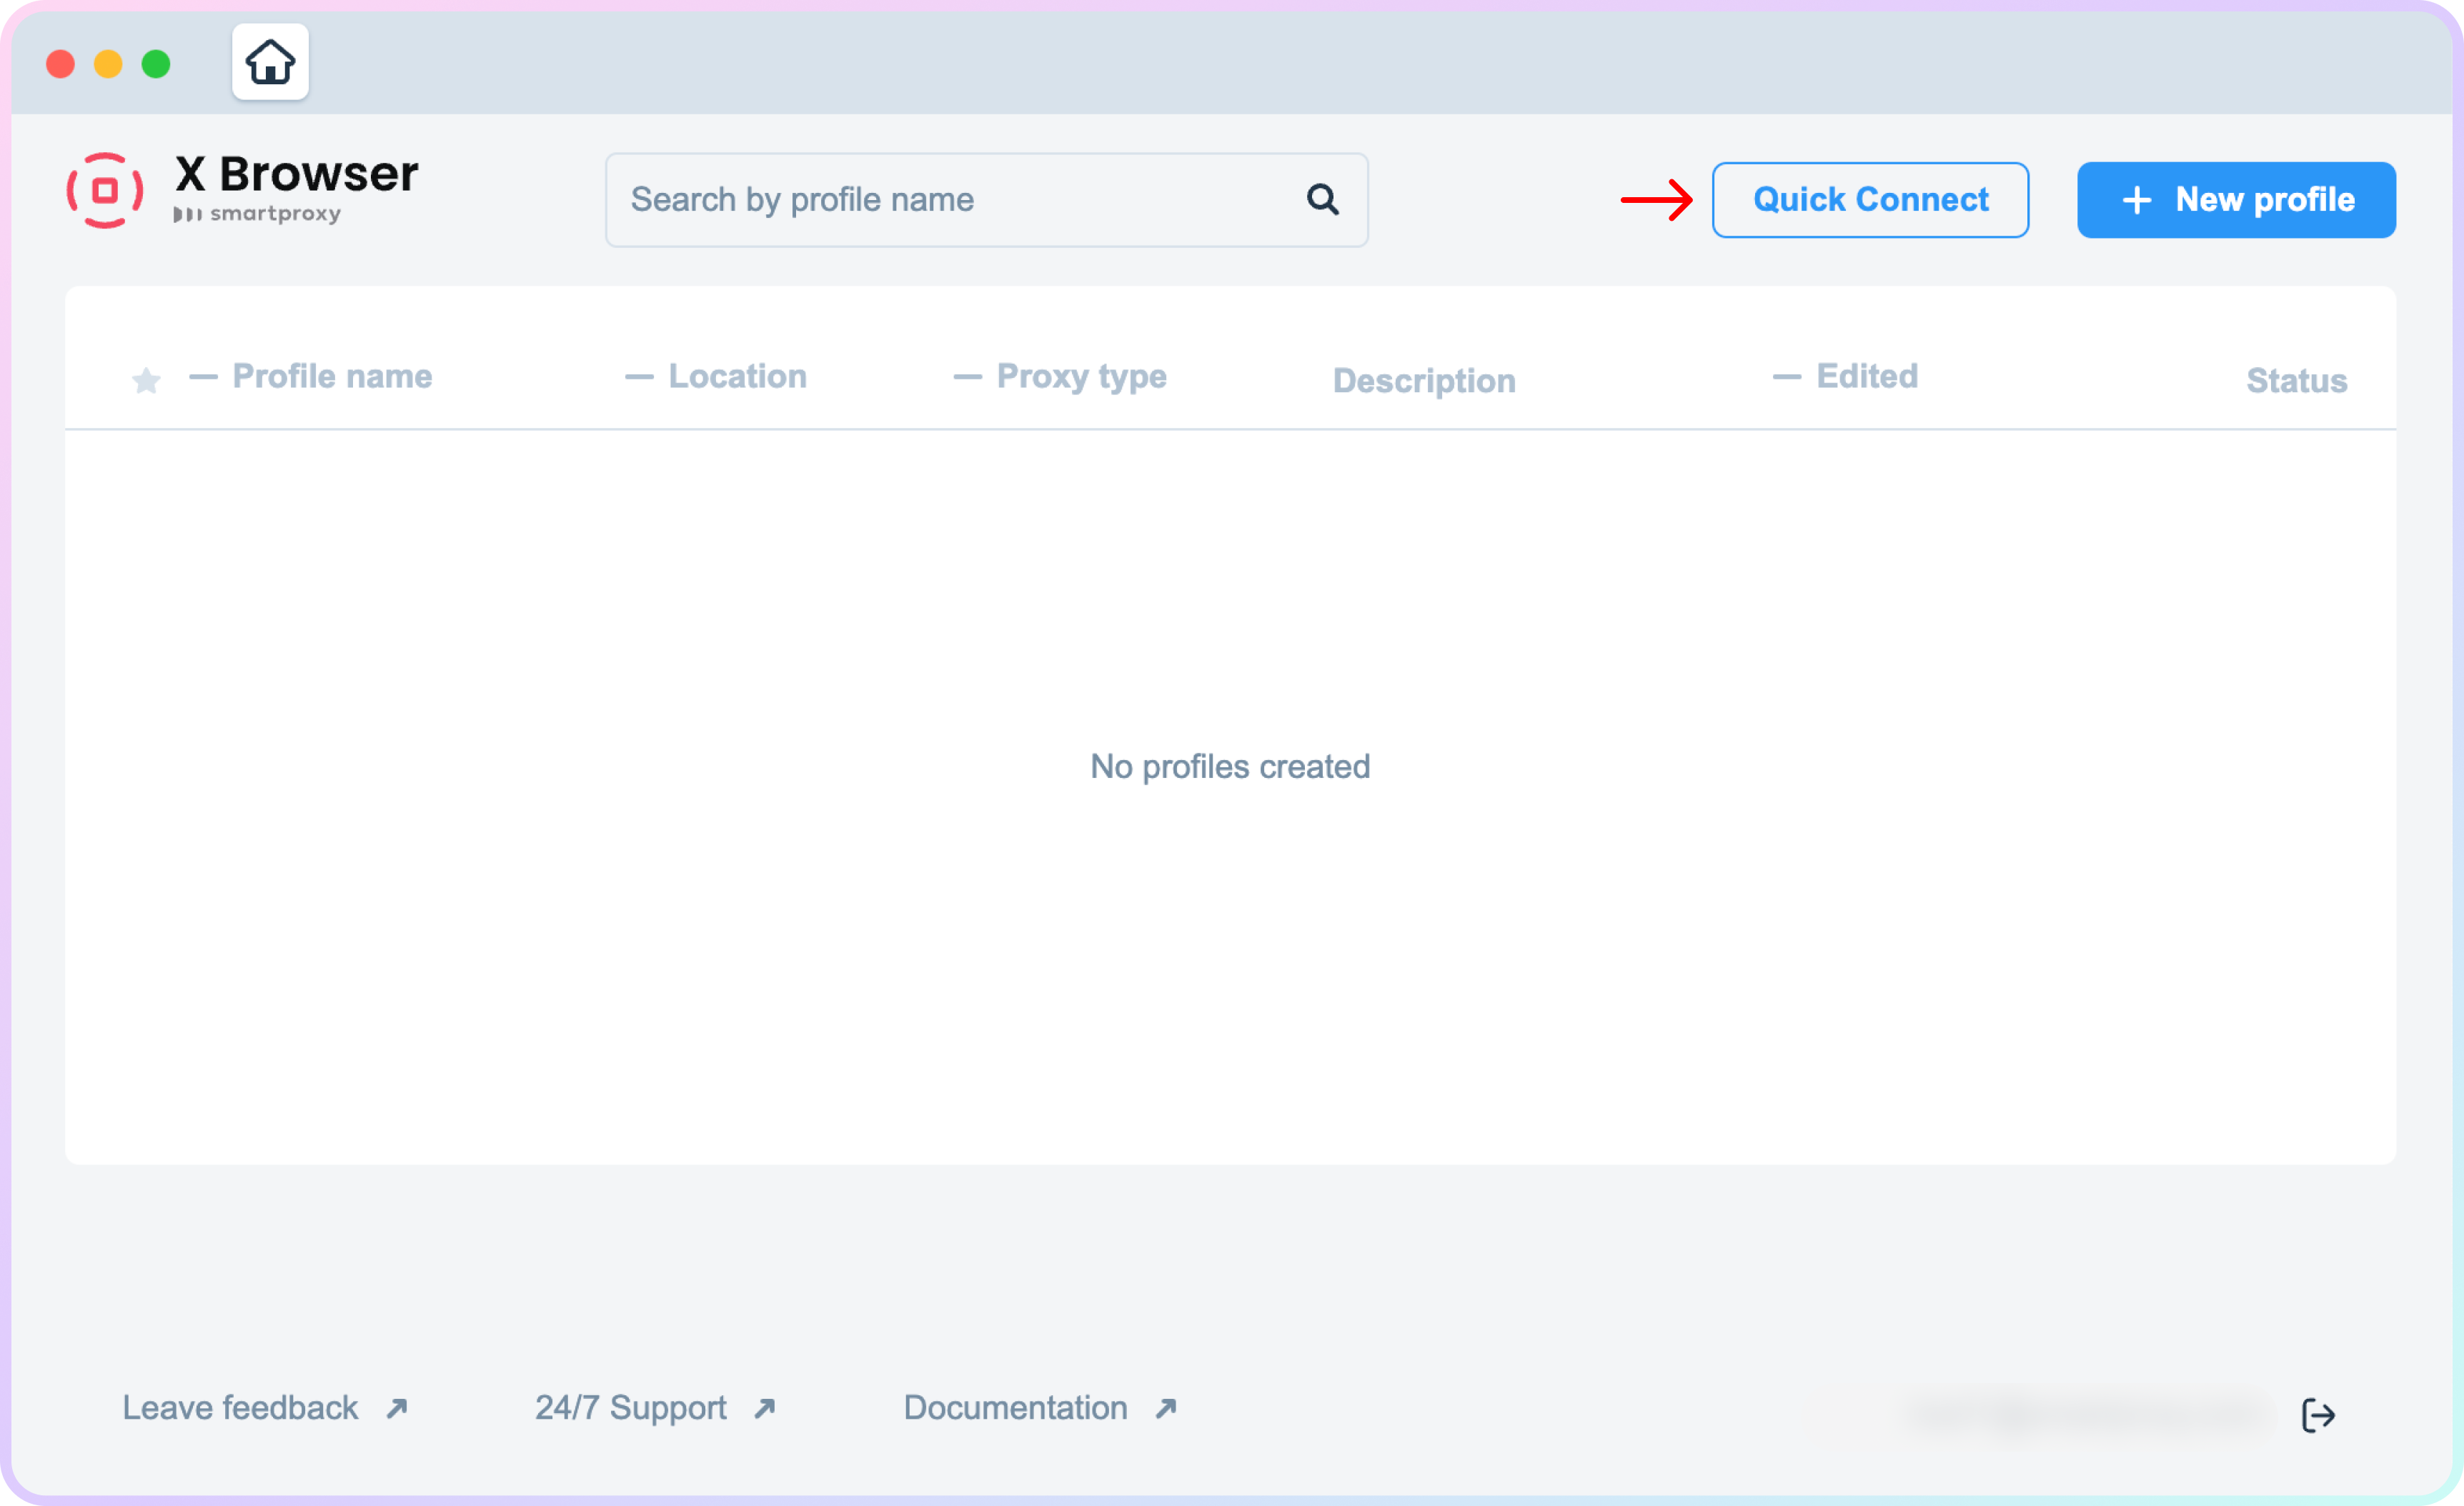
Two browsing options to connect
- Quick Connect– chose the proxy type and proxy user to immediately launch a profile.
- + New profile – create a profiles and specify various fingerprint options for later use.
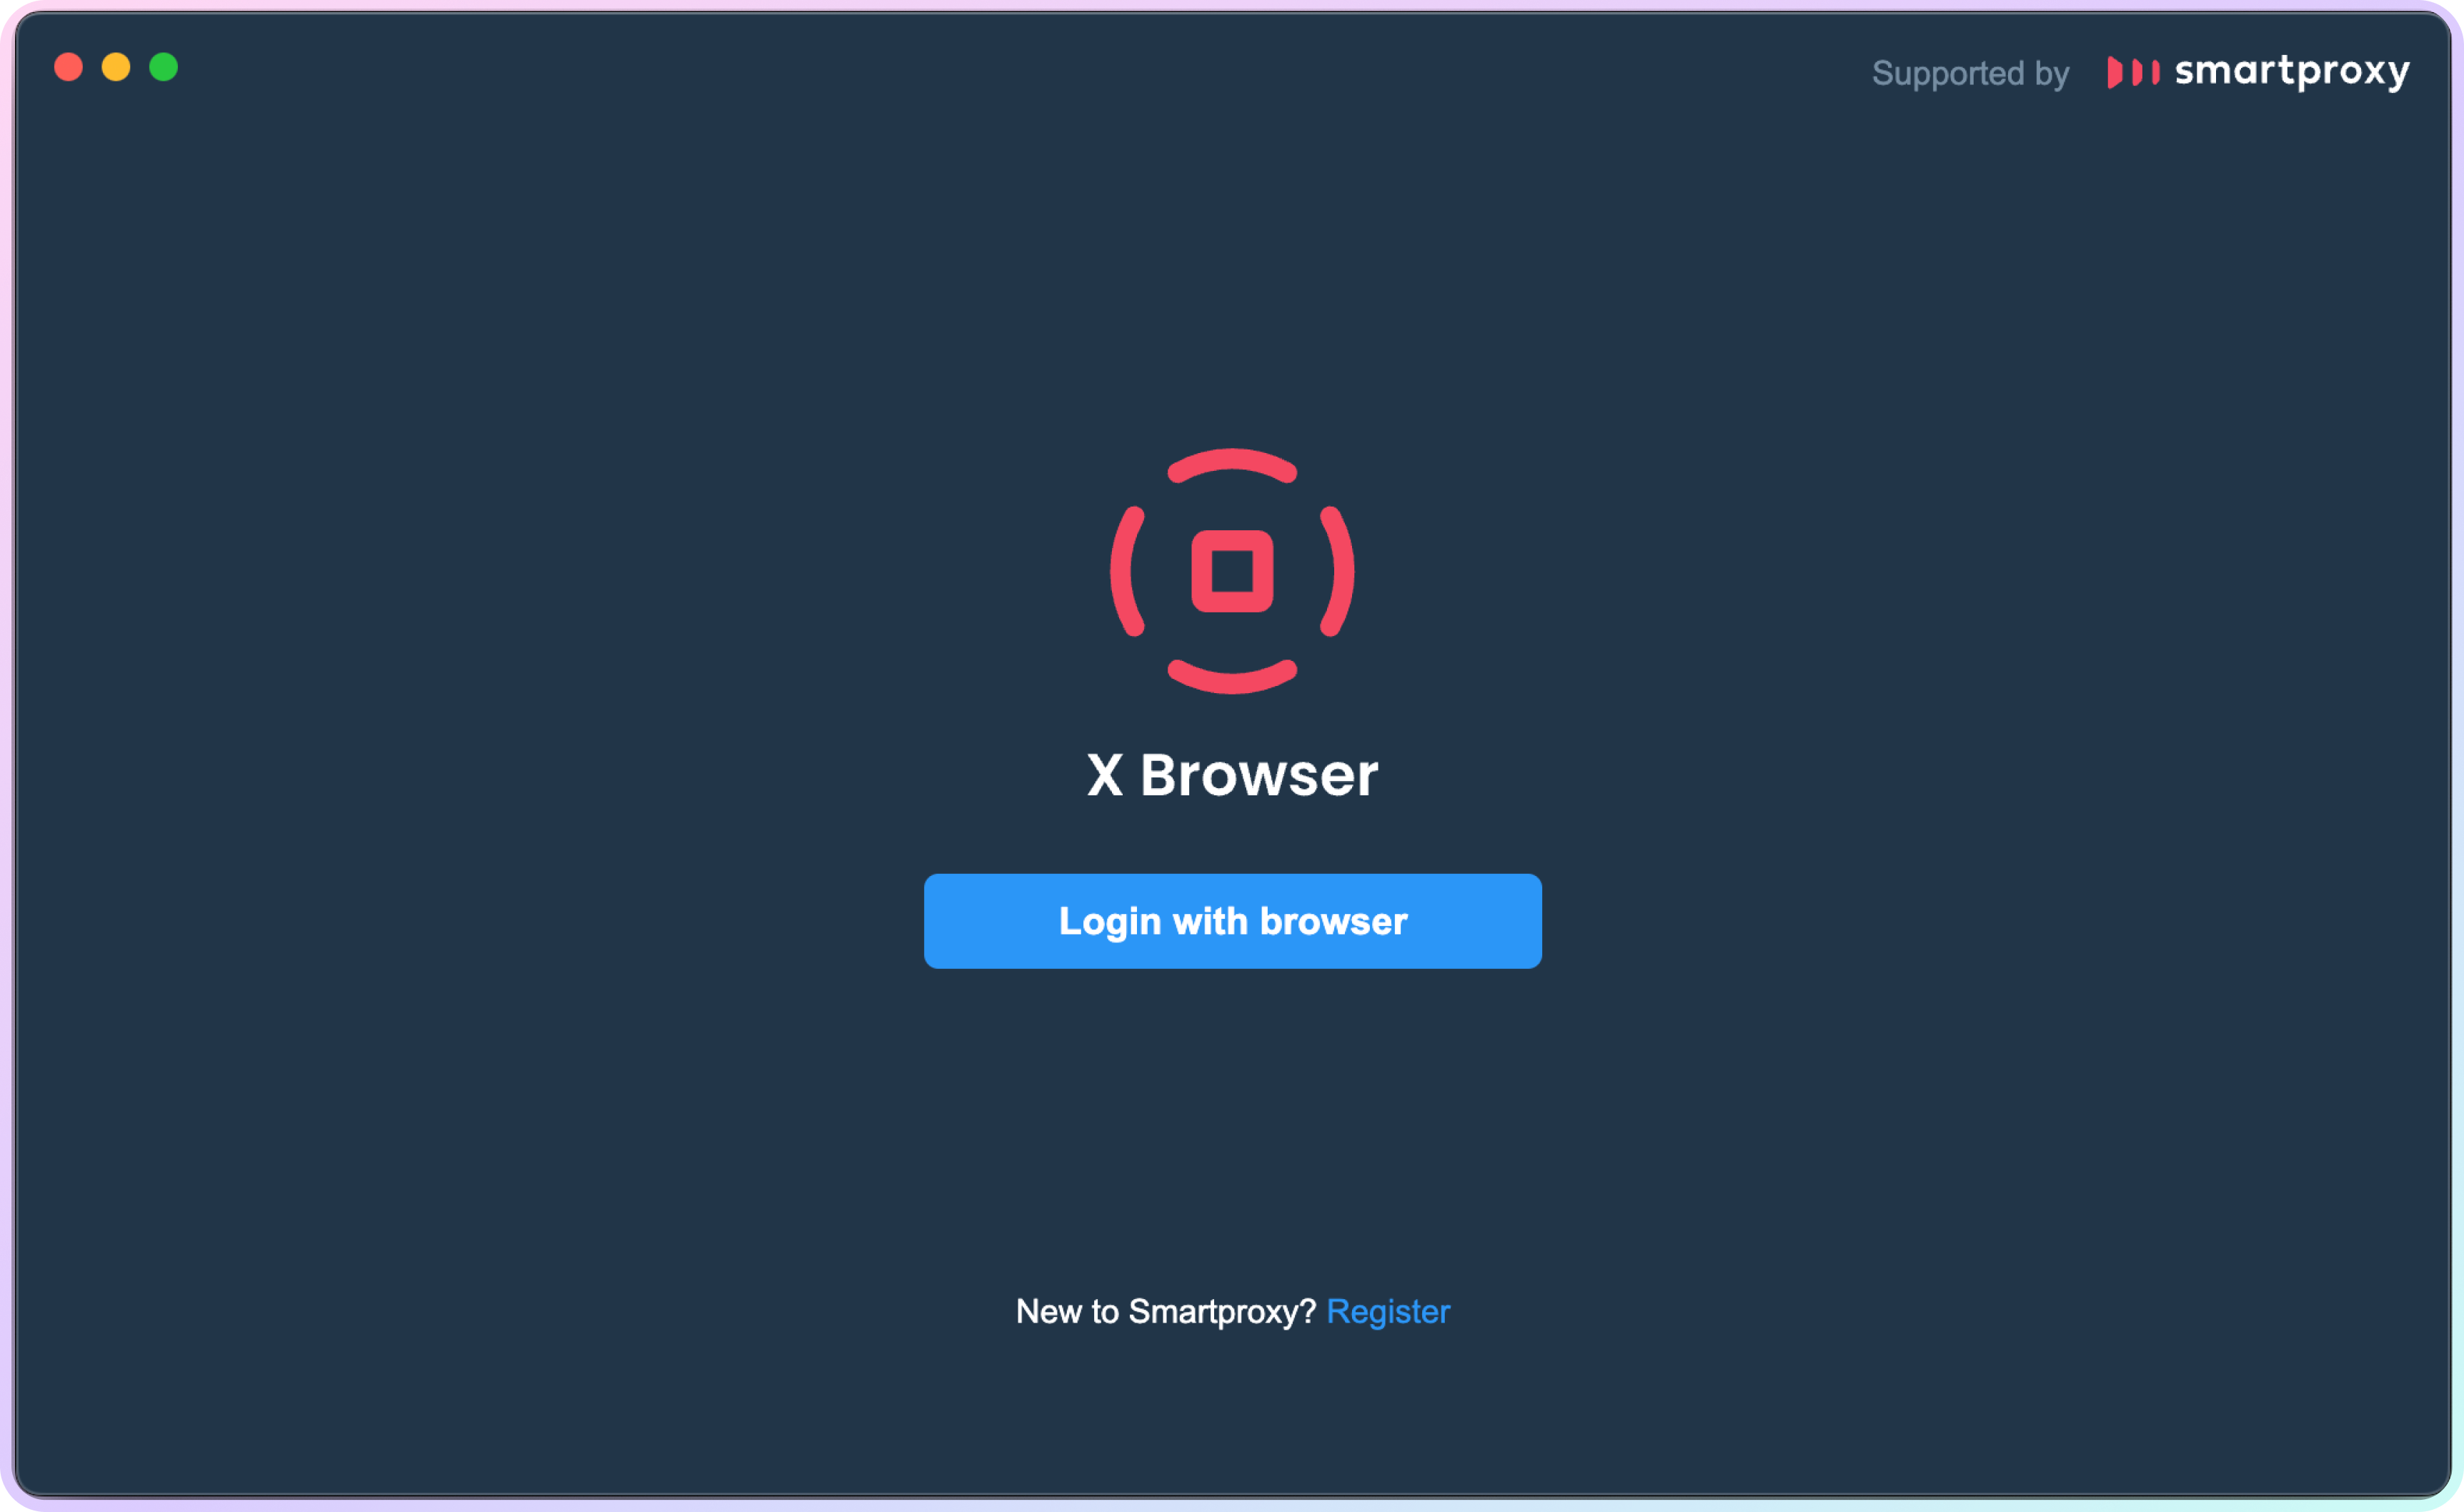
X Browser – loggin in.
Quick Connect
Quick connect does not store cookies.
- Click Quick Connect.
X Browser – Quick connect.
- Choose the Proxy Type and Proxy User for authentication, and click Start session.
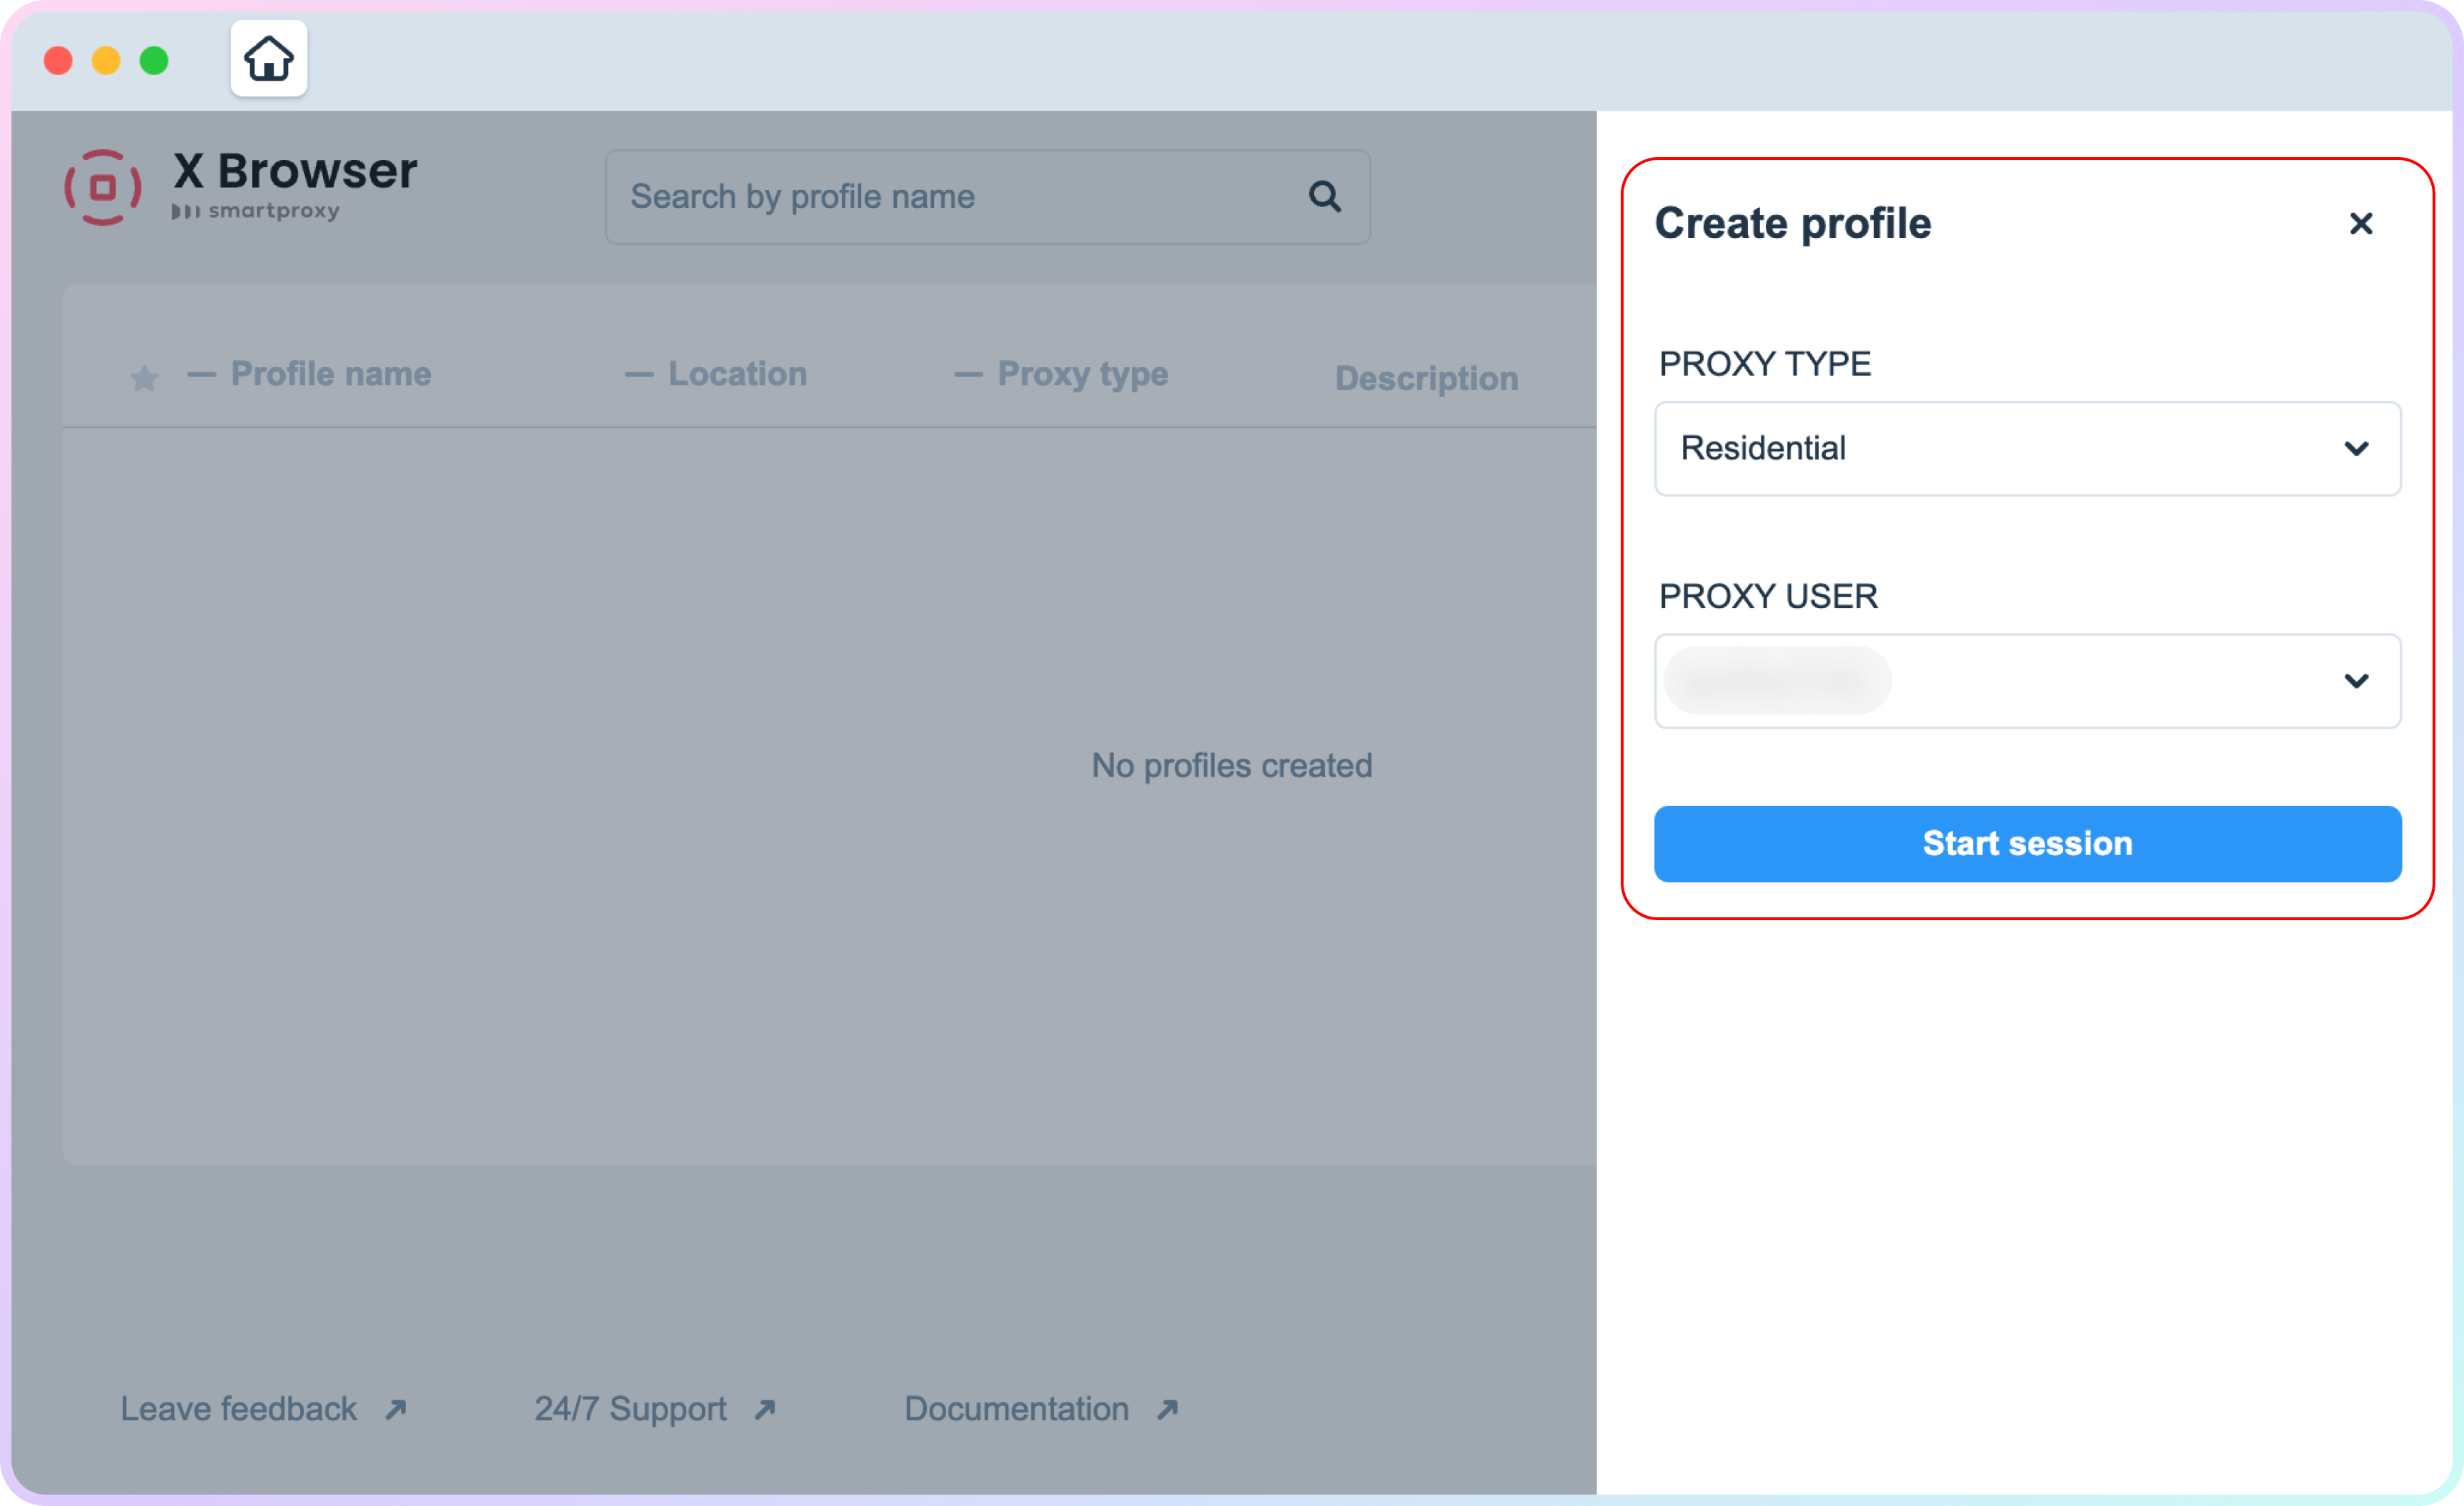
X Browser – Quick connect profile creation.
- A browser profile will launch using random fingerprint parameters, which you can see on the loaded page.
- Quick connect sessions will be nested under the Quick session tab group.
- Click the Home icon on the top left, to go back to the home screen.
- You can always check your fingerprint by clicking the fingerprint icon on the right of the address bar.
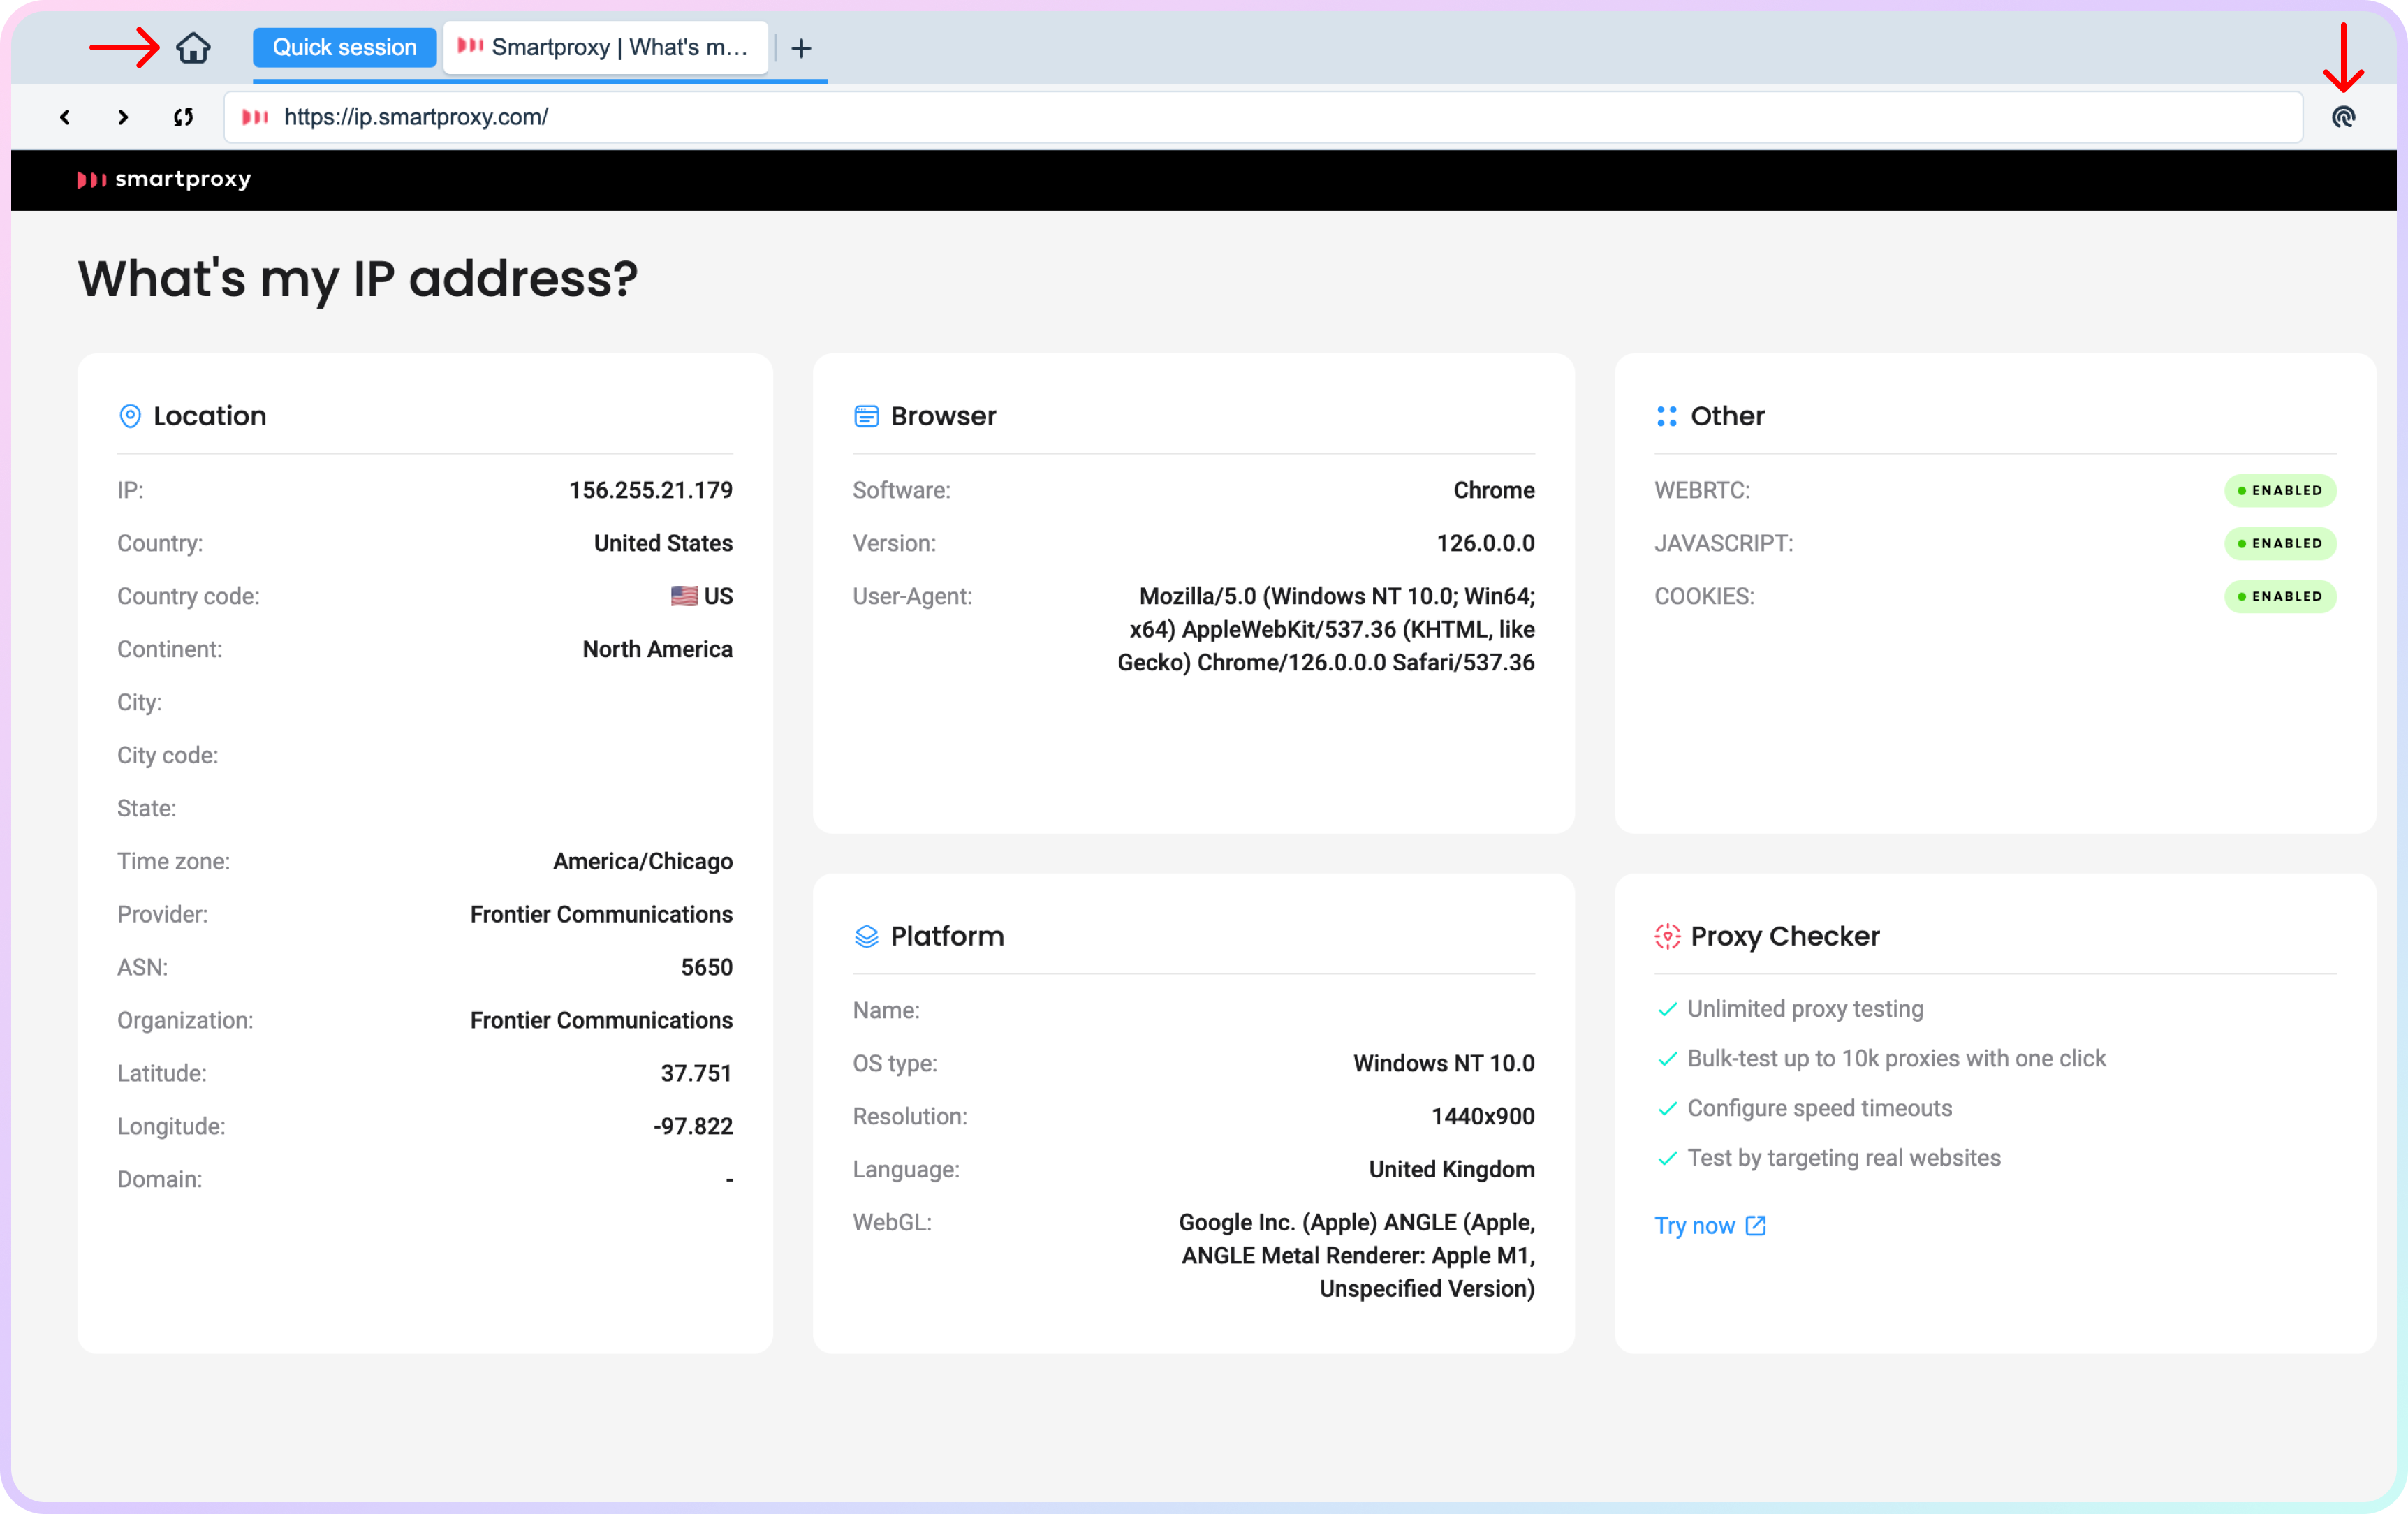
X Browser – a Quick session.
Creating and saving profiles
- Click + New Profile and optionally specify any particular settings you wish.
- Click Create profile.
Profile settings
- Name the profile.
- Select the proxy type, proxy user, protocol, location, and session type.
- Select the platform (
Windows/MacOS), language settings.- Enable or Disable
JavaScript.- Specify the
URLfor the default website.- Describe the profile.
- In the X Browser home page section, select the profile you wish to use and click Start session. A browser profile will launch using the specified fingerprint parameters, which you can see on the loaded page.
- Specific manual profile sessions are nested under the tab group of the given profile name.
- Click the Home icon on the top left to go back to the home screen.
- You can always check your fingerprint by clicking the fingerprint icon on the right of the address bar.
Profile section options
- You can favorite profiles.
- Sort by favorite profile, location, proxy type, and last edited profile.
- Check the status of the profiles, which ones are active or inactive.
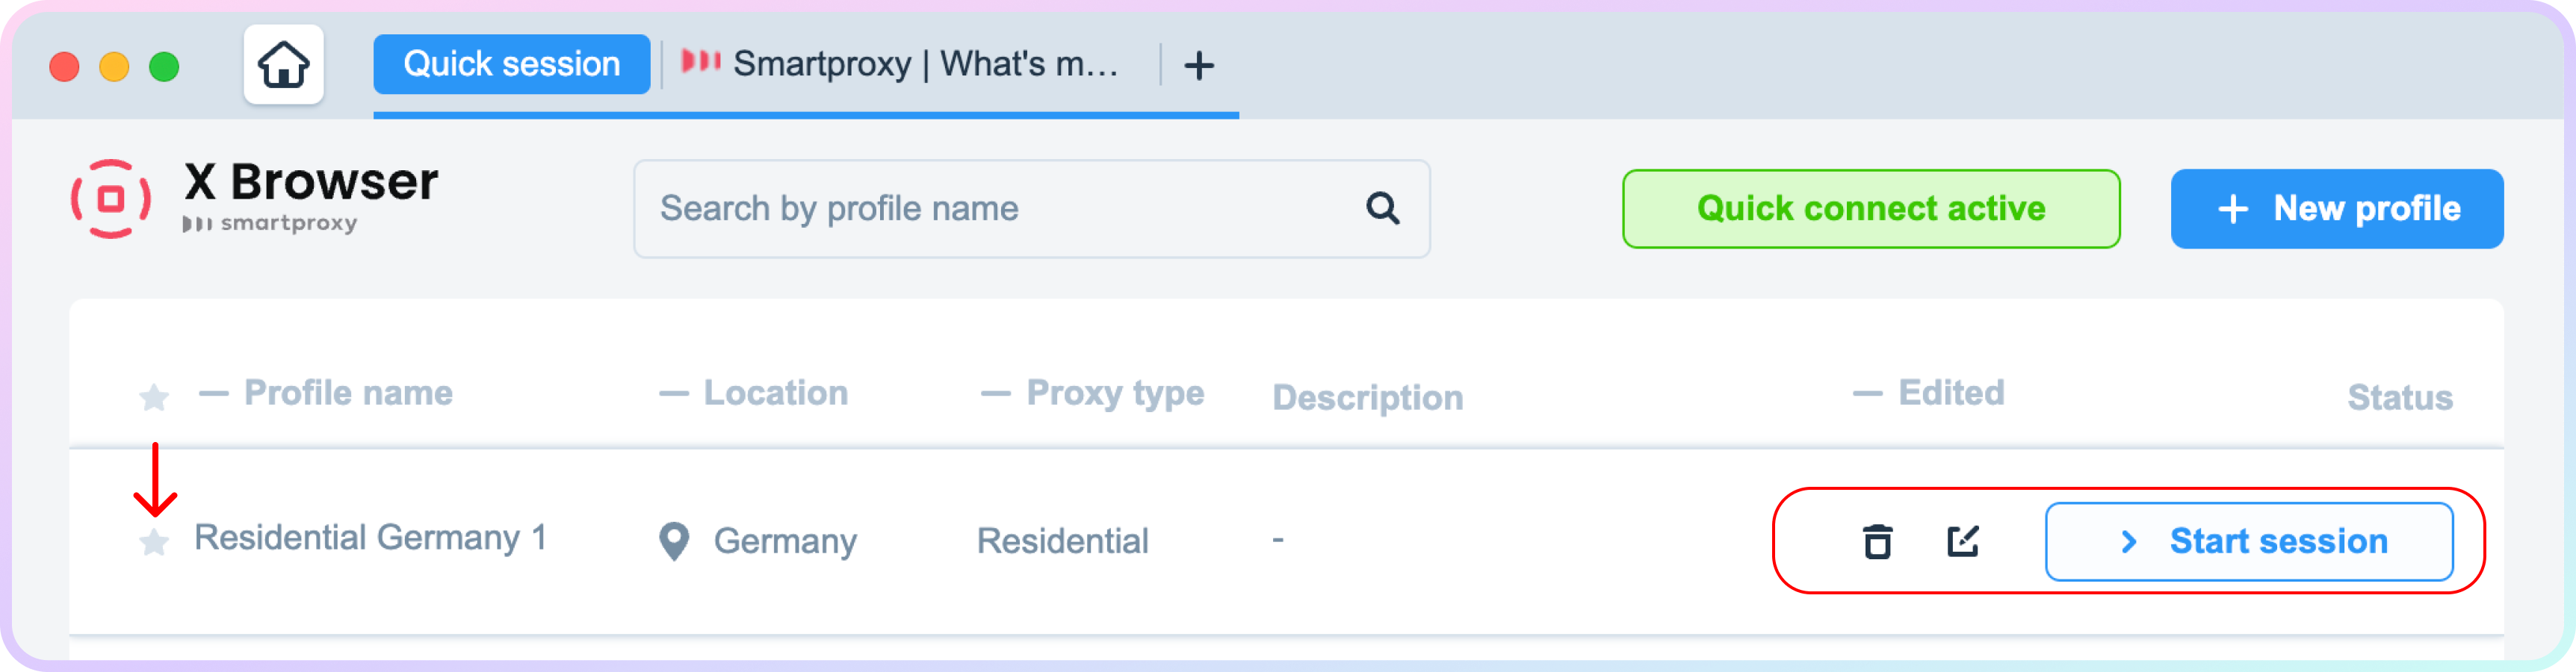
X Browser – saved profile section.
Support
Need help or just want to say hello? Our customer support is available 24/7. You can also reach us anytime via email at [email protected].
Updated 2 months ago