BitBrowser
Anti-detect browser
Getting Started
Proxy Setup
-
Open up the BitBrowser app and log into your BitBrowser account. The dashboard should look something like this:
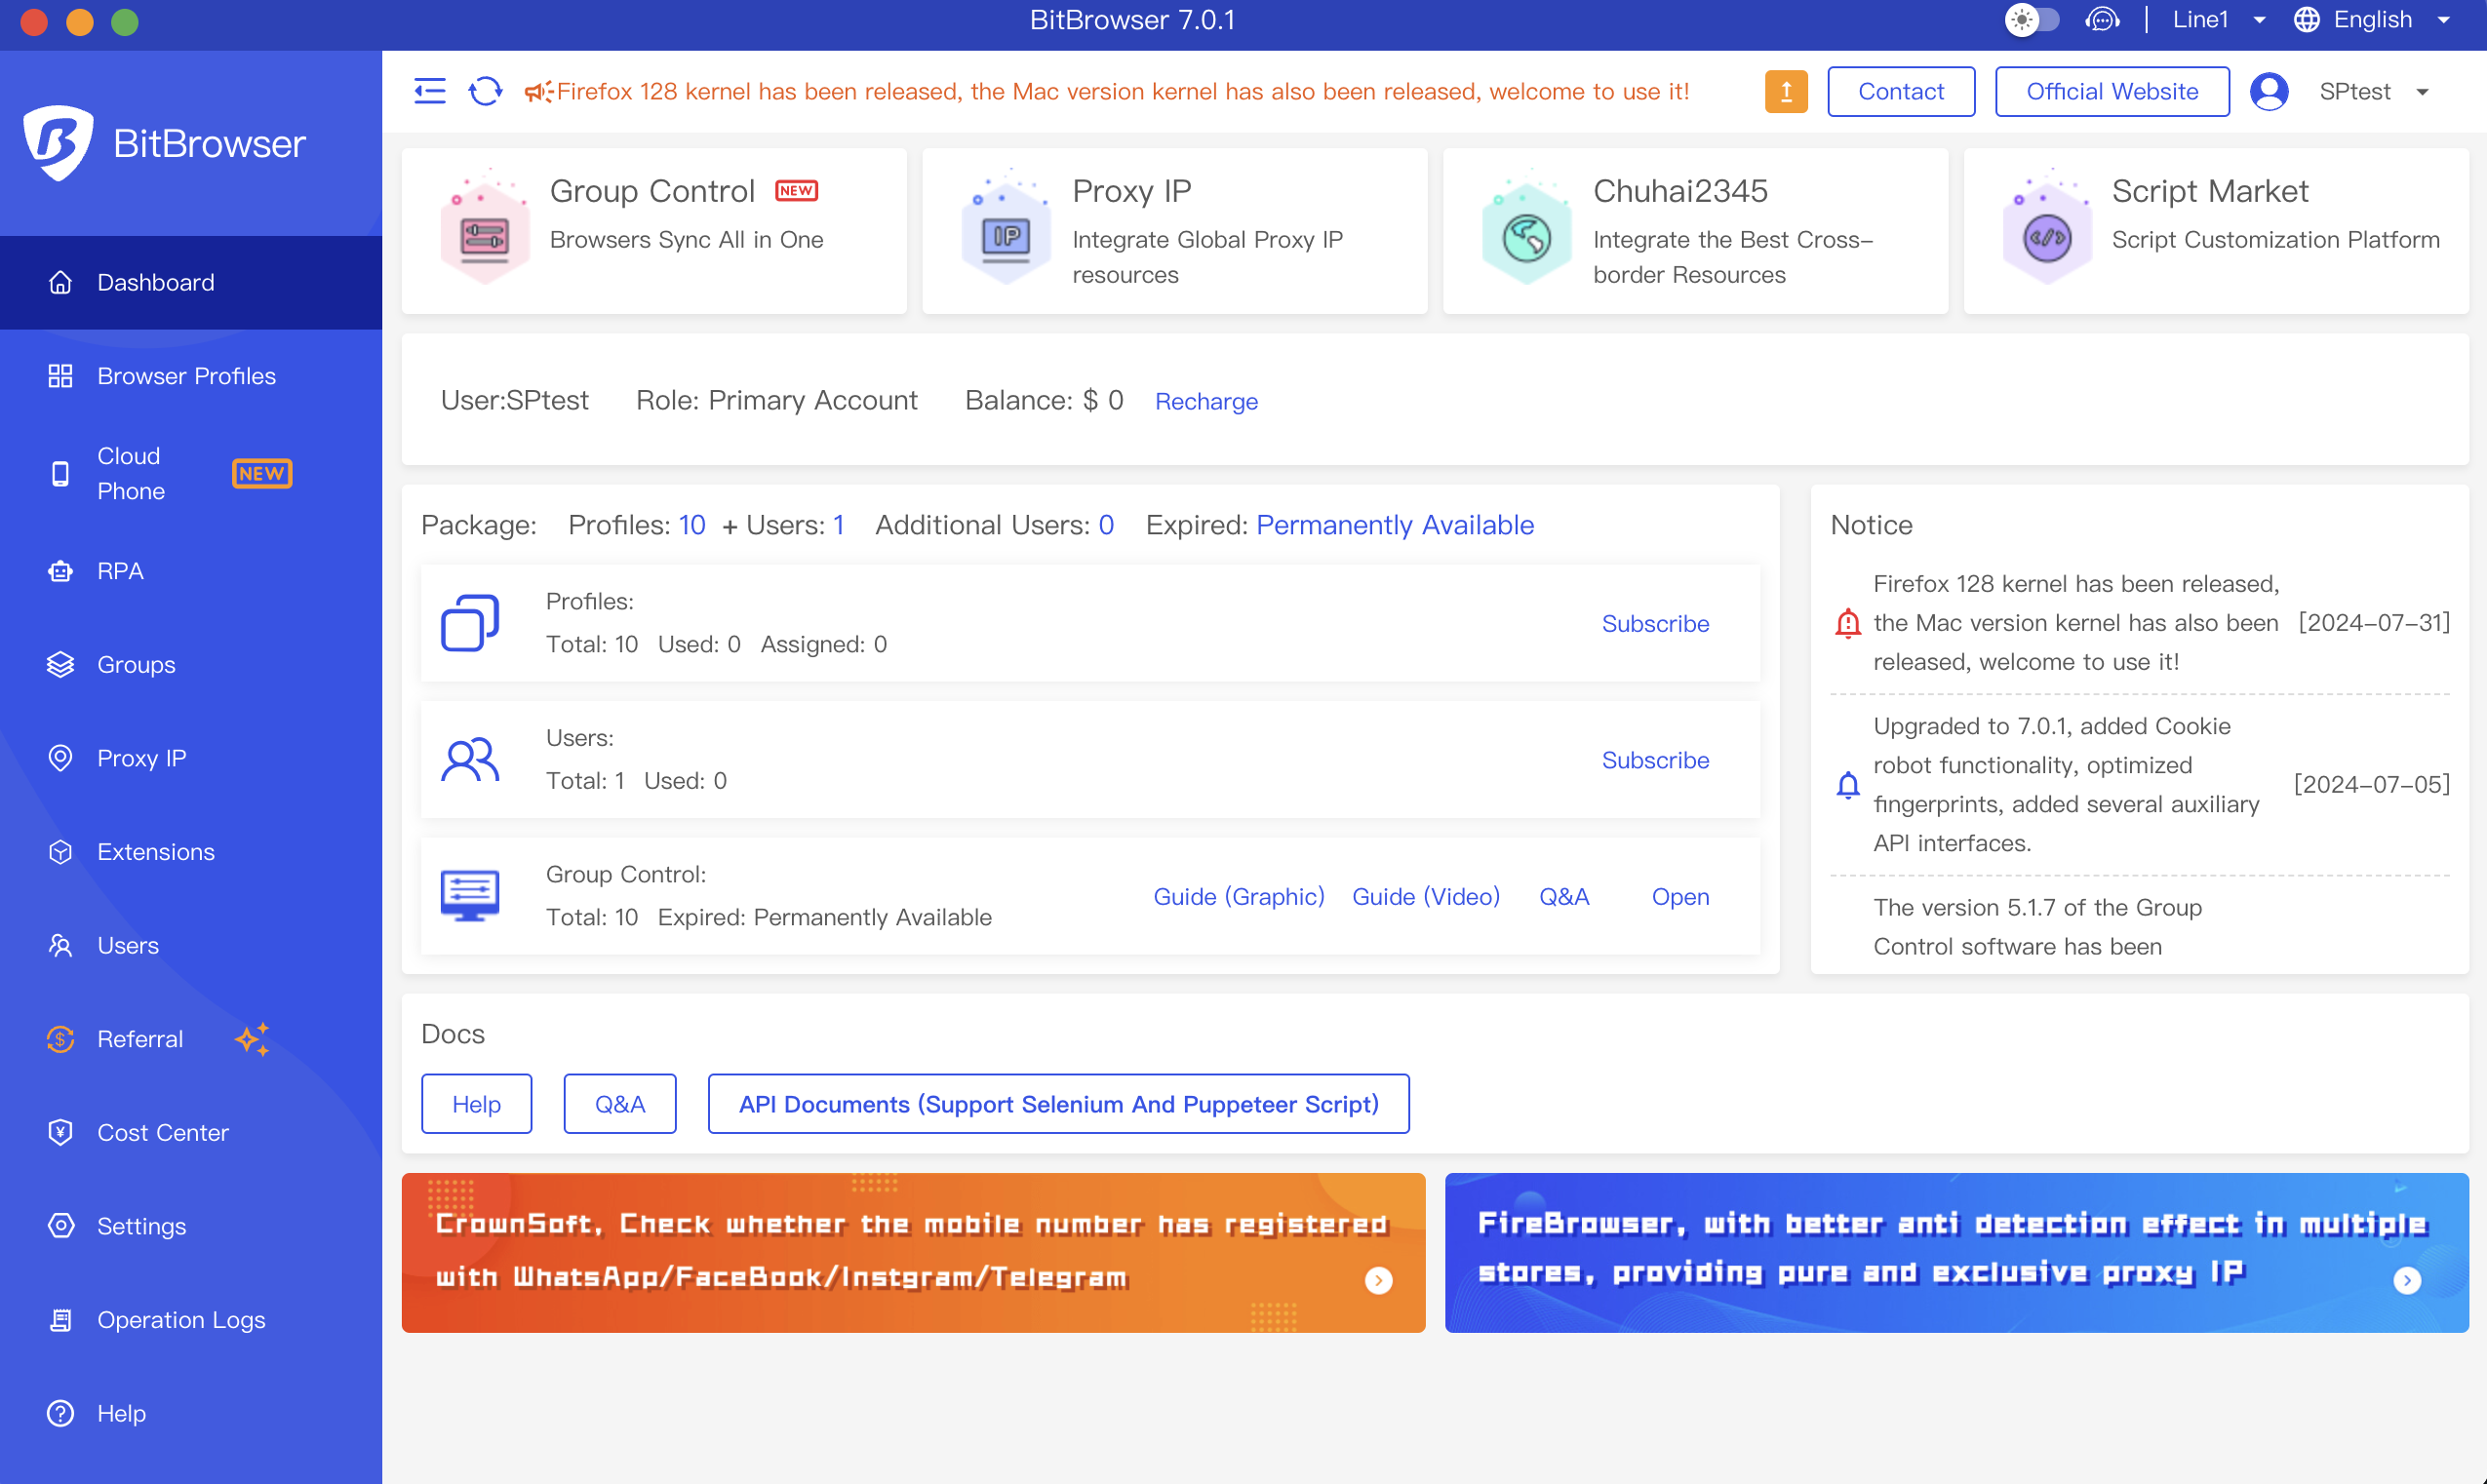
Open BitBrowser app
-
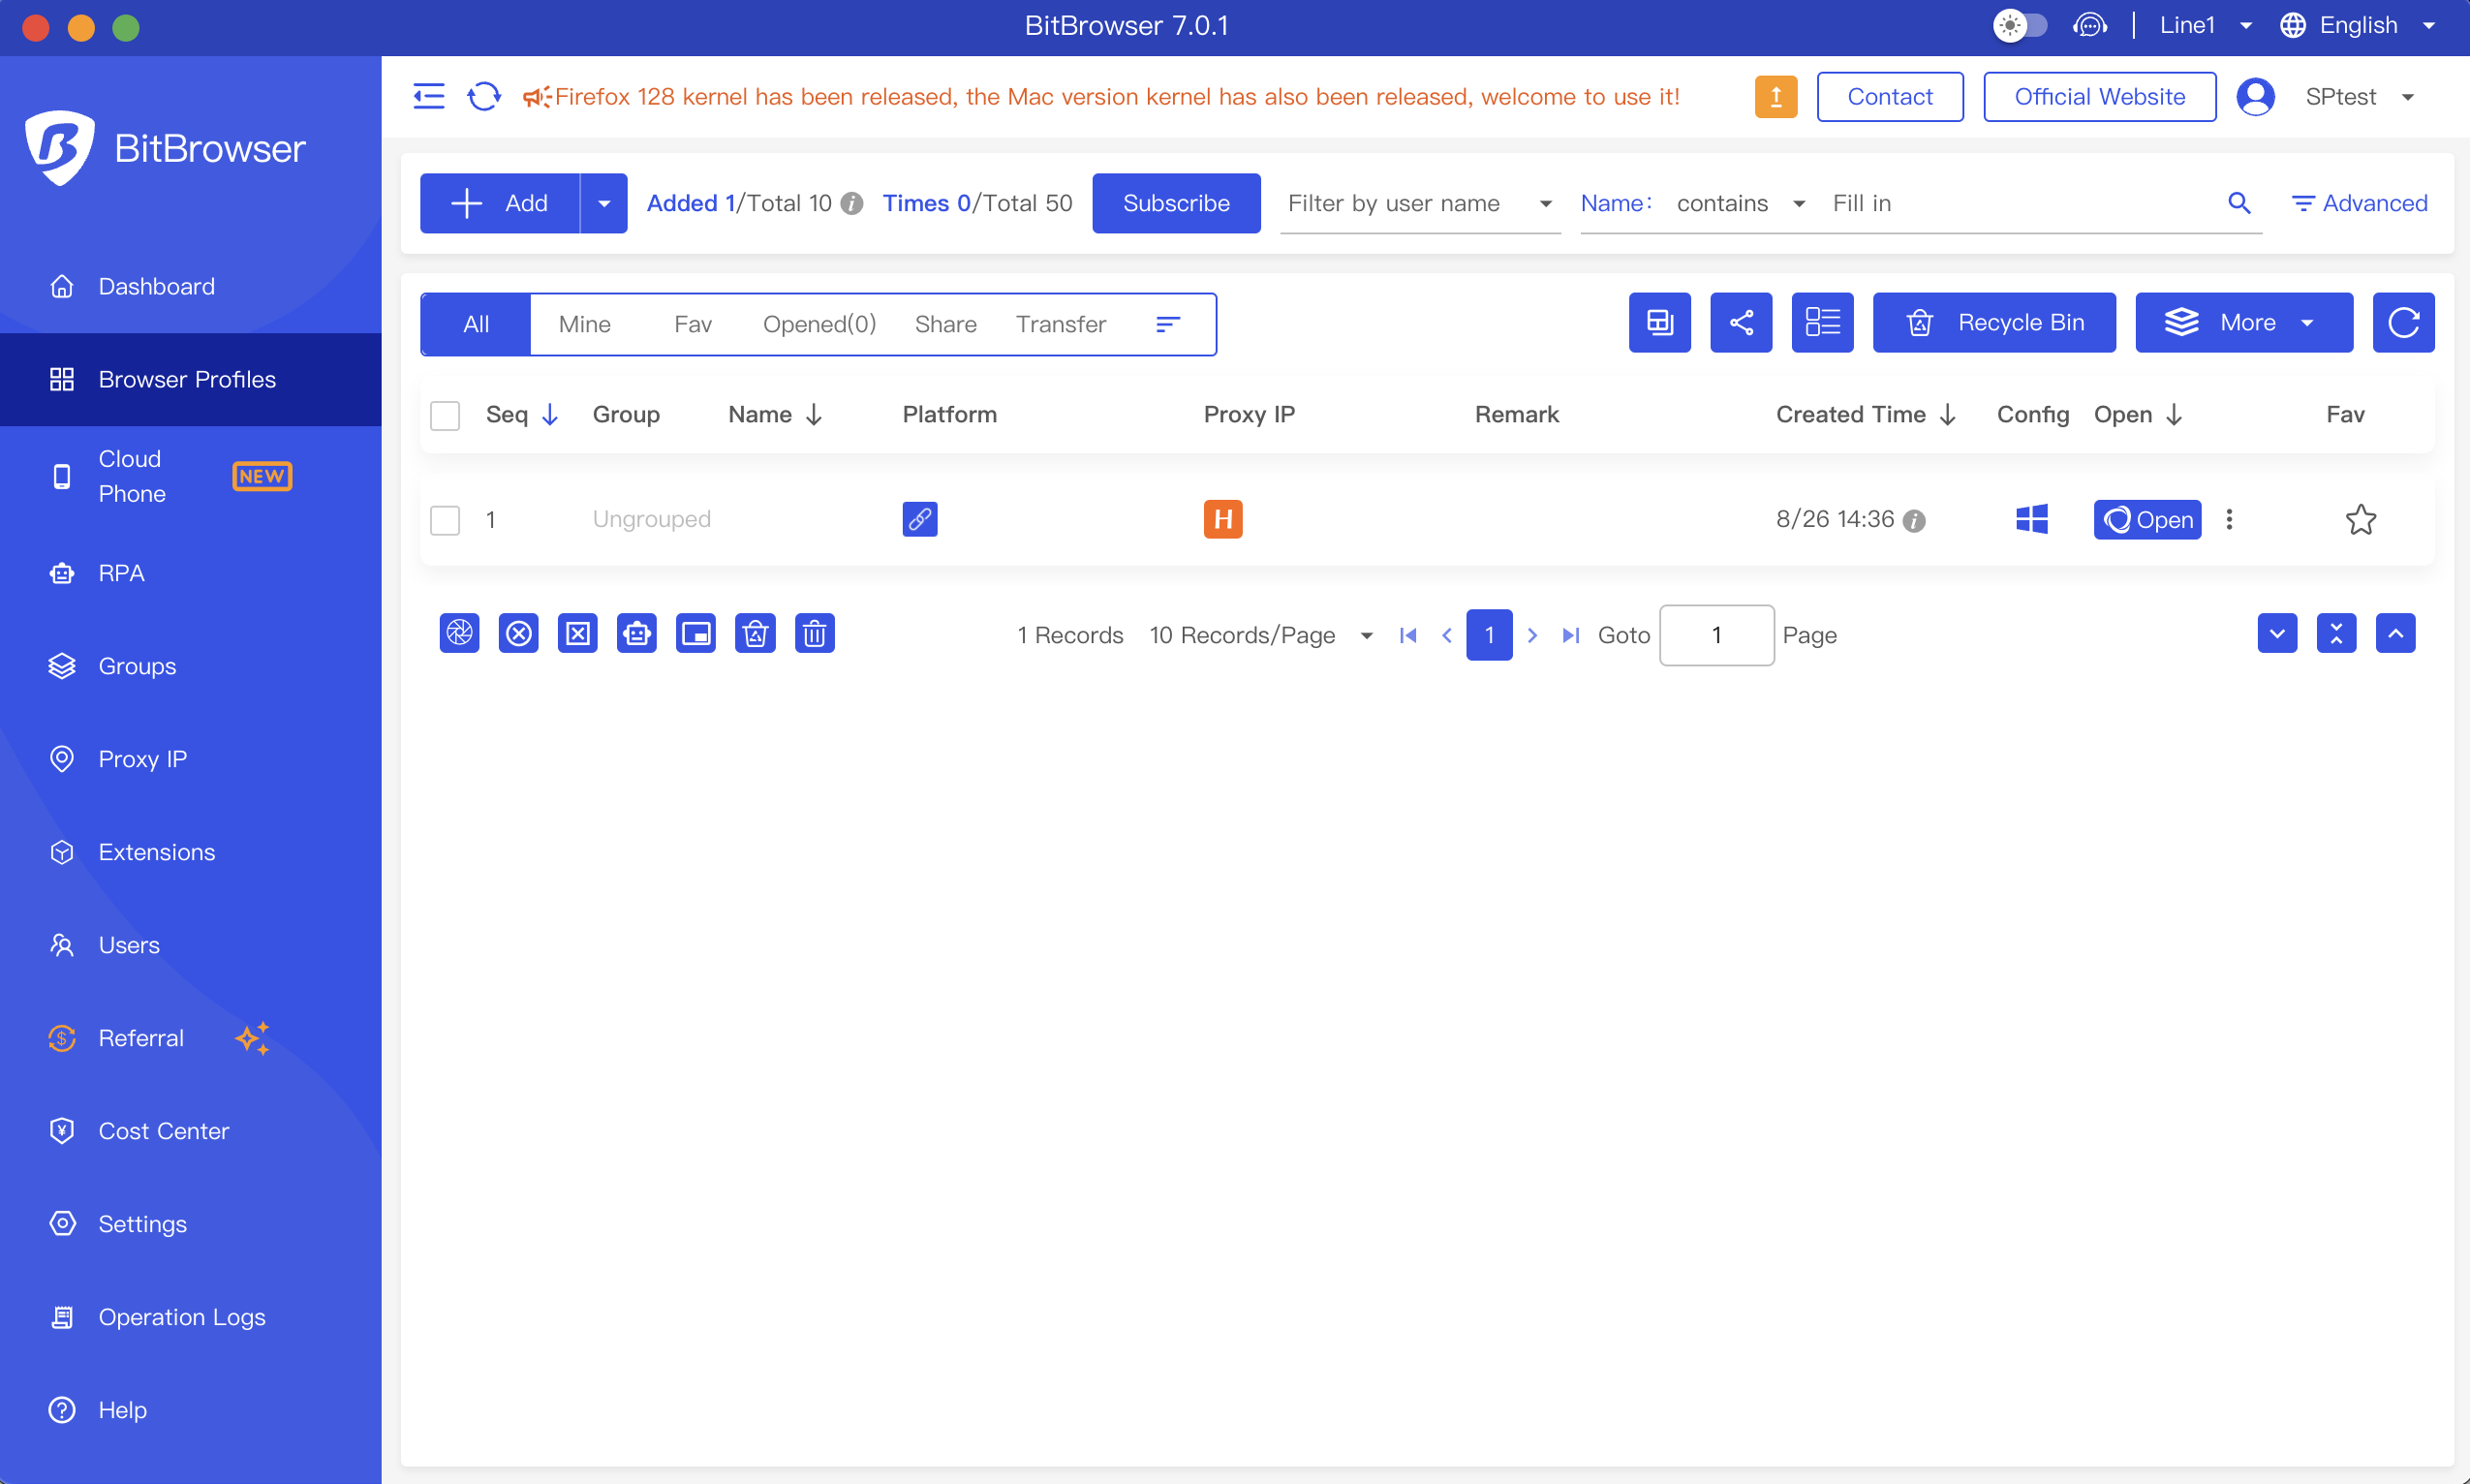
Navigate to the Browser Profiles tab and click "Add" to add a new profile/proxy:
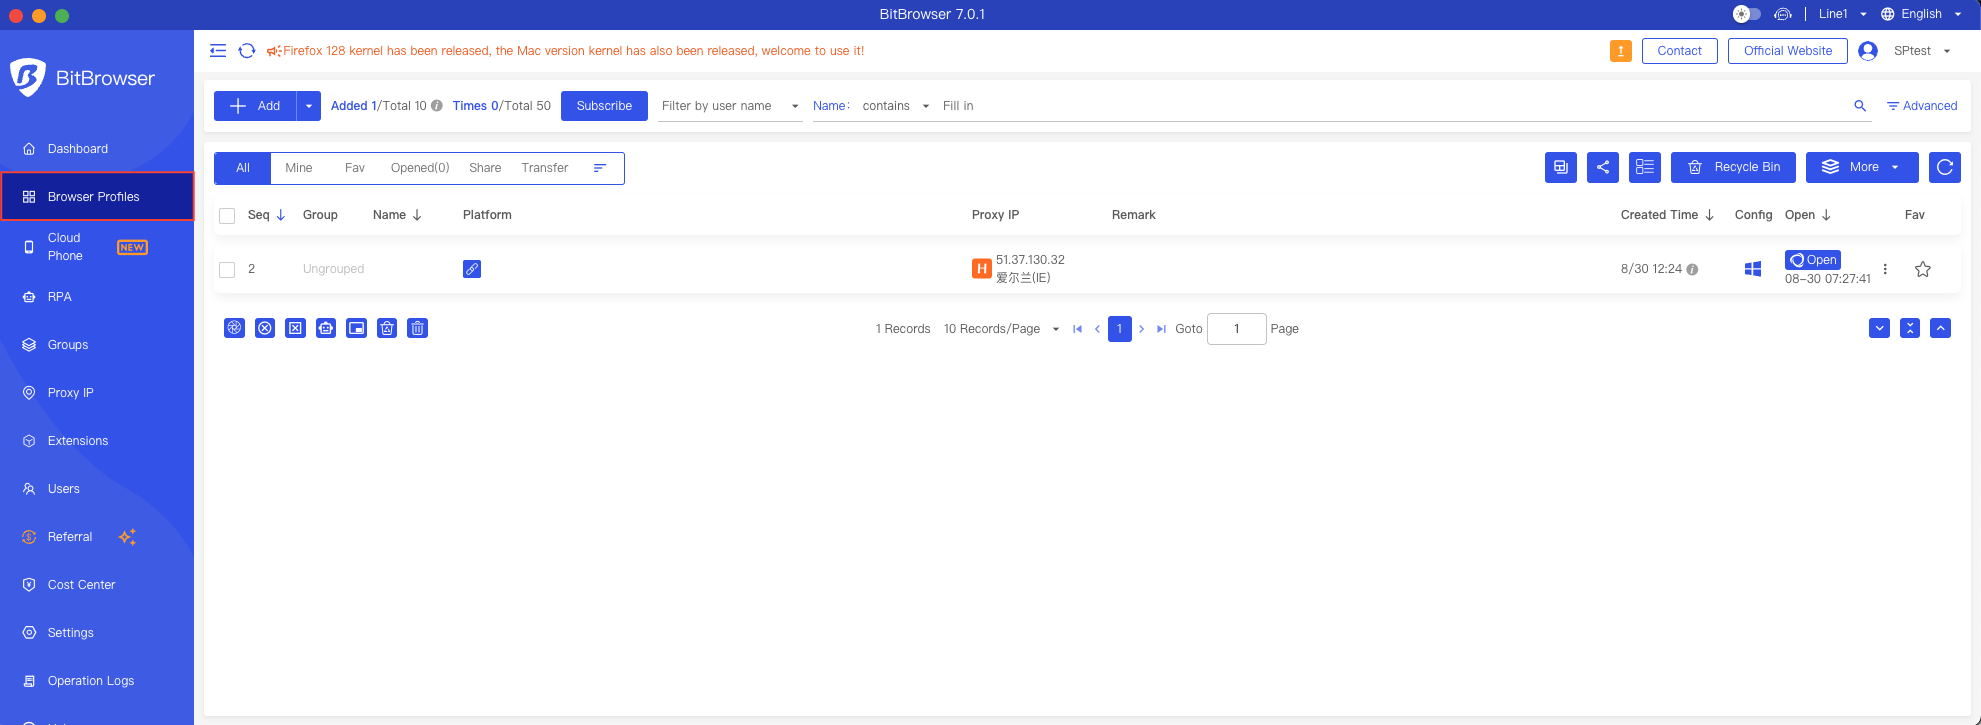
Open Browser profiles
-
A settings tab should appear from the right side; scroll down until you find Proxy and select the appropriate proxy type:
- You can view all the special settings you can select for this browser here.

Proxy settings in profile setup
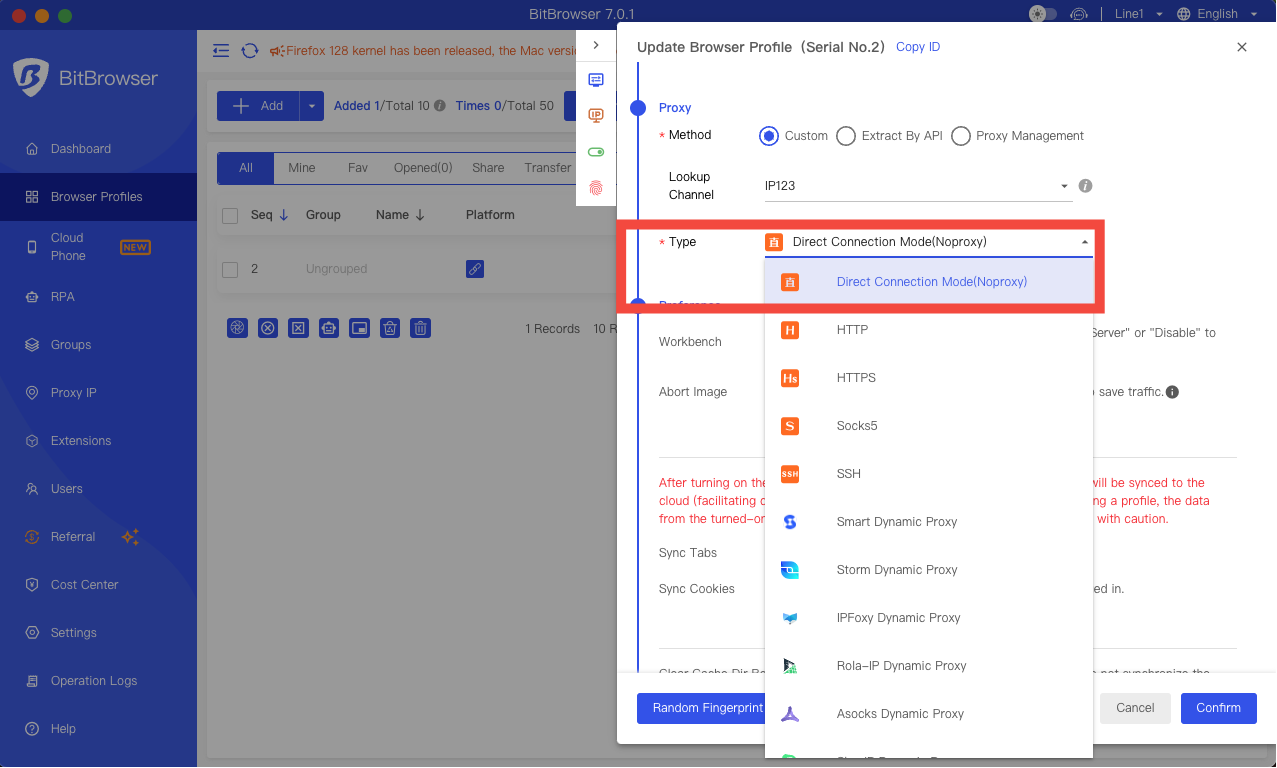
Selecting the proxy type
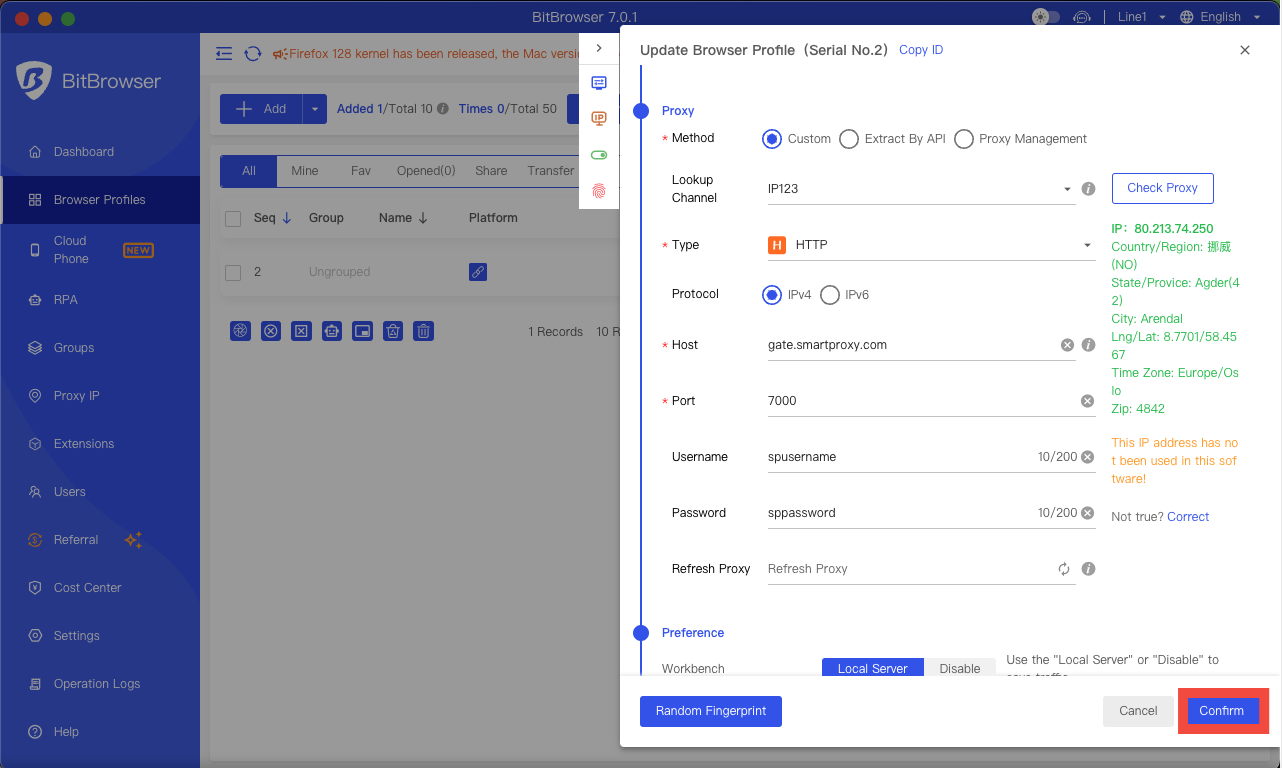
- Input the proxy details/endpoint into the correct fields, and choose the Proxy Type (
HTTP,HTTPS, orSOCKS5). Next, the proxy details can be found on your Smartproxy dashboard. Here's an example for residential proxies:- Host:
gate.smartproxy.com - Port:
10001 - Username: Input your
proxy username - Password: Input your
proxy password - You can go into advanced options and customize your browser fingerprint if needed.
- Host:
Proxy Guides
You can find our quick setup guides for each proxy type here.
- Once input, you can double-check if the proxy works by clicking "Check proxy":
- Click "Confirm" on the bottom right corner, the profile should be saved, and that's it:
Confirmation for Proxy in BitBrowser
BitBrowser profile
Checking the Proxy IP / Connection
- Launch the created profile from the main menu.
- Visit ip.smartproxy.com to check the current IP address and location.
Target Access
Please be aware that we restrict access to some domains. You can learn more here.
Support
Need help or just want to say hello? Our customer support is available 24/7. You can also reach us anytime via email at [email protected].
Updated about 1 month ago