Octoparse
A quick guide on how to set up proxies on Octoparse.
- Open the Octoparse application.
- In the top-left menu hover over the New button, and click on Custom Task. For testing purposes, we are going to create a custom task.
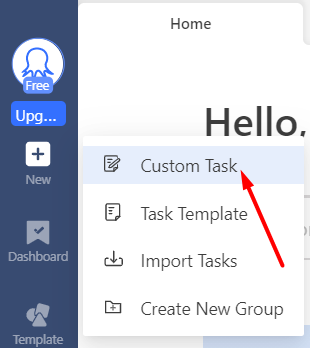
Octoparse – Create a task
- In the URL Input field, indicate the website you would like to extract data from. For this test, we are going to use
ip.smartproxy.com. Once you do that, hit the Save button.
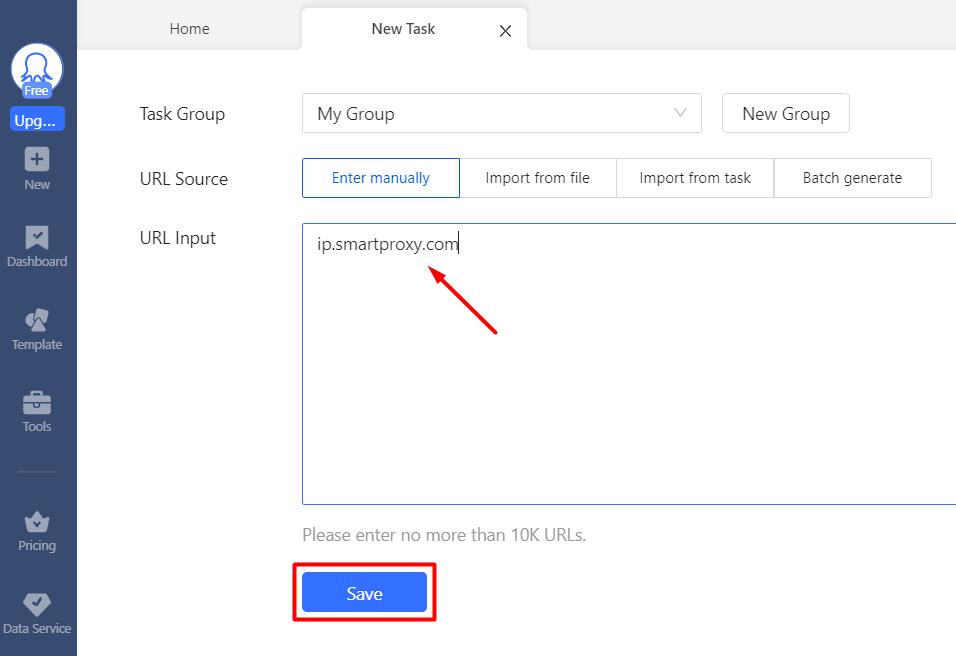
Octoparse – Save website URL
- You should now find yourself in your Task tab. To configure our proxies, select the Task Settings button.
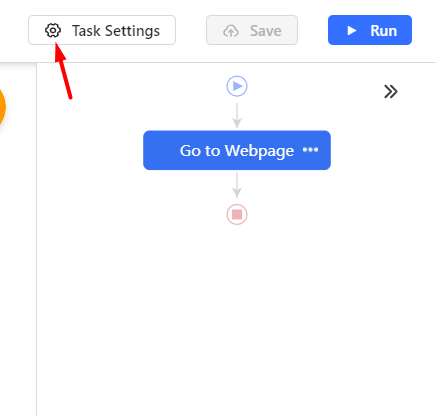
Octoparse – Settings
- In the pop-up menu, choose the Anti-blocking tab and checkmark the option to Access websites via proxies. You should now be able to click on the Configure button.
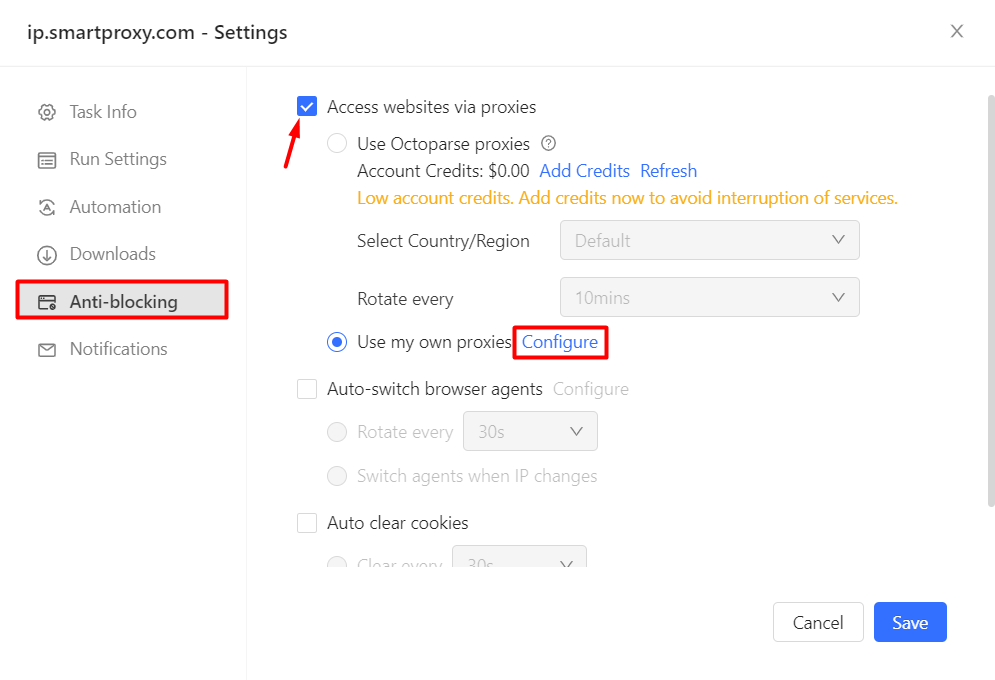
Octoparse – Proxy settings
- In the Proxy Settings pop-up, define the proxy you would like to use. Unfortunately, Octoparse only offers
IP:PORTbased format to authenticate through a proxy network. For that particular reason, you will need to use our Whitelisted IP feature to skip the traditionalusername:passwordauthentication when going through a proxy. You can whitelist your IP after logging into our dashboard here. - Once you have your
IP:PORTready, select the Switch interval according to your session type. If you are using a rotating session type, set the interval to 1. If you are using a sticky session, set it to 600. Finally, hit the Confirm button.
Octoparse – Proxy switch interval
- You can enable some other settings here, like Auto-switch browser agents or Auto clear cookies. Once you're satisfied with your settings, click Save to continue.
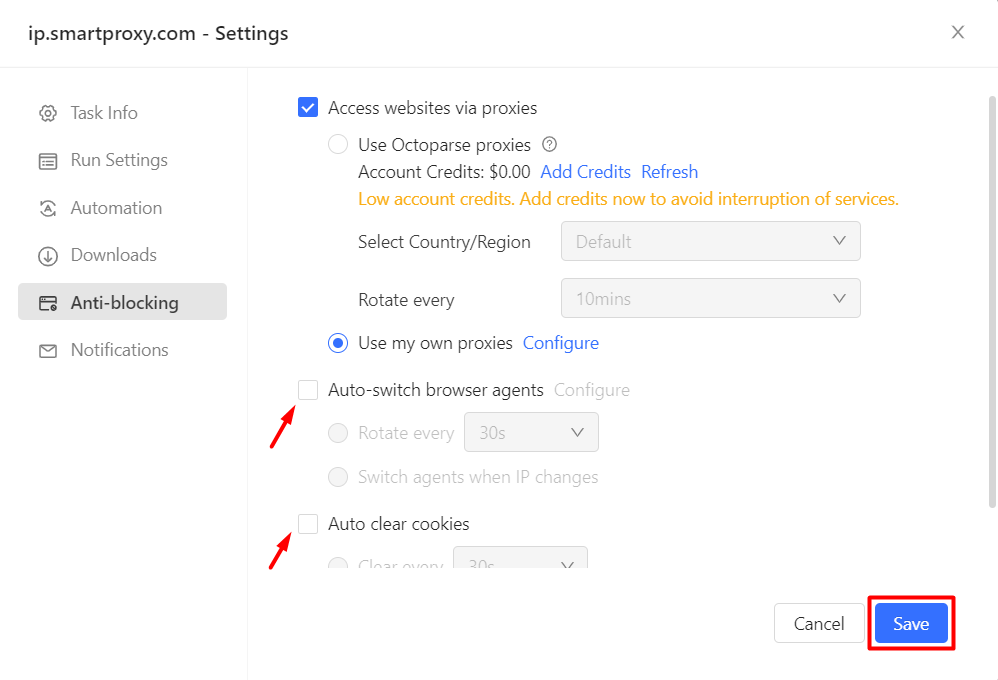
Octoparse – Save proxy settings
- To extract data from our example page, click on the IP address that you can see at the top of the Octoparse application and select Text in the Extract data option.
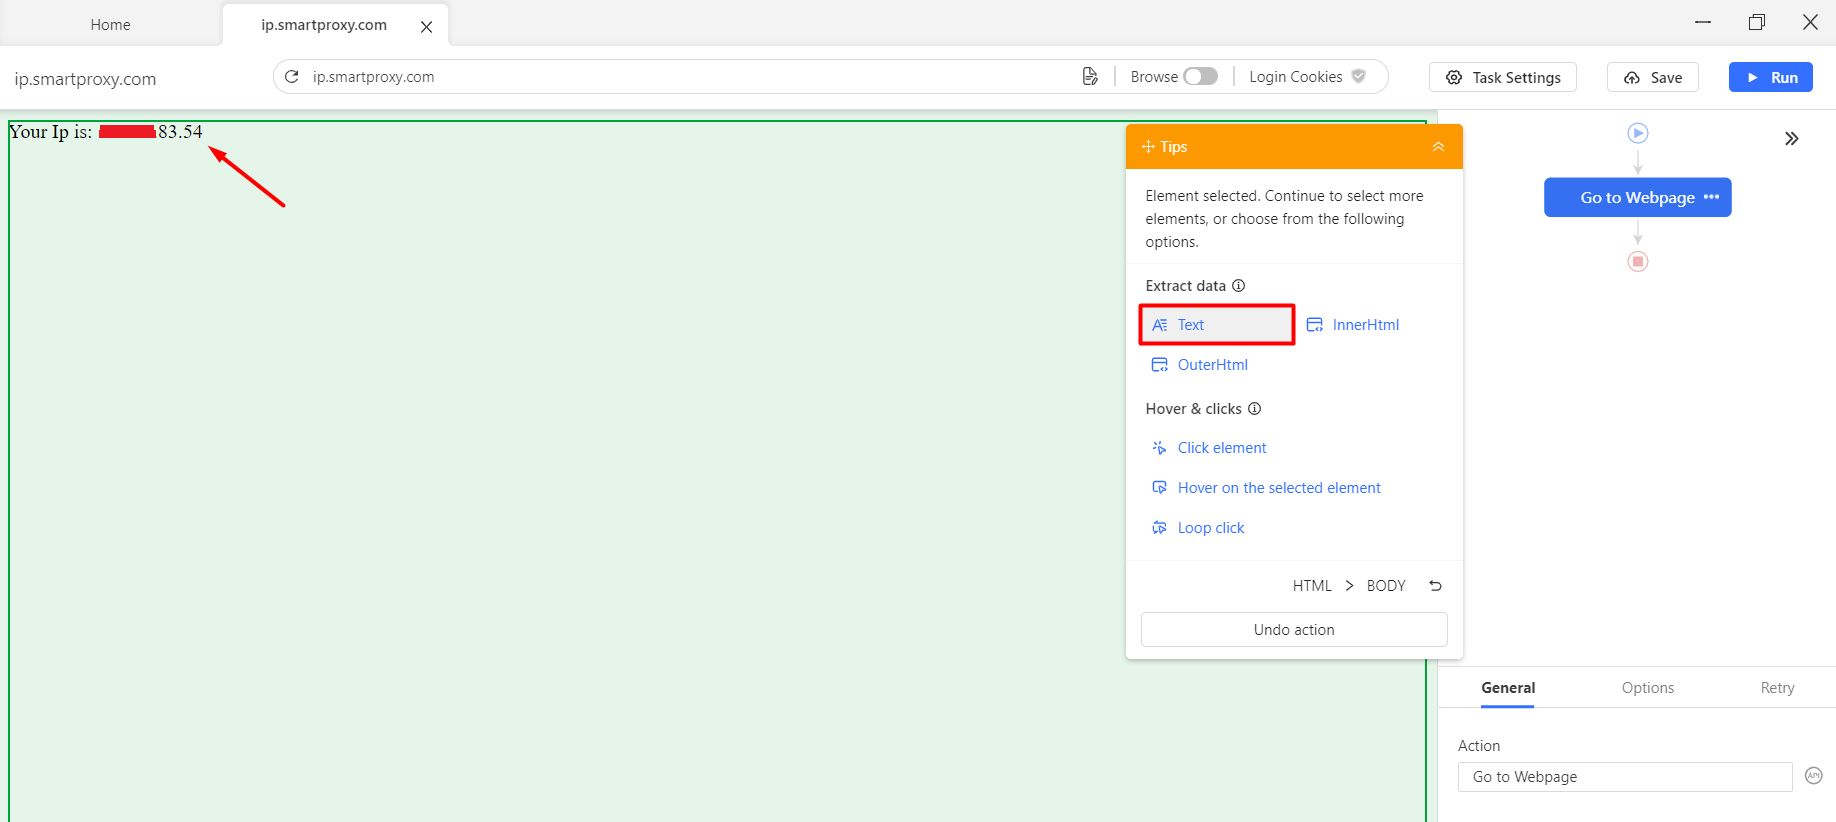
Octoparse – Extract data from the example page
- Once that is done, click on Save and then Run.
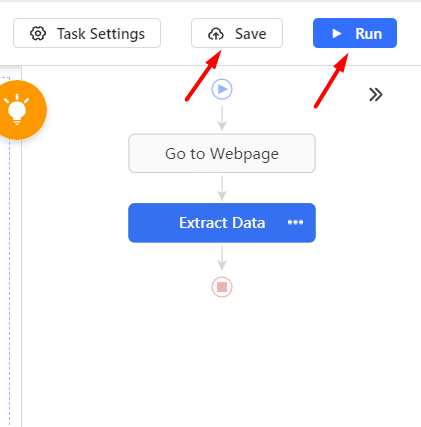
Octoparse – Save and Run
- Depending on how you want to run your task, select one of the available extraction options. For testing purposes, you can Run task on your device in Standard Mode.
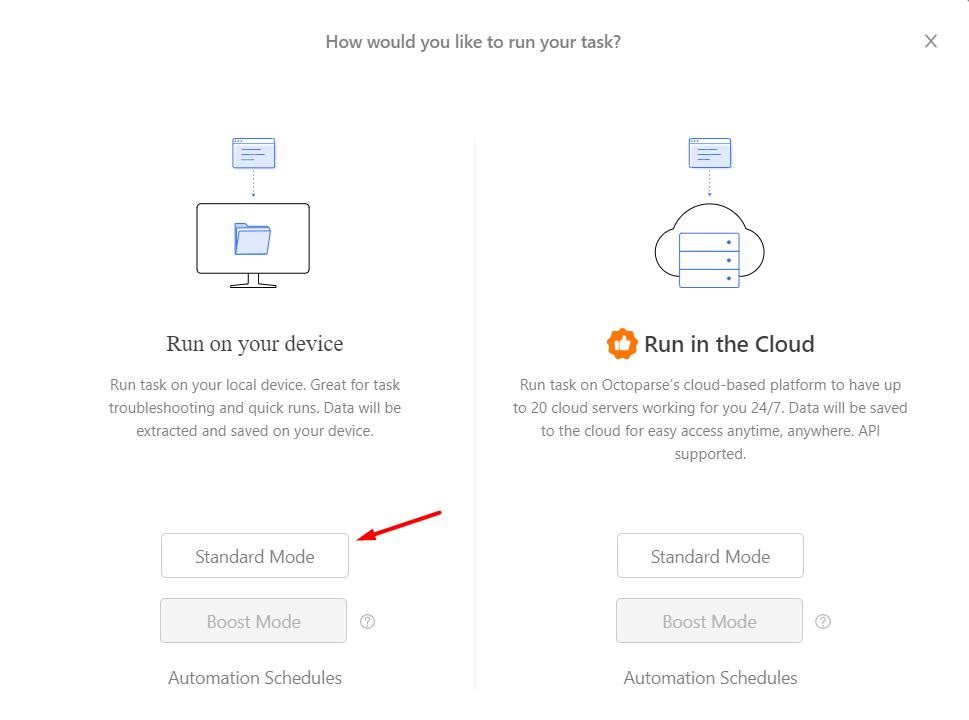
Octoparse – Run Task
- If done correctly, you should see our proxy IP in the extracted data table once the task is finished.
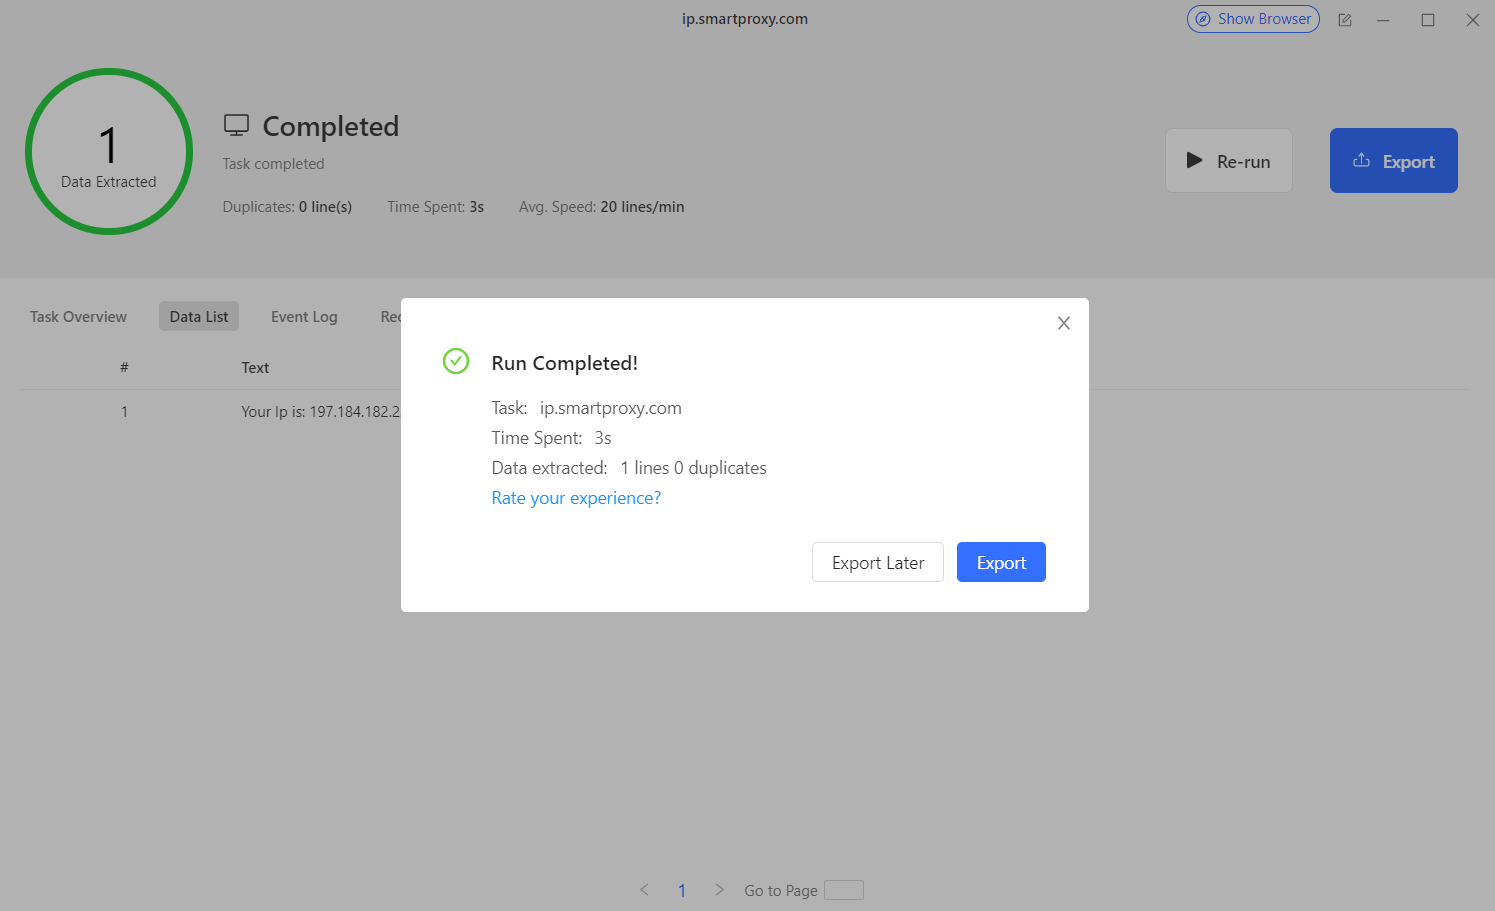
Octoparse – Extraction completed
The following video displays the same instructions described above. However, the dashboard and thus the instructions in the video might be partially outdated.
Support
Need help or just want to say hello? Our customer support is available 24/7. You can also reach us anytime via email at [email protected].
Updated about 2 months ago