Insomniac Browser
Instructions on how to setup proxy on the Insomniac Browser.
Proxy Setup
- Open the Insomniac Browser and click on Insomniac Proxy Per Tab > Manage Proxy List.

Insomniac Browser Proxy Per Tab
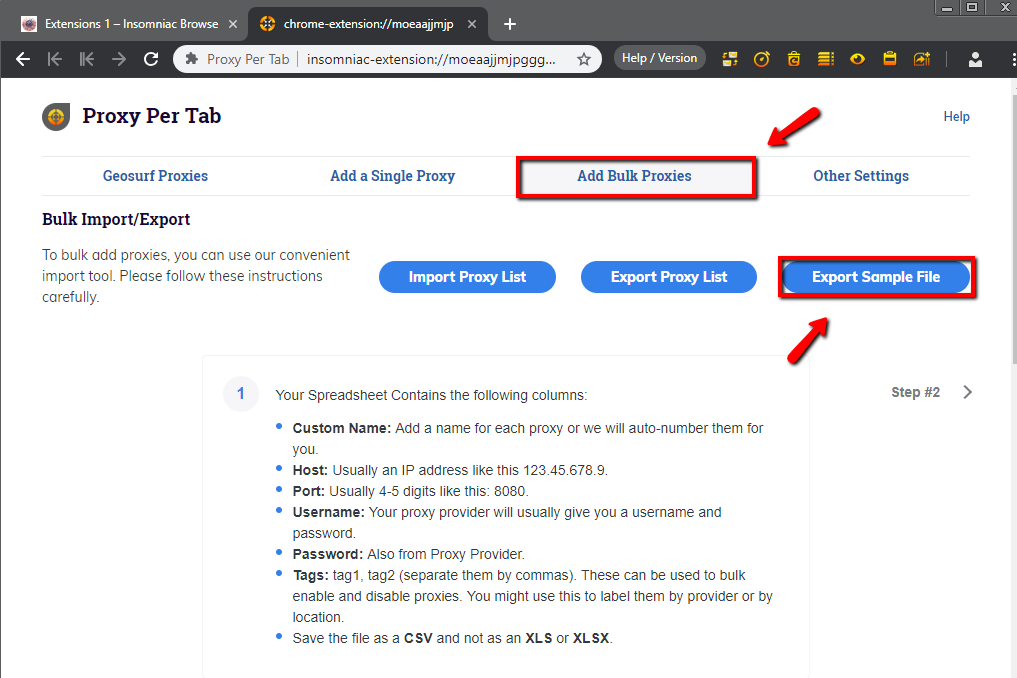
- In the new tab, select Add Bulk Proxies.
- First, you will need to generate a CSV file. Select Export Sample File to download a template.

Export Sample File on Insomniac Browser
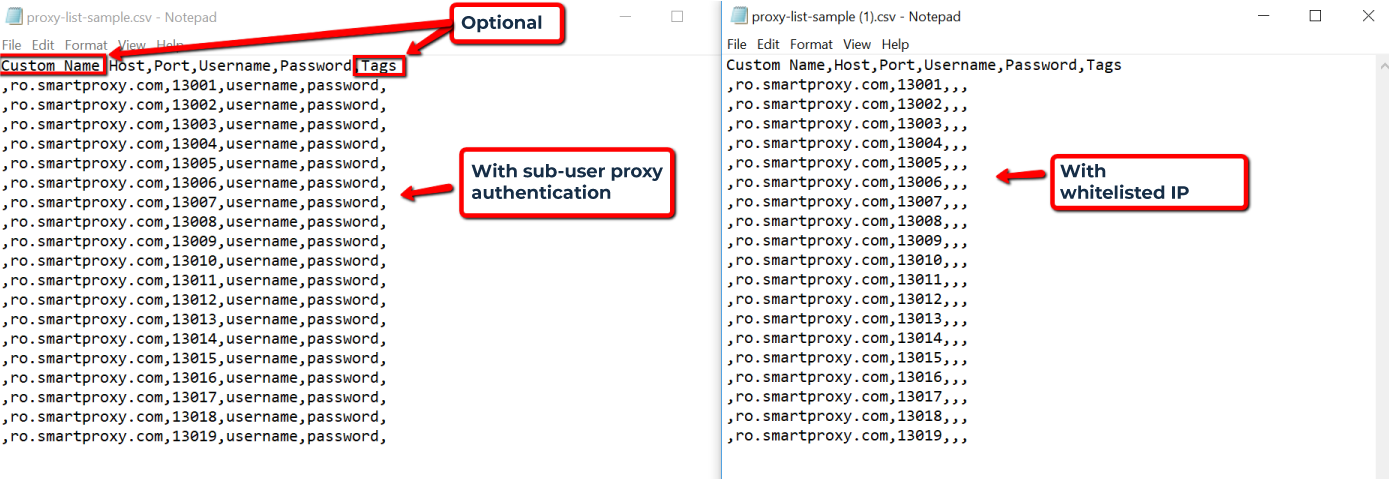
- Fill in proxy list as per the example below:
a) With a proxy sub-user authentication username and password. b) With a Whitelisted IP.
Custom name and Tags fields are optional. Otherwise, please separate everything with commas in order for Insomniac Browser to be able to read the list. This is shown in the example below.

Insomniac Browser proxy list sample in CSV format
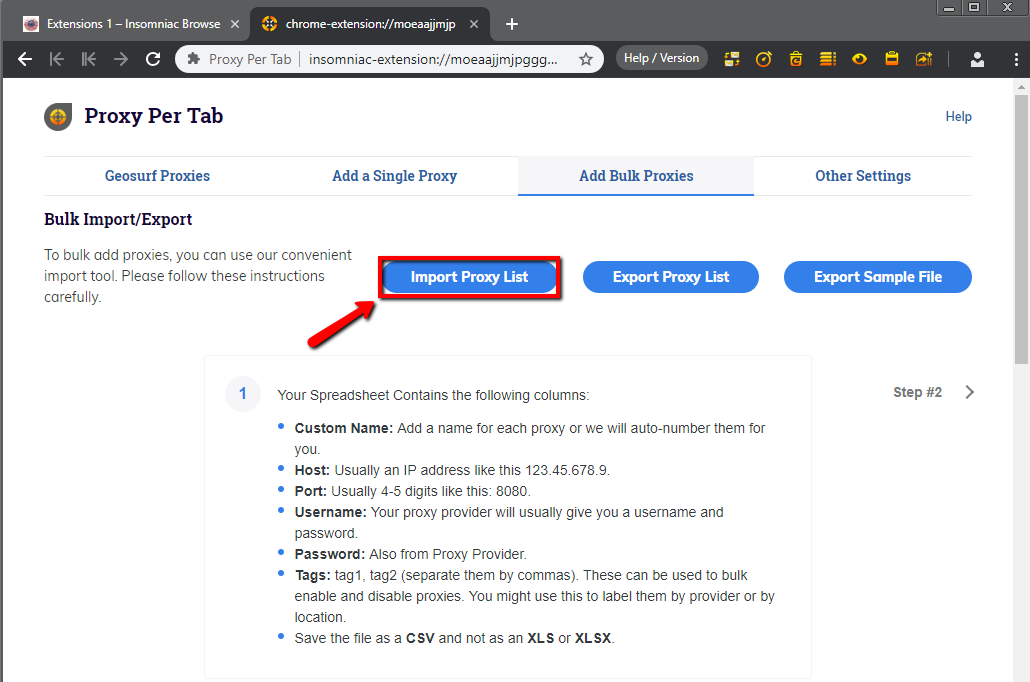
- Once your CSV file is ready, import it into the Insomniac Browser.

Import Proxy List on Insomniac Browser
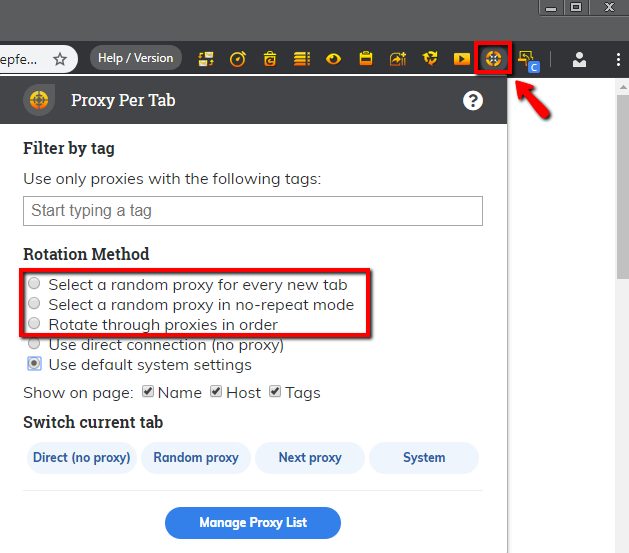
- Apply relevant settings to assign proxies for tabs.
- To see if the proxy is working, check your IP on ip.smartproxy.com.

Insomniac Browser Proxy Per Tab Rotation Method
Support
Need help or just want to say hello? Our customer support is available 24/7. You can also reach us anytime via email at [email protected].
Updated about 2 months ago