OpenBullet
Getting Started
The first thing you will need is to download and install the OpenBullet2 tool. You can find how to do that on the OpenBullet website
If you have the tool installed and ready to go, you can move on to the next article.
Proxy Setup
- Open OpenBullet2 and navigate to the Proxies tab.
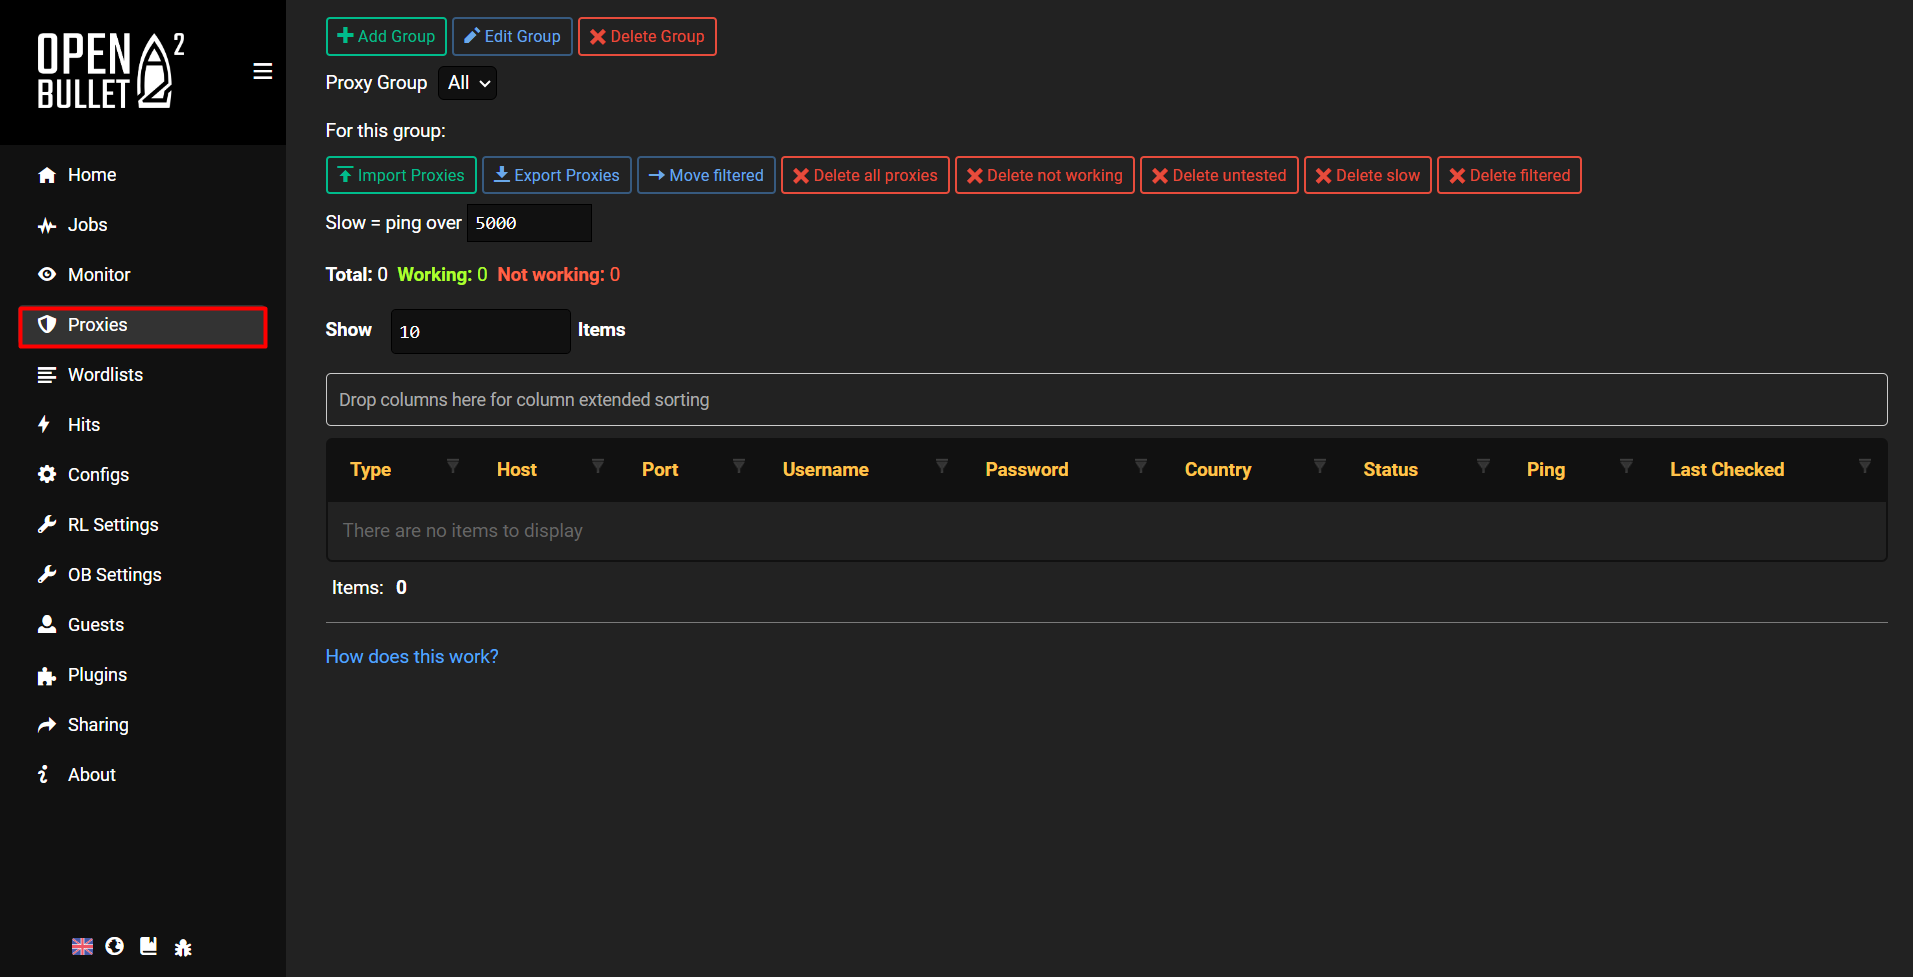
OpenBullet2 - Navigate to the 'Proxies' tab
- First, you will need to create a proxy group. Click on the Add Group button, enter a name for the group and click Create
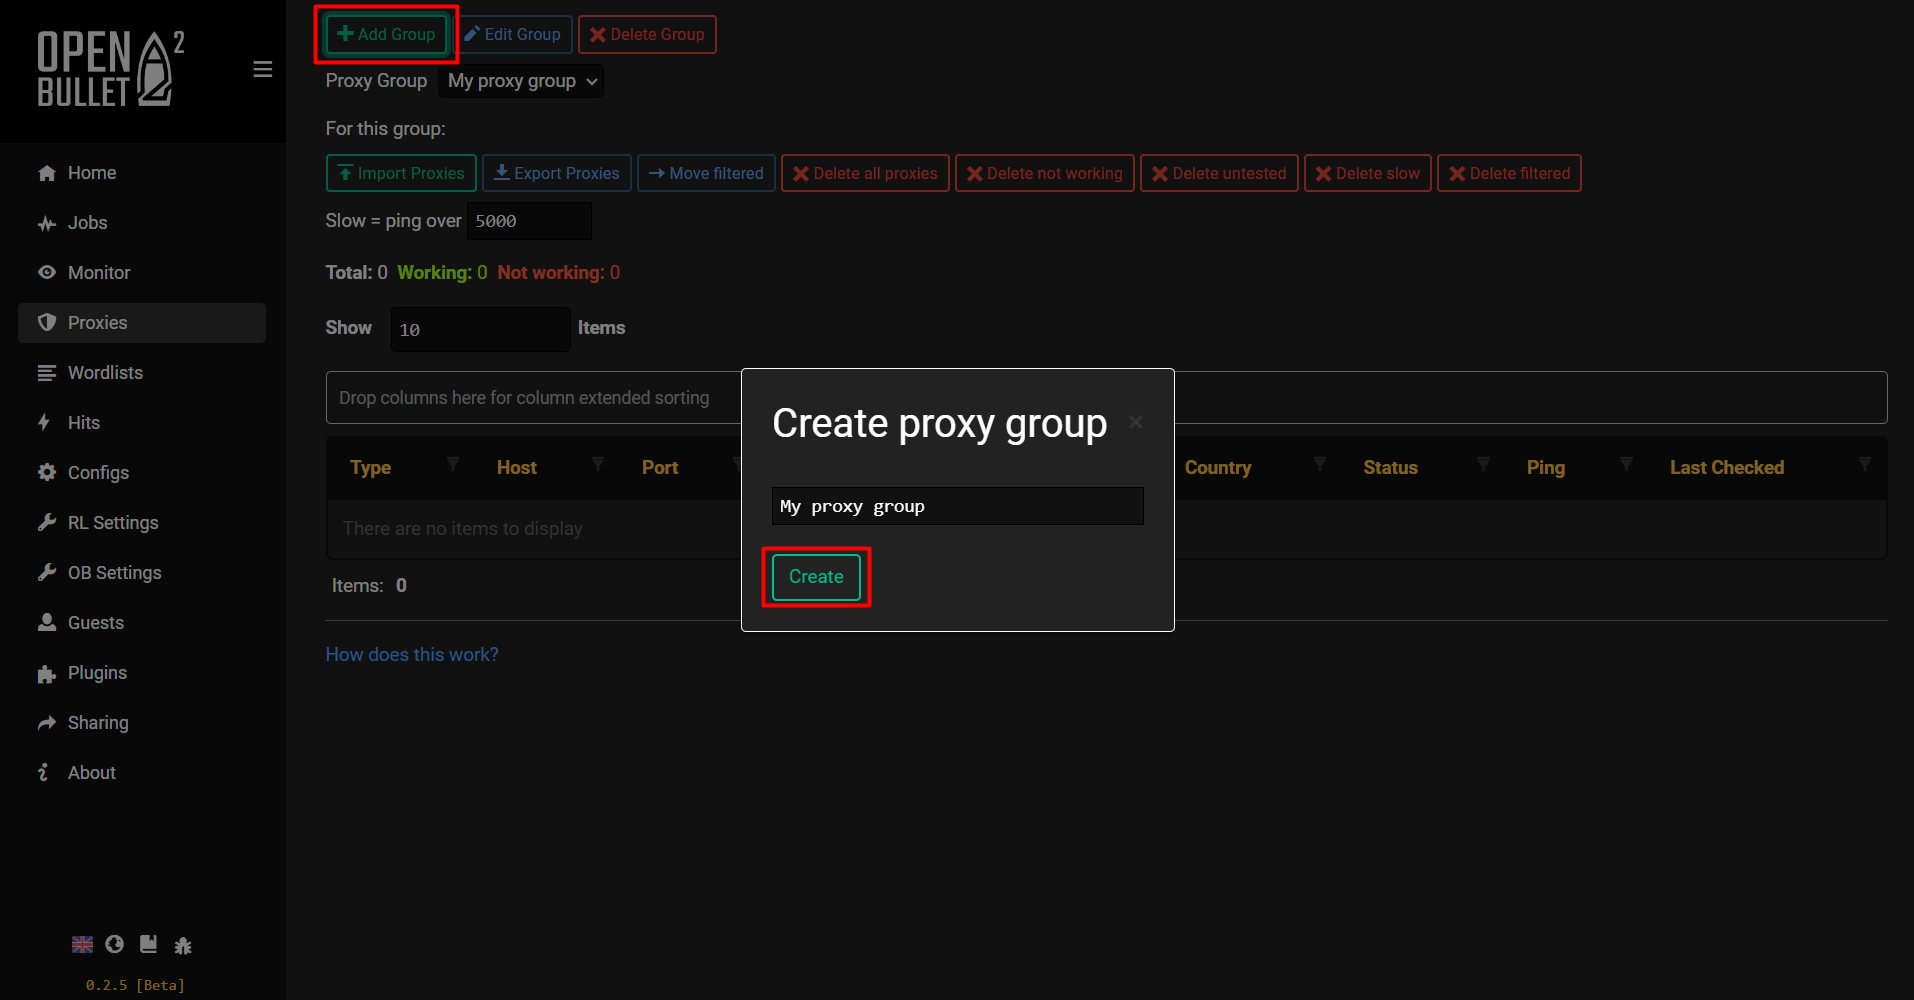
OpenBullet2 - Create a proxy group
- Click on Import Proxies, and insert your generated proxies.
3.1. If you have chosen/input your proxy username and password in the Endpoint generator tab in your dashboard and input the proxies with your credentials, click on the Import button. 3.2. If you have a Whitelisted IP set up in the Authentication method tab in your dashboard and input your proxies without credentials, click on the Import button. 3.3. If you haven't set up a Whitelisted IP in the Authentication method tab in your dashboard and input your proxies without credentials, you have to enter your credentials in the Username and Password fields.
Proxy Guides
You can find our quick setup guides for each proxy type here.
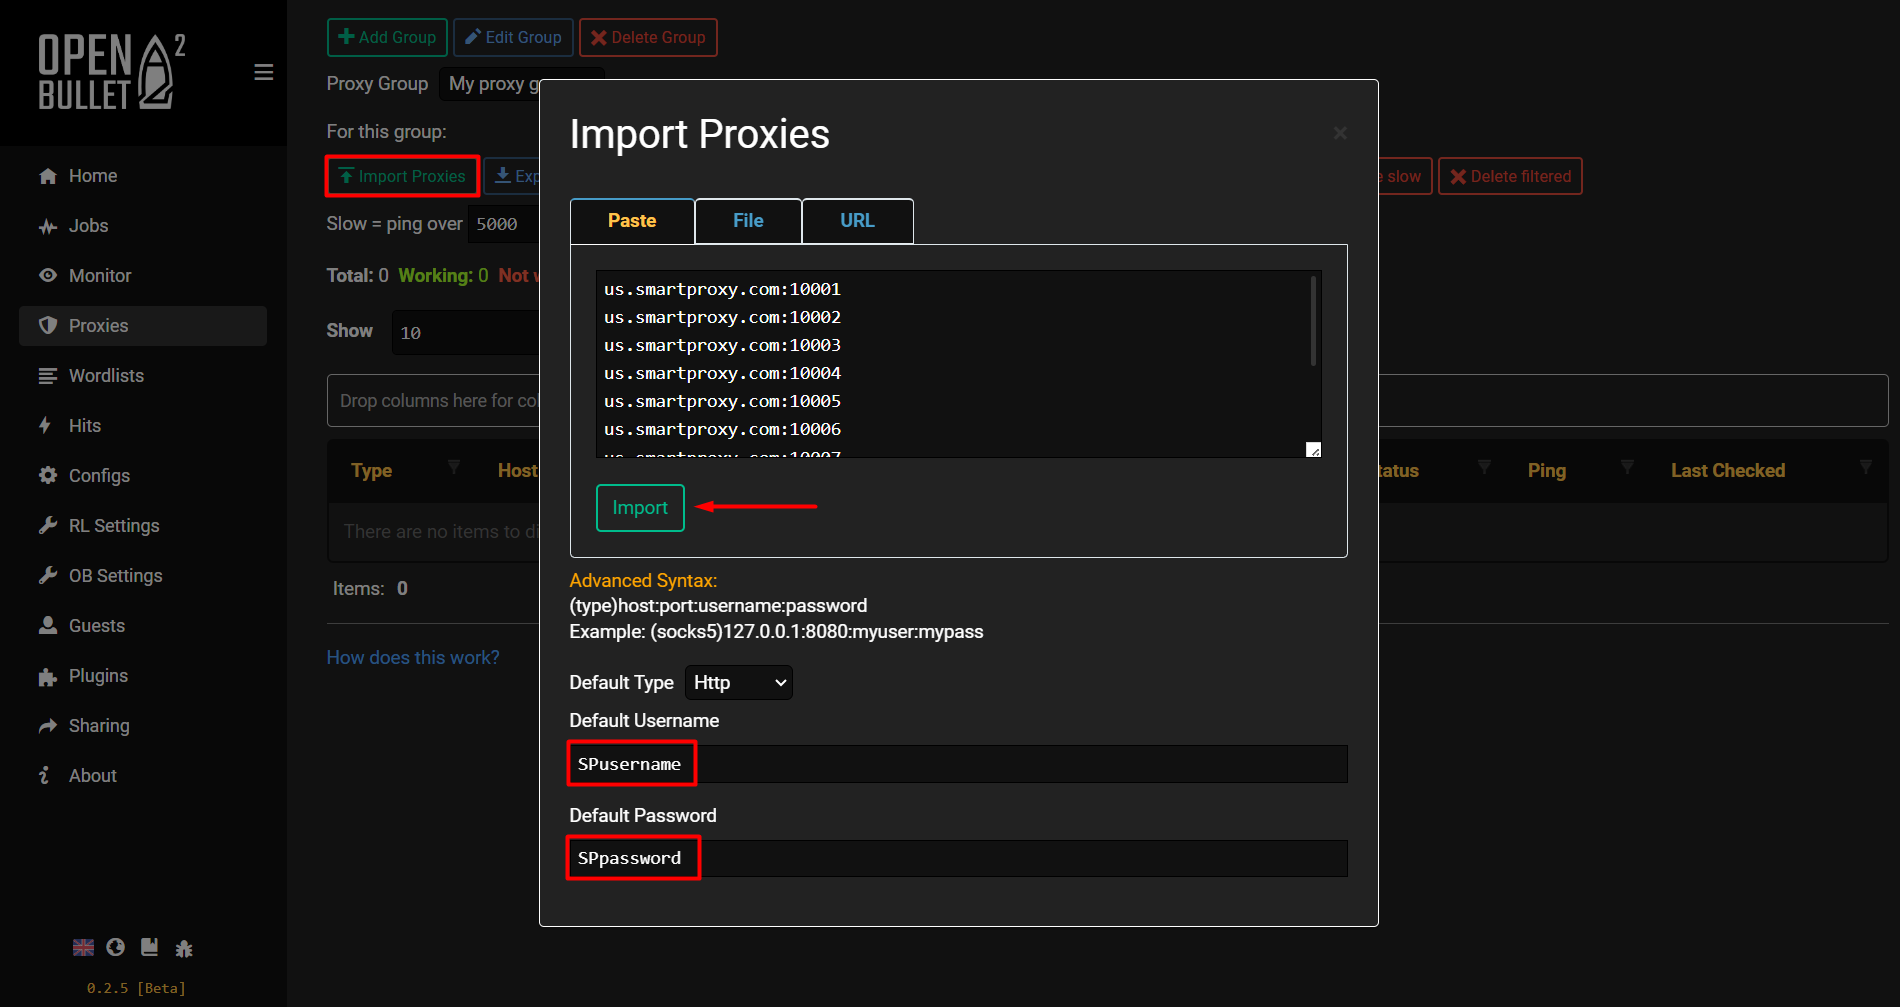
OpenBullet2 – Import proxies
- Once you finish setting up the proxies, navigate to the Jobs tab.
- Click the New button and then the Proxy Check button.
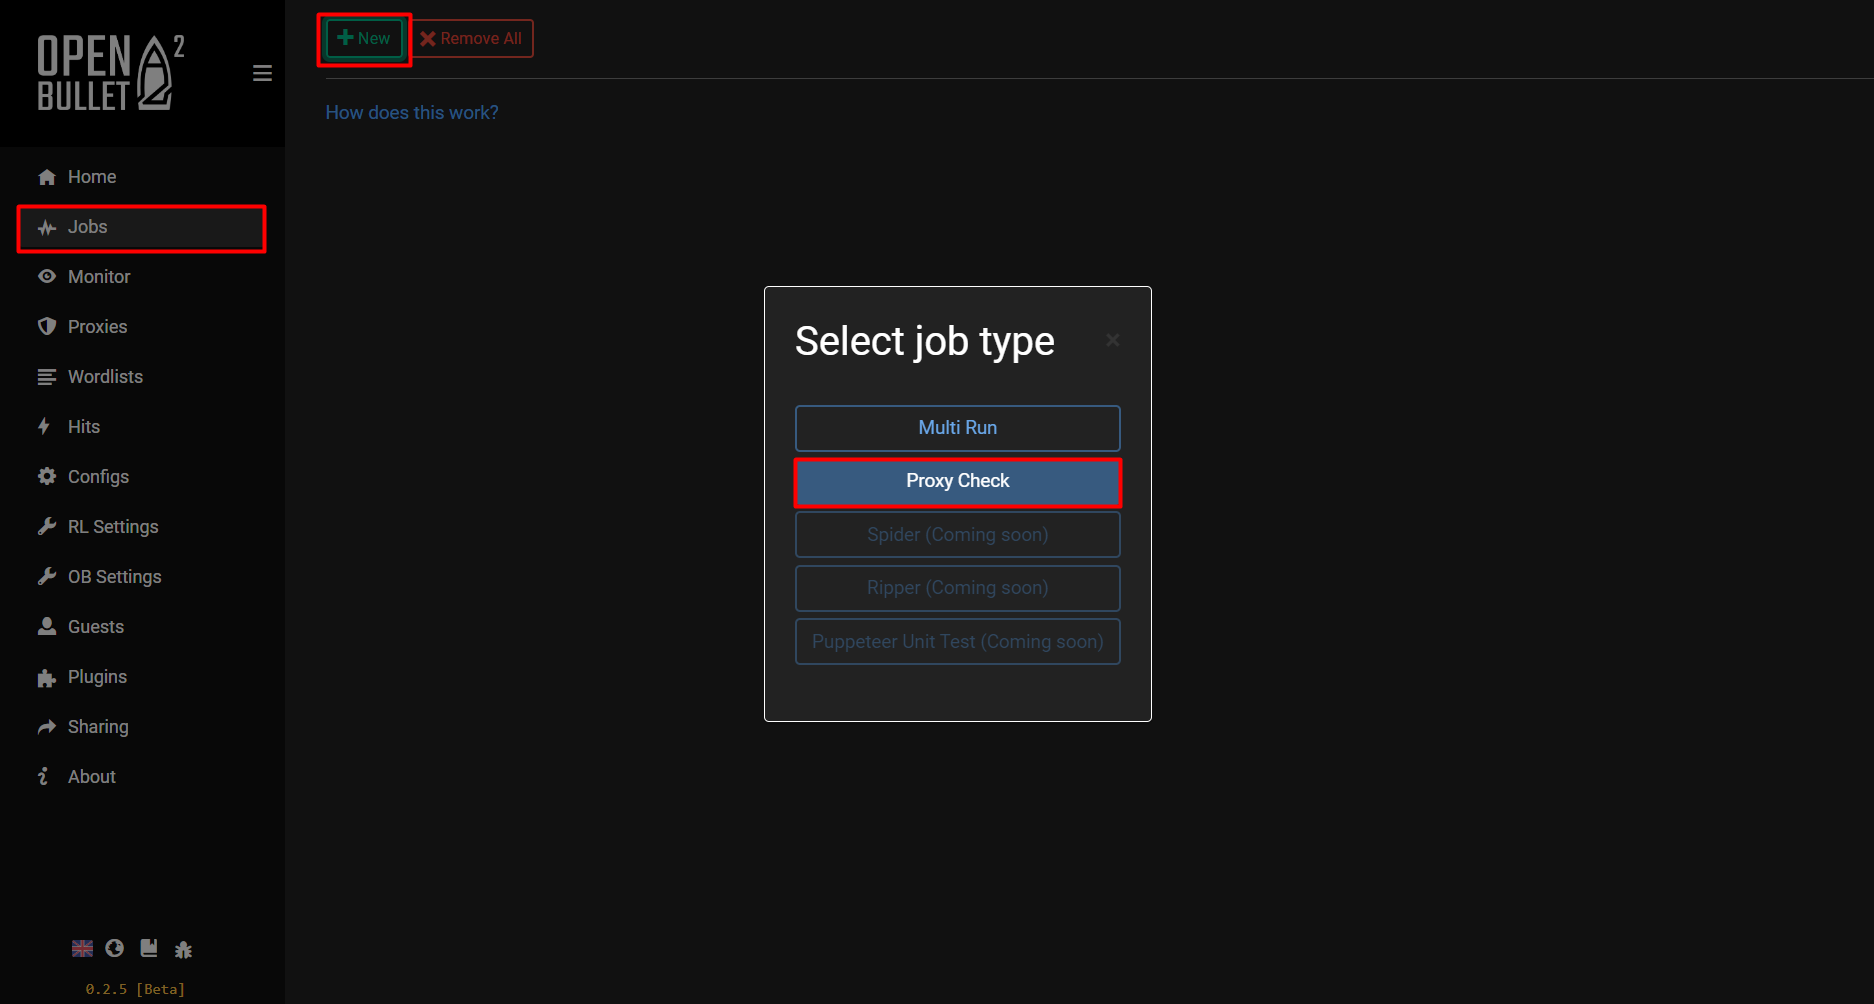
OpenBullet2 – Create a new 'Job' to check the proxies
- Choose the recently created Proxy group and click the Create Job button.
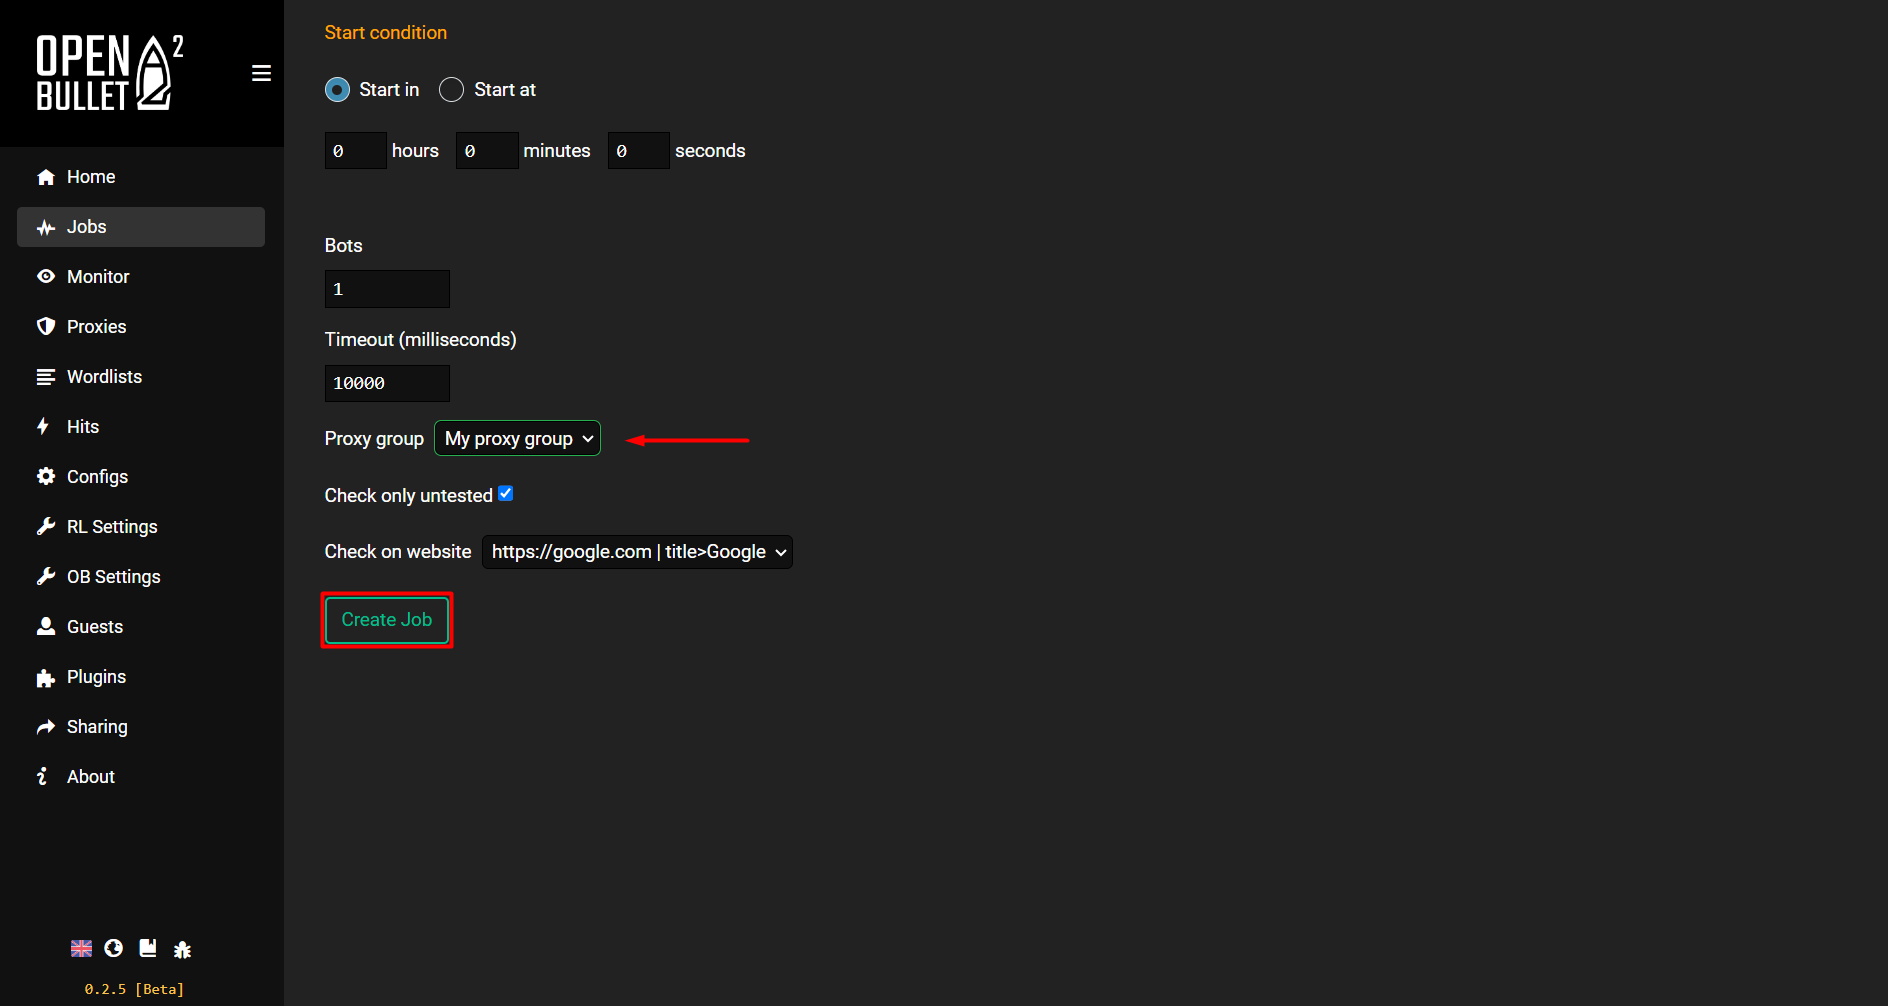
OpenBullet2 - choose the Job settings
- Click the Start button and wait for the job to finish to check if the proxies are working
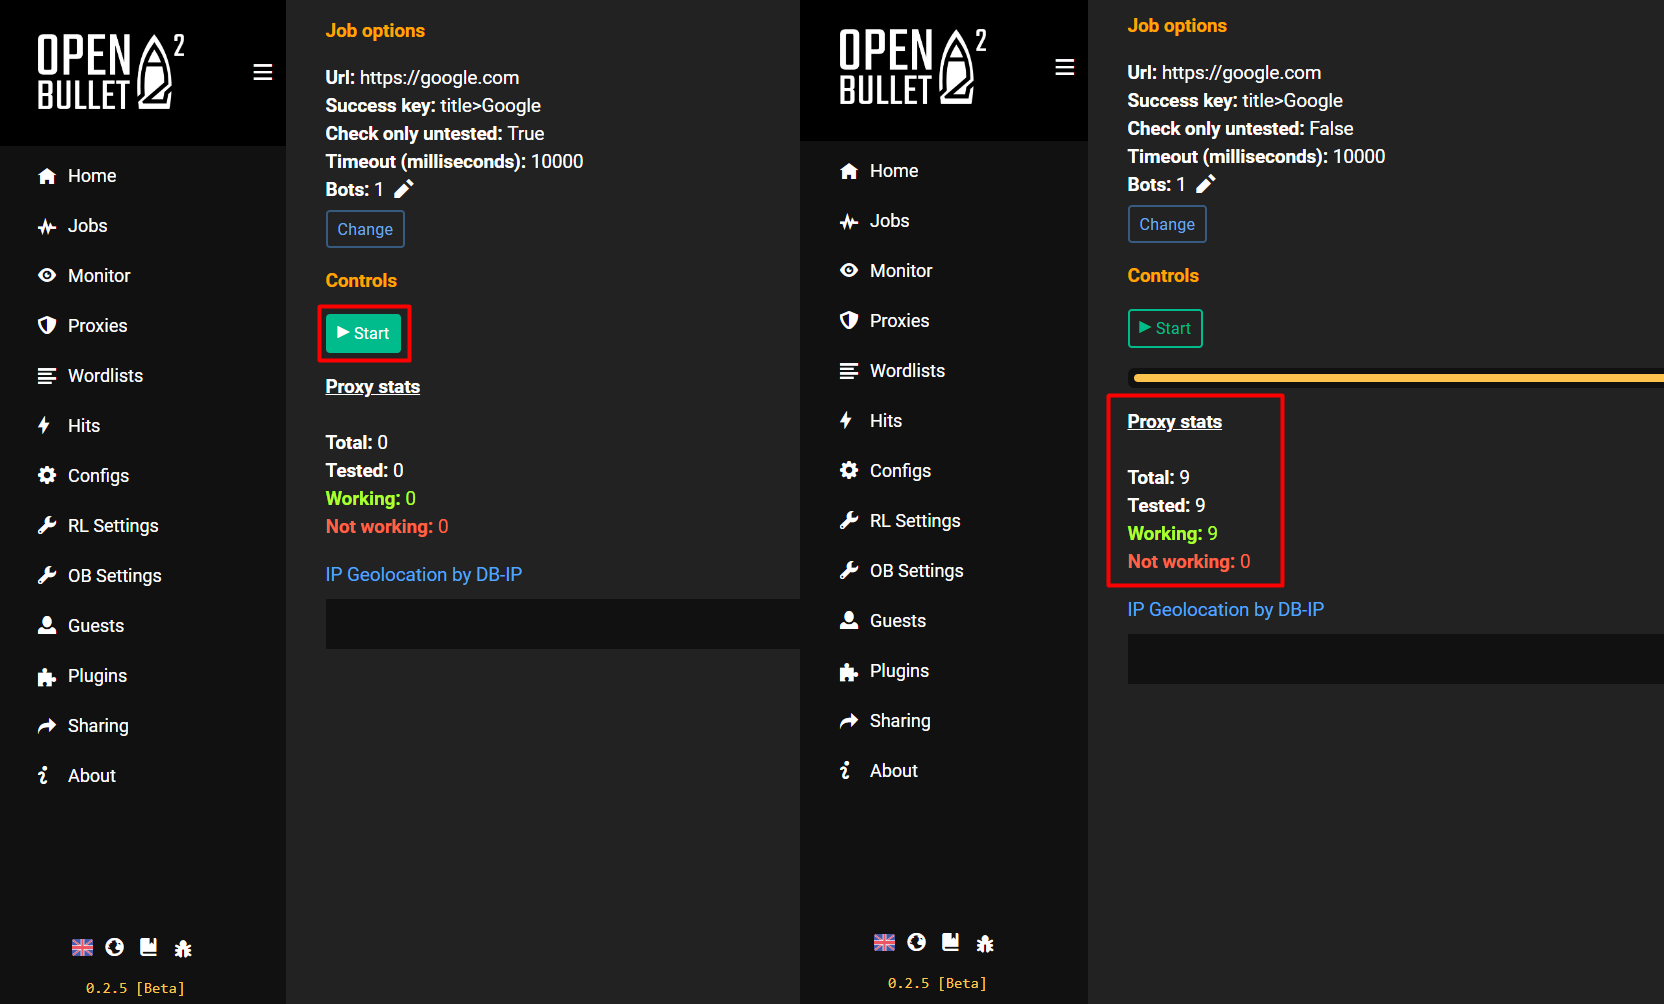
OpenBullet2 - Start the Job and see if the proxies are working
Do not worry if the proxies are showing up as Not working. OpenBullet2 checks the proxies by connecting to random targets, which might be blocked targets with our proxies.
You can check out more information about blocked targets. If you need access to a blocked site, you can always contact the support team via live chat to double-check.
Support
Need help or just want to say hello? Our customer support is available 24/7. You can also reach us anytime via email at [email protected].
Updated 7 days ago