Nike Shoe Bot
Getting the proxies
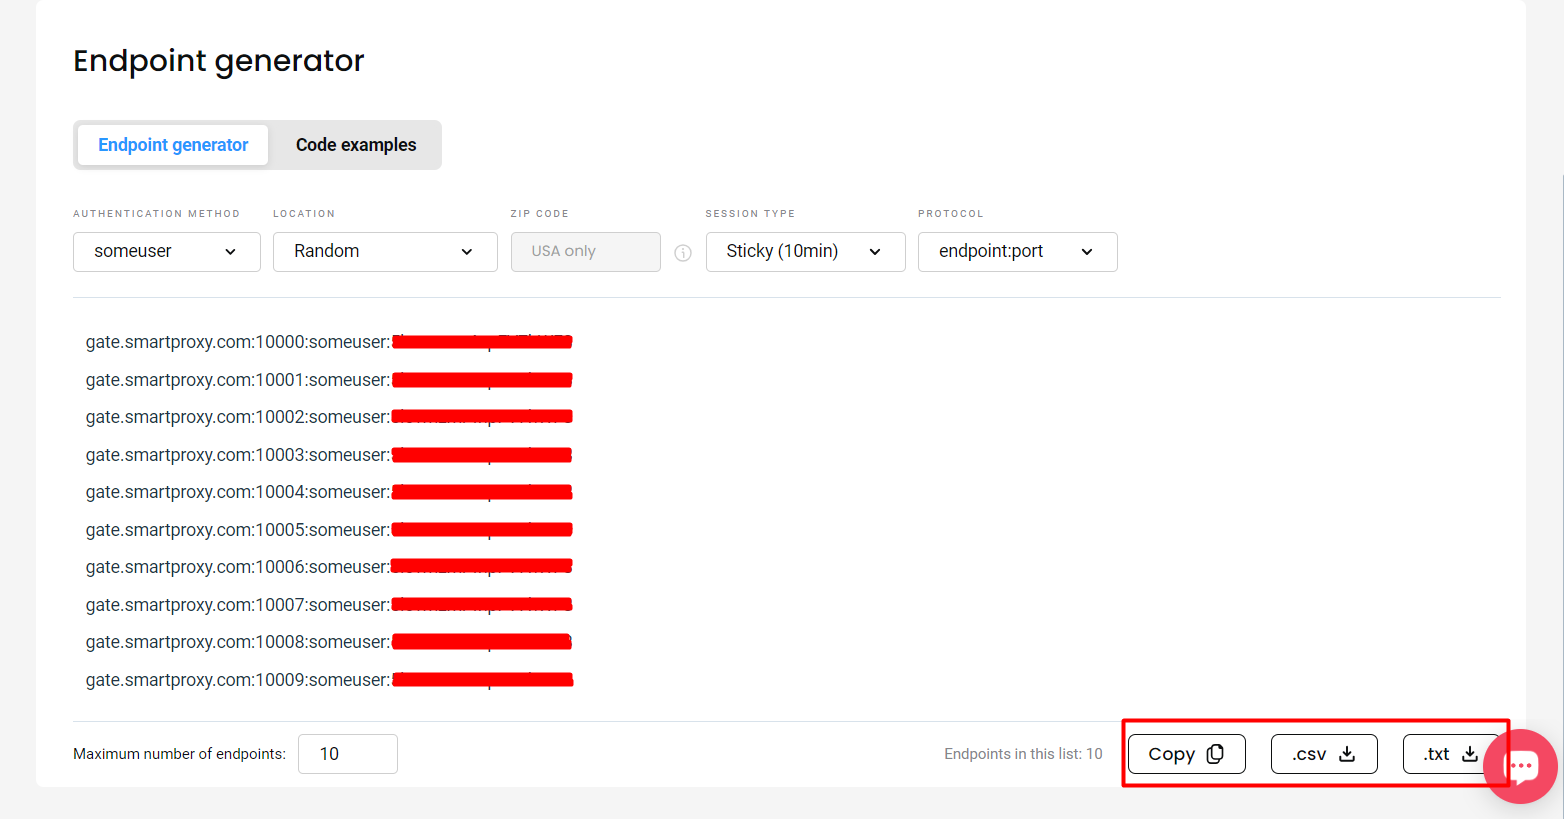
- Log in to your dashboard. Navigate to the Residential - Proxy setup page. You will find the Endpoint generator by scrolling down.
- Select your Authentication method and Location.
- Select the Session type.
- Select the Protocol. If needed, you can change the number of proxies you want right above the generated list on the right side.
- You can download a list of proxies in .txt or .csv files. Alternatively, you can copy the proxies right from the generated list.

Getting a proxy list for your sneaker bot in the dashboard
Configuring proxies on Nike Shoe Bot
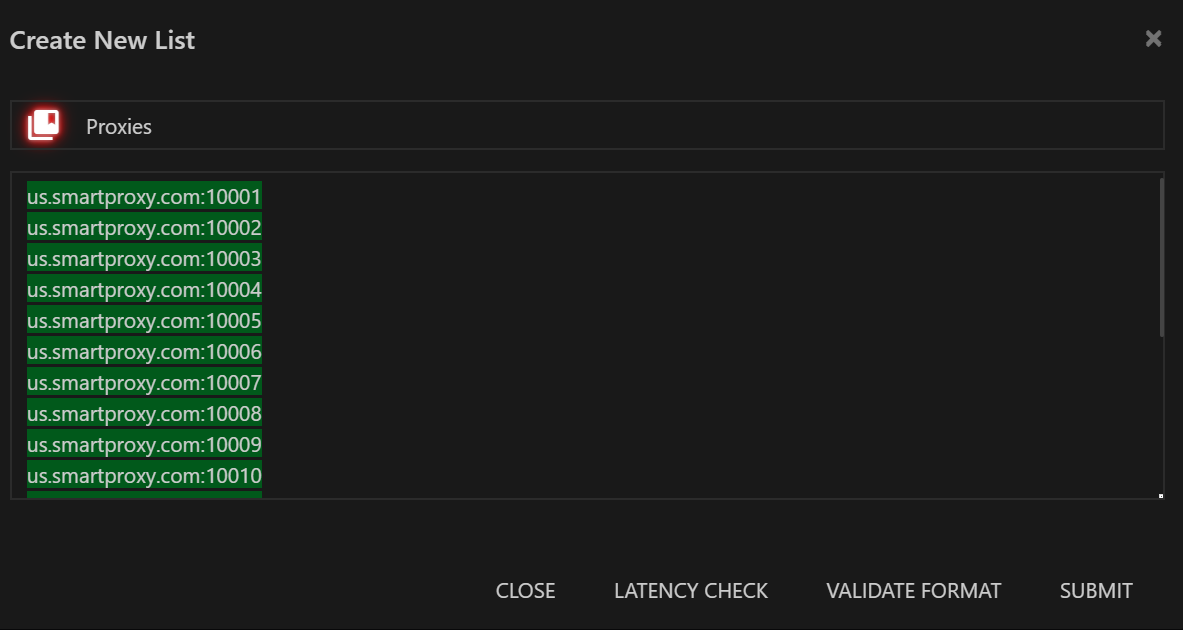
- To set up proxies in Nike Shoe Bot, go to the Proxies tab, and click Add Proxy List.

Nike Shoe Bot – ADD PROXY LIST
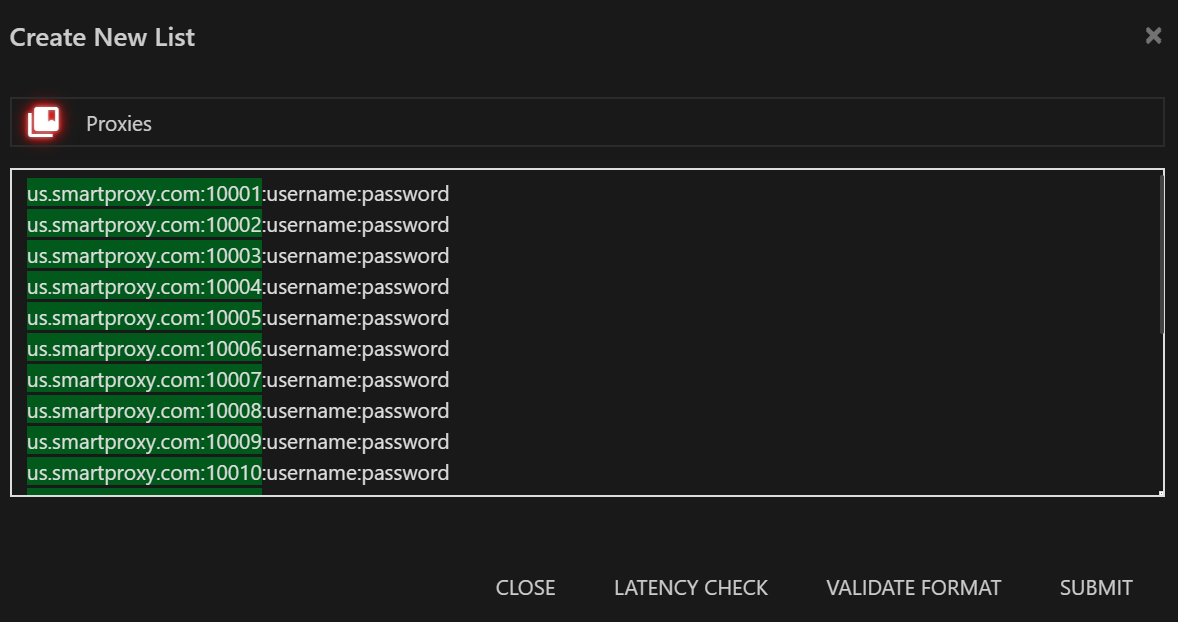
- Paste the generated proxy endpoint list into the pop-up window.
a) If you use Whitelisted IP authentication, you can simply paste it like this:

Nike Shoe Bot – Proxy list with Whitelisted IP
b) Otherwise, you will need to use your sub-user username:password authentication like so:

Nike Shoe Bot – Proxy list with username:password authentication
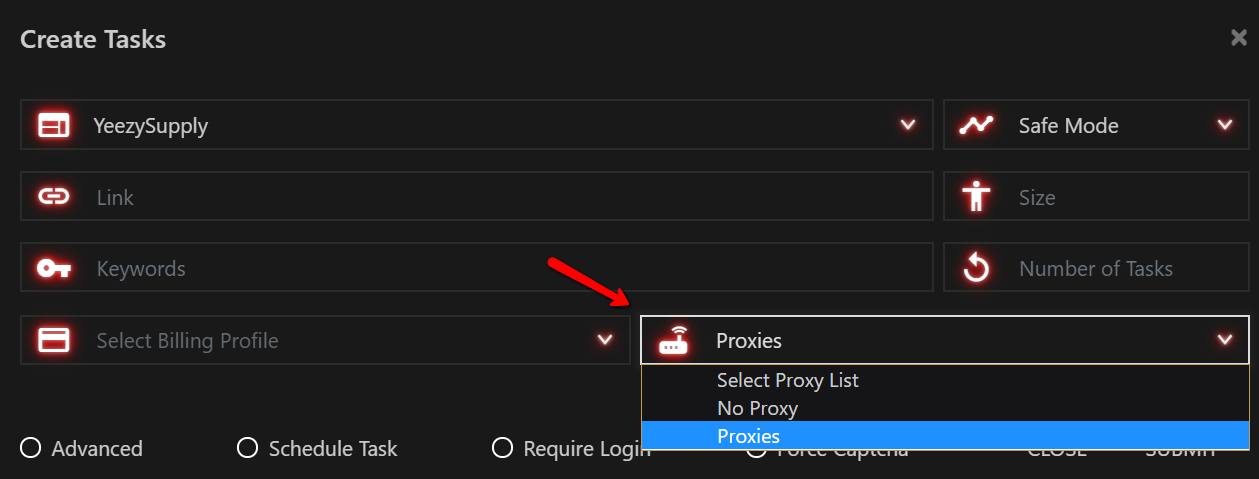
- When you create a task for your desired shoe, select your created proxy list.

Nike Shoe Bot – Select the proxy list for the task
Support
Need help or just want to say hello? Our customer support is available 24/7. You can also reach us anytime via email at [email protected].
Updated 6 days ago